

Thanksgiving is just a few days away and I think we all can agree that this one feels different from any Thanksgiving that any of us can remember. My husband and I are planning to stay home and prepare an intimate family dinner for ourselves and the kids. The stakes feel high since Thanksgiving is basically the kick-off for the holiday season and I’m determined to make our first-ever Thanksgiving at home extra special for my three-year-old daughter Dessa. She doesn’t exactly know what to expect for the holiday, but Dessa does know that we are taking time to think about all the things we are thankful for, that turkey is on the menu for our Thanksgiving dinner, and that many of our neighbors have silly turkey decorations in their yards. I decided to lean into the turkey theme and create a fun Thanksgiving turkey art project with Dessa’s favorite art supply: Do-A-Dot markers.
This post contains affiliate links. I earn a small commission each time someone makes a purchase through one of my links, which helps to support the blog.
I love everything about this project, and here are a few of the reasons you will love this painted turkey Thanksgiving art too:
It’s simple.
It only requires a few basic supplies (that we already had on-hand).
Kids of all ages will probably love it.
The colors are gorgeously vibrant.
It’s easy for children to work on with some independence.
It keeps children engaged for longer than 10 minutes.
The marker ink is washable.
The finished product isn’t covered in scribbles (which is huge in my book).
The fact that this Thanksgiving art project is larger than a standard sheet of paper makes it feel extra big and special. It also conveniently doubles as fun decor that you can hang to display for your family celebration. (You better believe that our little girl’s artwork will hang prominently in our house on Thursday!)

PROJECT SUPPLIES

Seriously, there is so much to love about this project and I can’t wait to walk you through it. Here are a few quick notes before we dive in:
Age Level: This project was great for my three-year-old and I’m certain that it could easily hold the attention of five- and six-year-olds, too. If you’re working with preschool children, I recommend only drawing small sections at a time for your child to fill in to help keep any feelings of overwhelm at bay. Younger children don’t have the ability to think ahead and keep their hands and sleeves out of wet paint, so if you are doing this with your preschooler, you will probably want to encourage your child to start at the top and rotate the turkey as he or she works to minimize the mess.
For older kids, you can probably draw the entire turkey right away and enjoy the peace and quiet while they independently fill the bird and feathers with dots.
Marker choice: I highly recommend using a black Sharpie to draw the turkey and feathers. The permanent marker didn’t bleed onto my coffee table through the white paper and, more importantly, it didn’t bleed from the wet ink of the dot markers. I originally used a black Crayola marker to make the turkey body and face because I liked the idea of a bold outline for the turkey, but quickly realized that the ink was rubbing into the dot art that Dessa was creating. I used a sharpie on the turkey feathers and was much more pleased with the result. The Sharpie ink didn’t bleed and made a much cleaner outline.
Do-A-Dot markers are washable! If you try this activity with preschoolers, there is a very good chance they will end up wearing some dot marker ink on their clothes. Five minutes into this project, Dessa got brown ink across the chest on her shirt. I foolishly tried to dab the ink away and it just sort of smeared and made a mess. Later on, I sprayed the stain with Dreft and it came cleanly out. Getting dot marker ink on our clothes has become a regular event in our house and it always washes cleanly out.
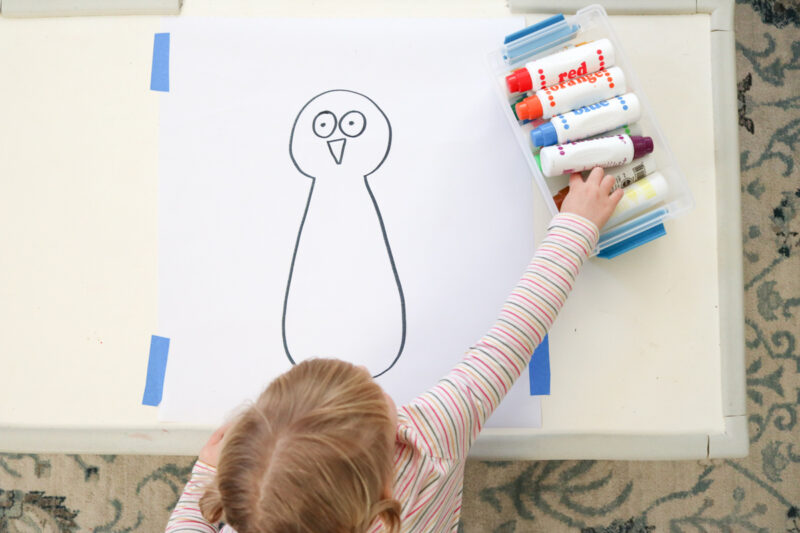
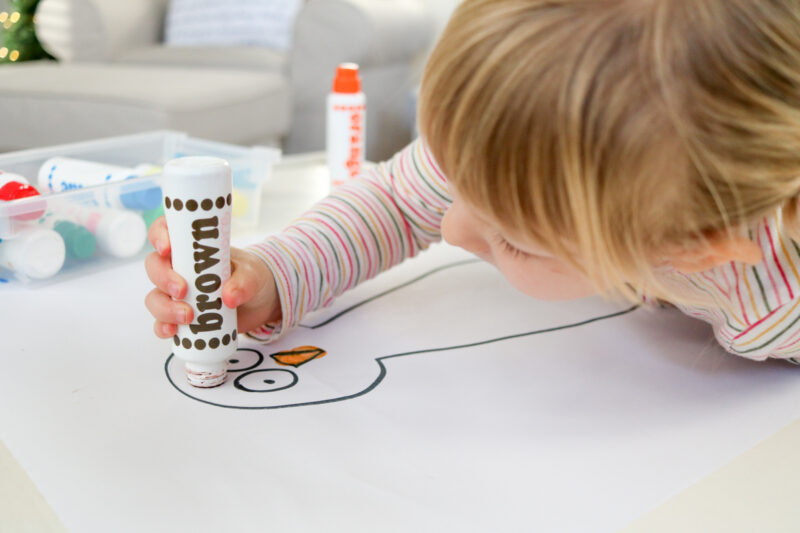
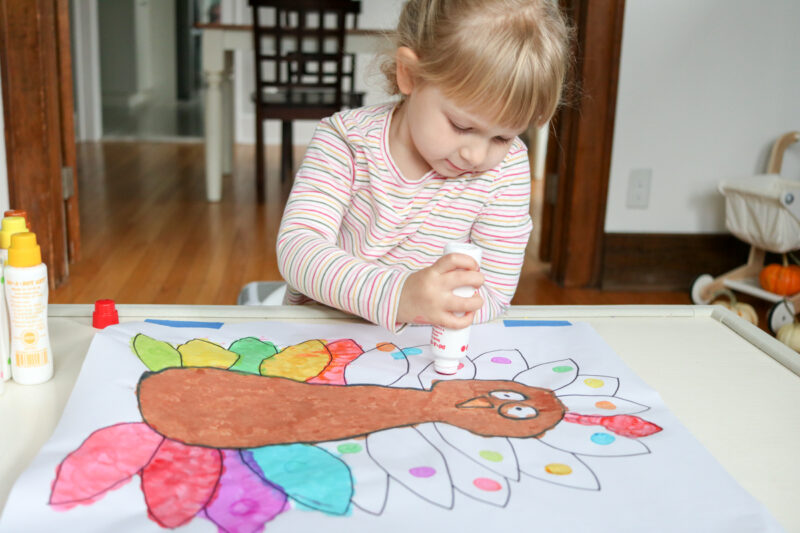
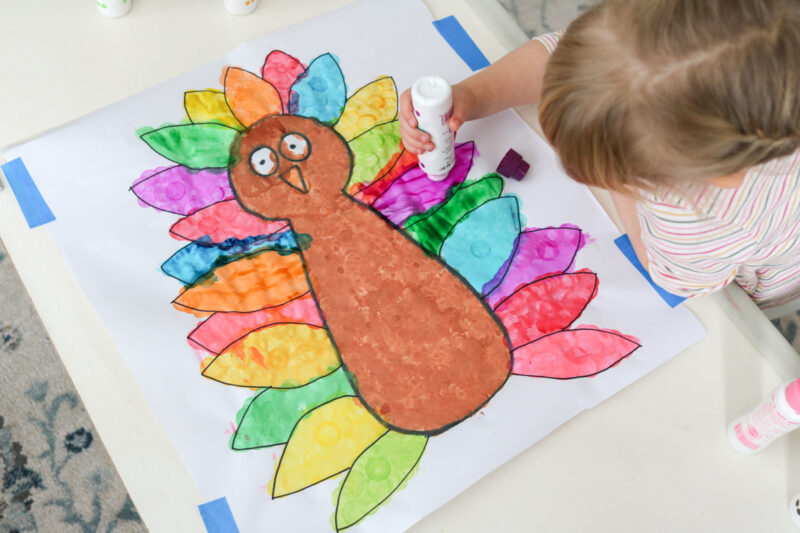
The setup for this project was quick and incredibly simple (which is always a win in my book!) I cut a large sheet of paper of the big roll of white paper that I always try to keep stocked in the house (it has come in clutch so many times for a big project to help occupy my three-year-old) and used a few pieces of painters tape to hold it in place on our coffee table. Next, I grabbed a black marker and drew a quick outline of a turkey’s body with eyes and a beak. I forgot to add a red wattle next to the beak so you’ll want to make sure you remember this key turkey feature. If you forget, you can always redeem yourself by adding a few red dot stickers as a wattle once the painting is complete. (That’s what we did and it worked out great.)
After that, grab some Do-A-Dot markers and let the fun begin!
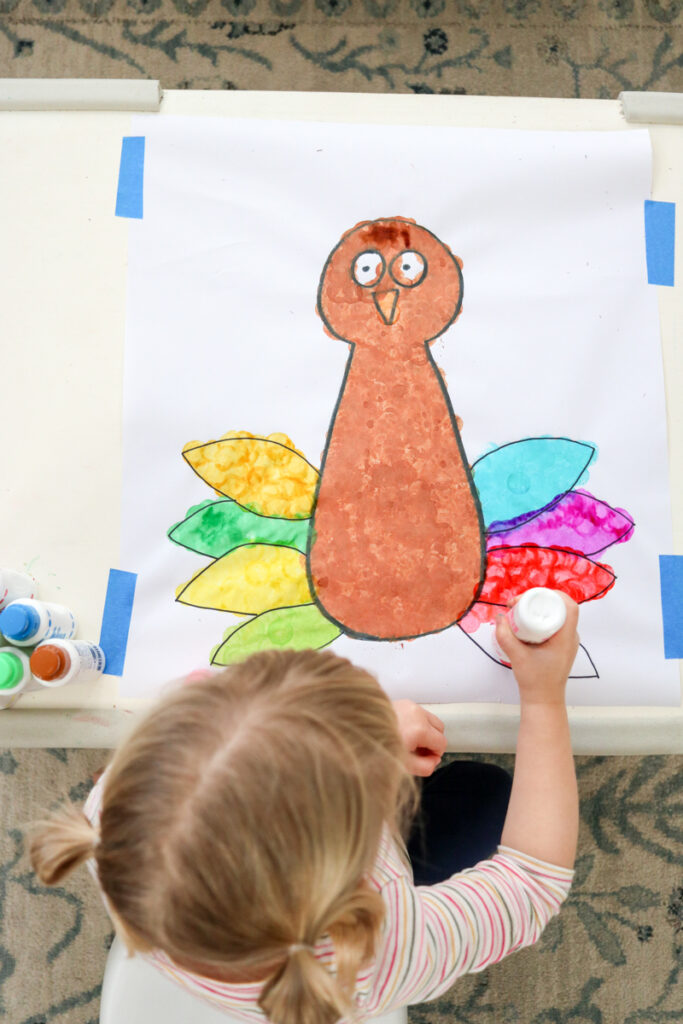
I’ve been encouraging Dessa to thoughtfully choose colors for her projects that portray animals and objects the way God made them. Together we decided that orange would be the best color for the turkey’s beak and I suggested that his body should be brown.

This is a good time to introduce the concept of starting to paint from the top of a picture and to work down from there. If your child starts at the bottom of the turkey, he’s sure to end up with paint all over his sleeve.

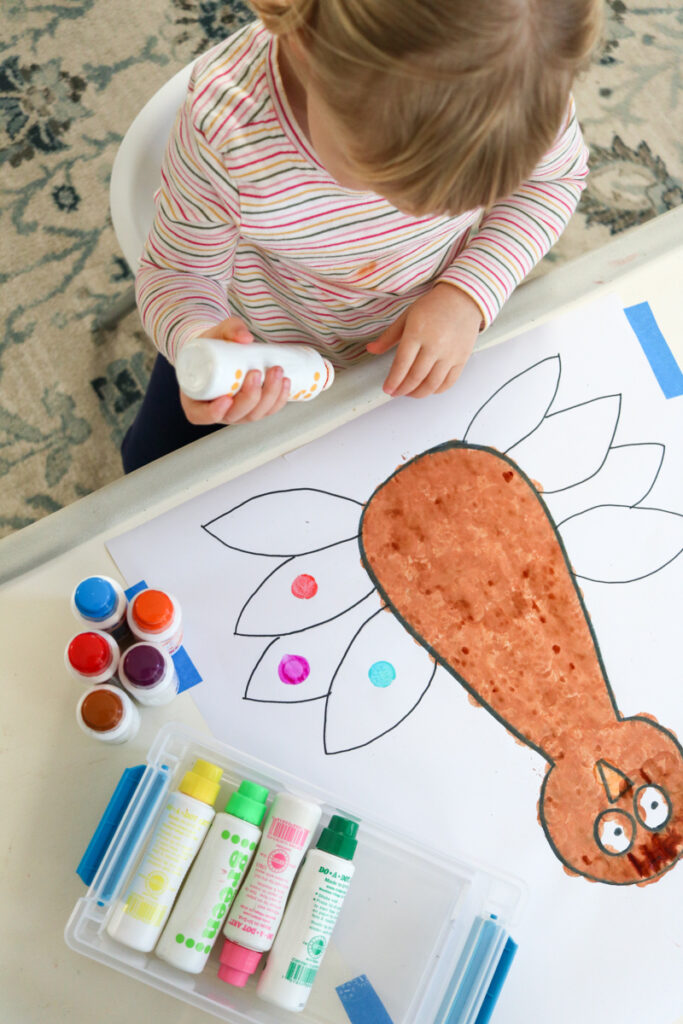
Once the body was painted, it was time to add feathers!
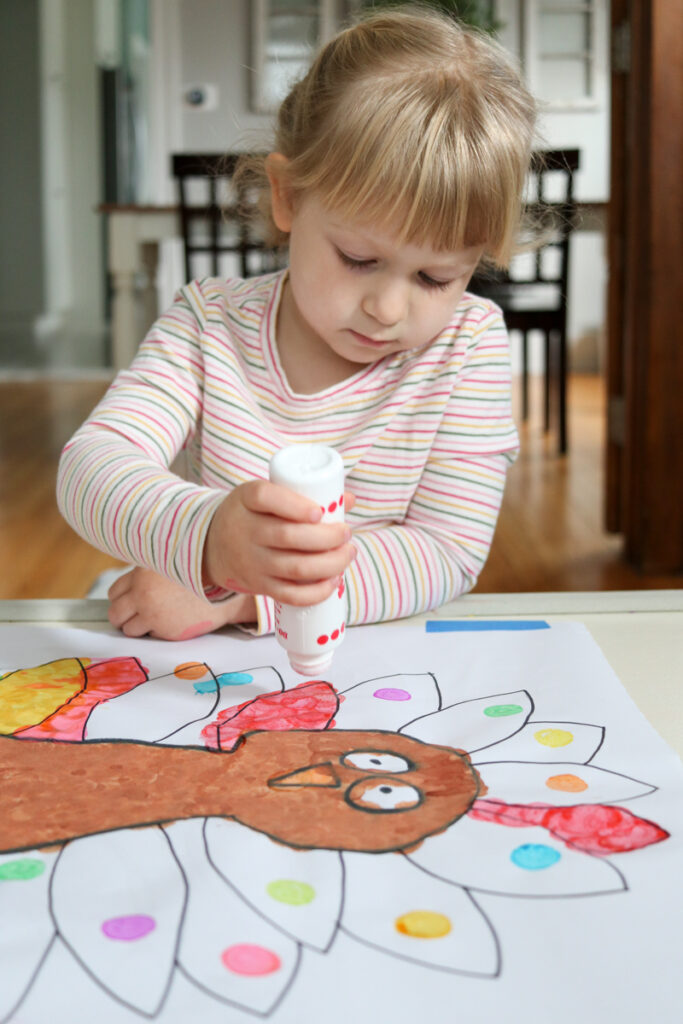
I drew eight feathers onto the bottom of the turkey. Remember that young children can easily feel overwhelmed, so I highly recommend only drawing a few feathers at a time. Dessa selected which colors she wanted to use for each feather and my only guidance was that I encouraged her to make each feather a different color. I often plan colors with Dessa ahead of time, then let her work independently. Marking each feather with a single dot helps her remember the plan we discussed so she can follow through on her own.
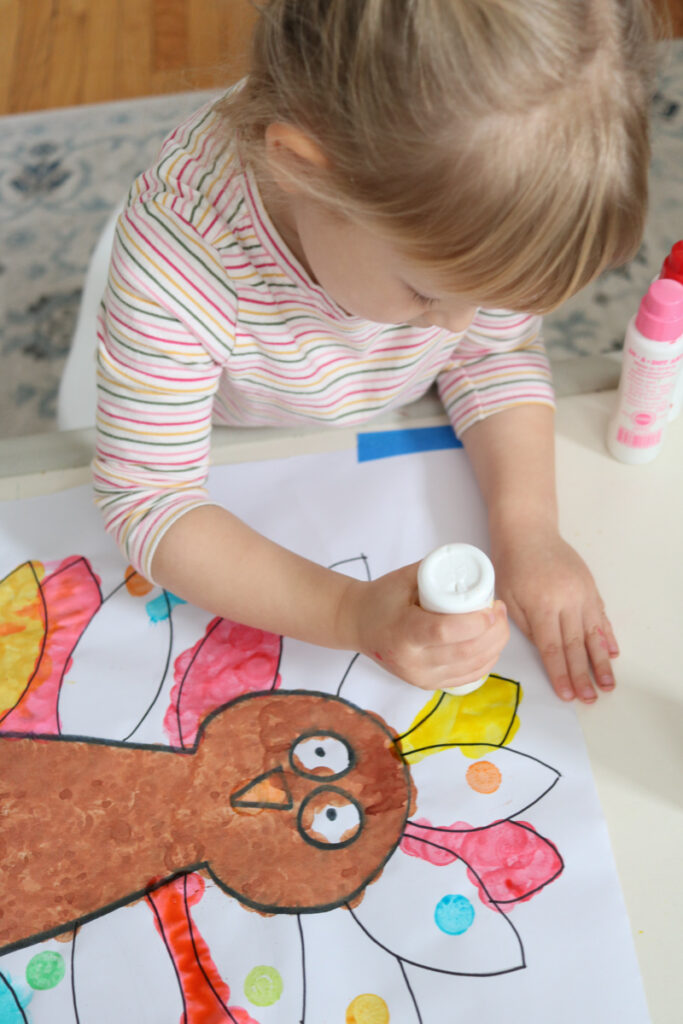
You may have noticed the brown stain on Dessa’s shirt in the photo above. She accidentally got ink on her shirt while we were rolling up sleeves. It looked pretty bad at first and the stain spread when I dabbed it with a wet rag, but the spot disappeared completely after I put the shirt in the laundry. That’s my favorite thing about Do-A-Dot markers – they always wash out of my kids’ clothes!
Once our feather colors were planned, it was time to paint! You can use dot markers to draw strokes like an actual marker, but I prefer to fill the space with dots. It looks great and requires more concentration and patience from your little artist.
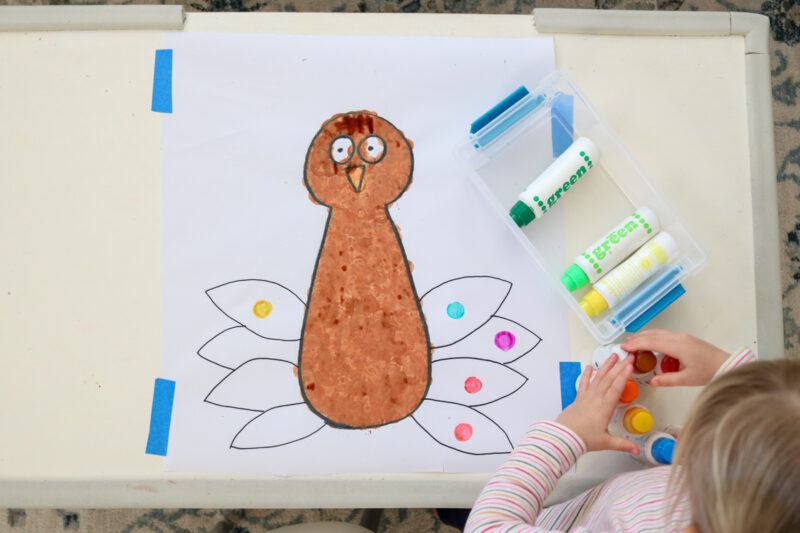
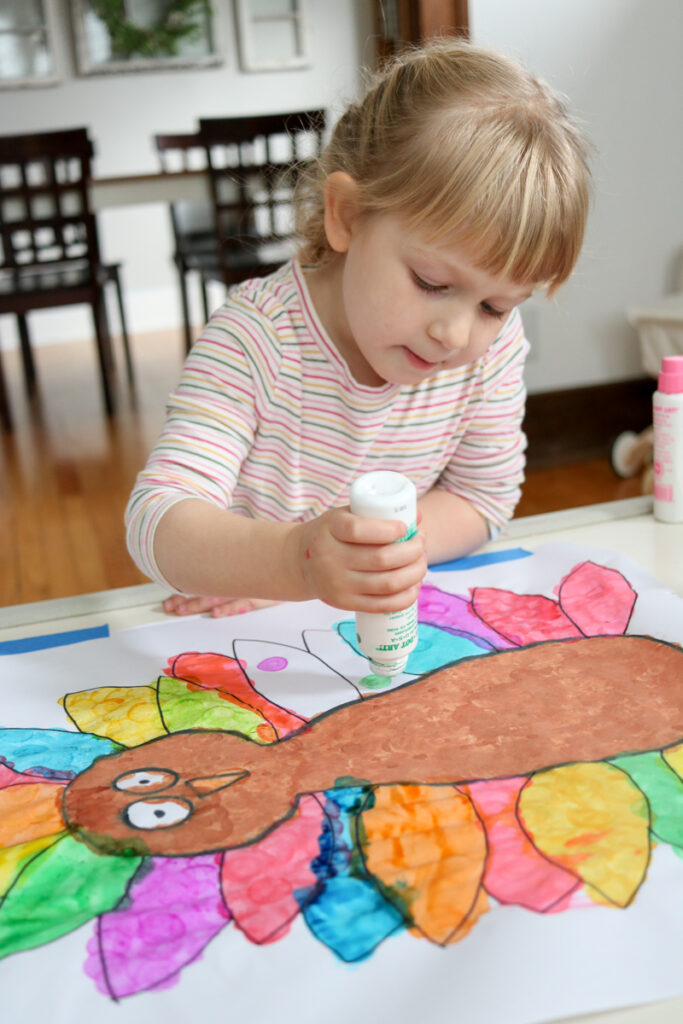
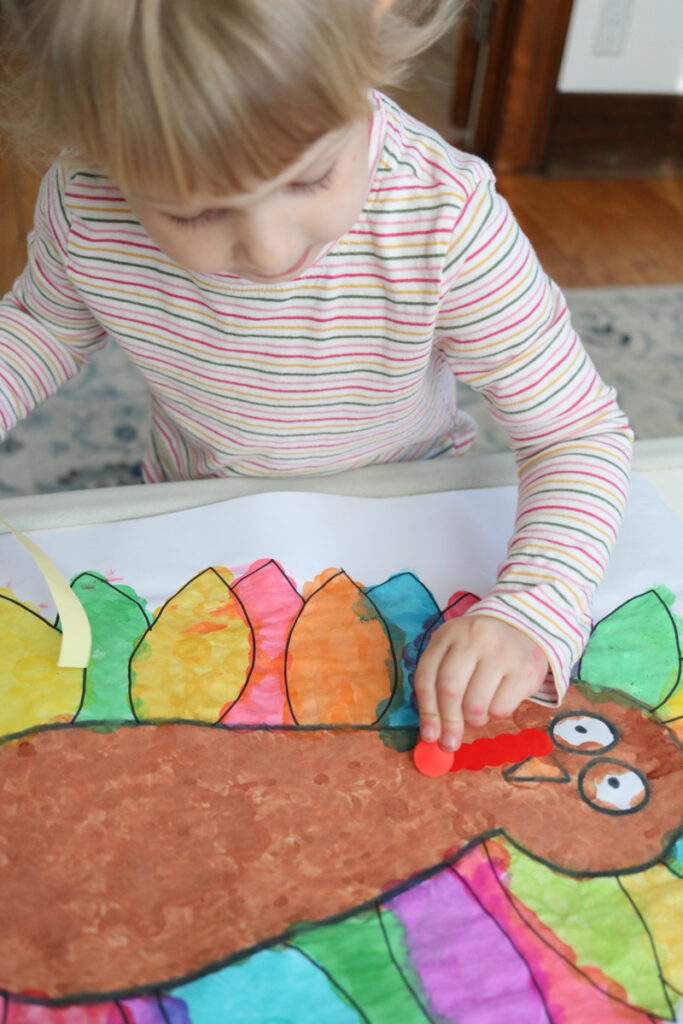
Once Dessa colored the eight feathers I drew, it was time to take a break. We set the turkey aside and resumed our Thanksgiving art project the following day. At this point, Dessa knew exactly what to do and each feather was relatively quick to complete so I went ahead and drew all of the remaining feathers on her turkey. I also turned the turkey sideways on our coffee table in an attempt to spare her hands and sleeves of any ink transfers.
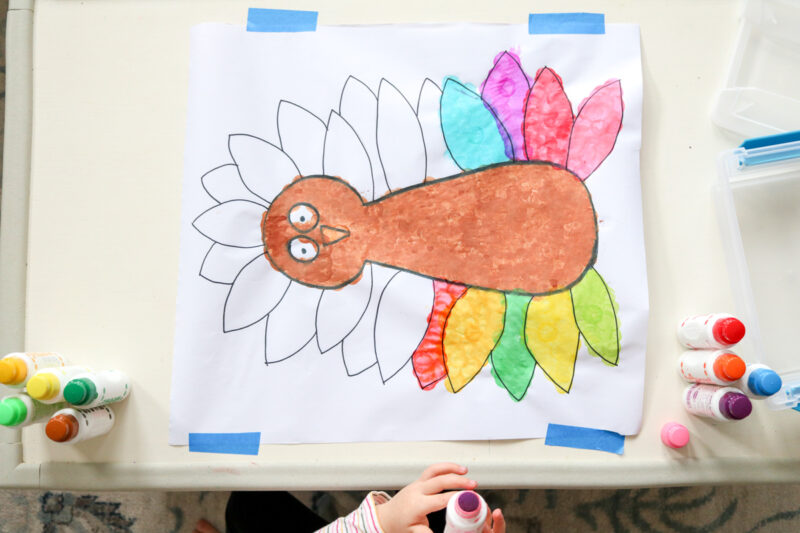
We once again designated each feather color with a single dot, then I let Dessa take over the Thanksgiving art project.
I had washed her shirt overnight and you can see that it was free of brown stains after being laundered.
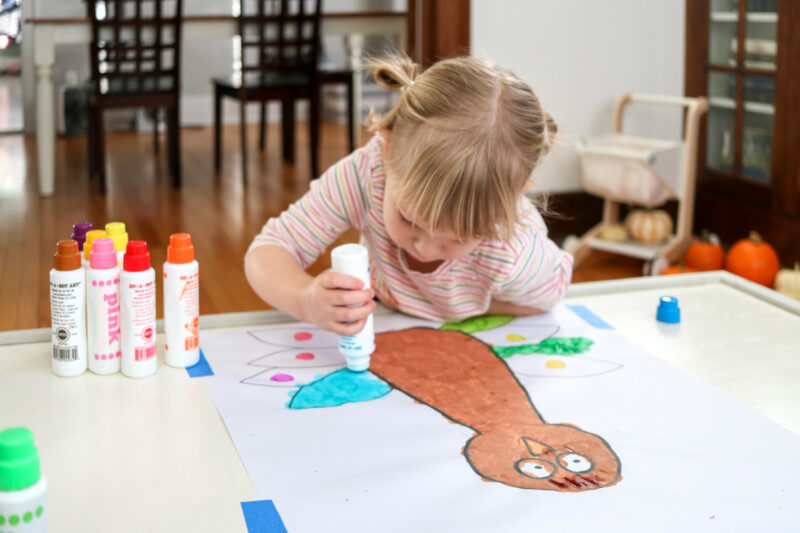
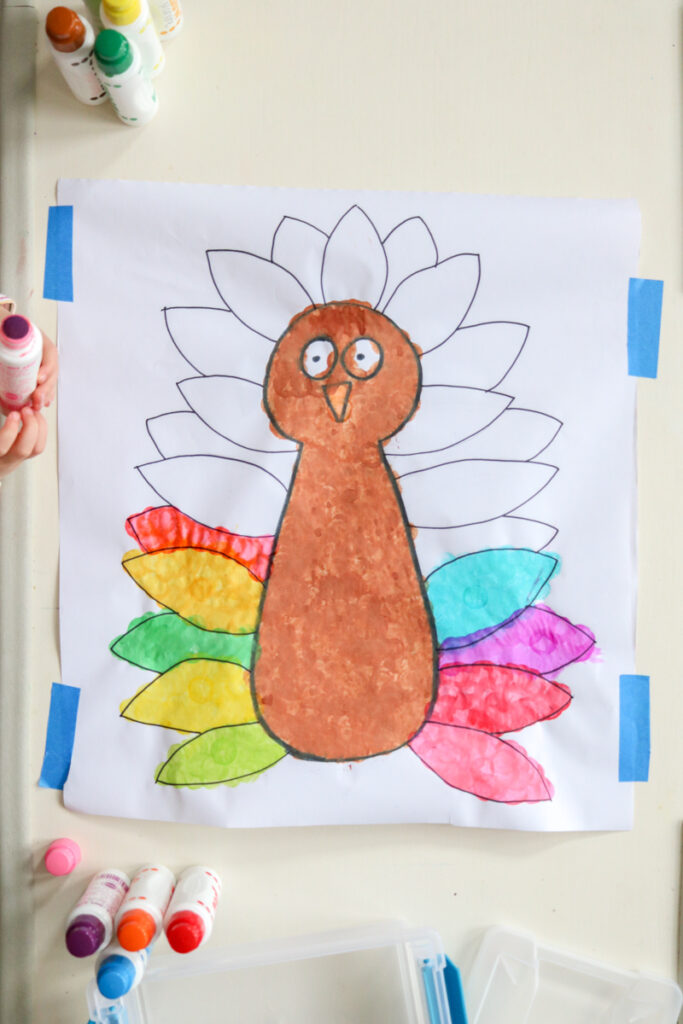
Little by little, Dessa worked to paint the rest of the turkey feathers and the bird became more and more vibrant with each dot she stamped.
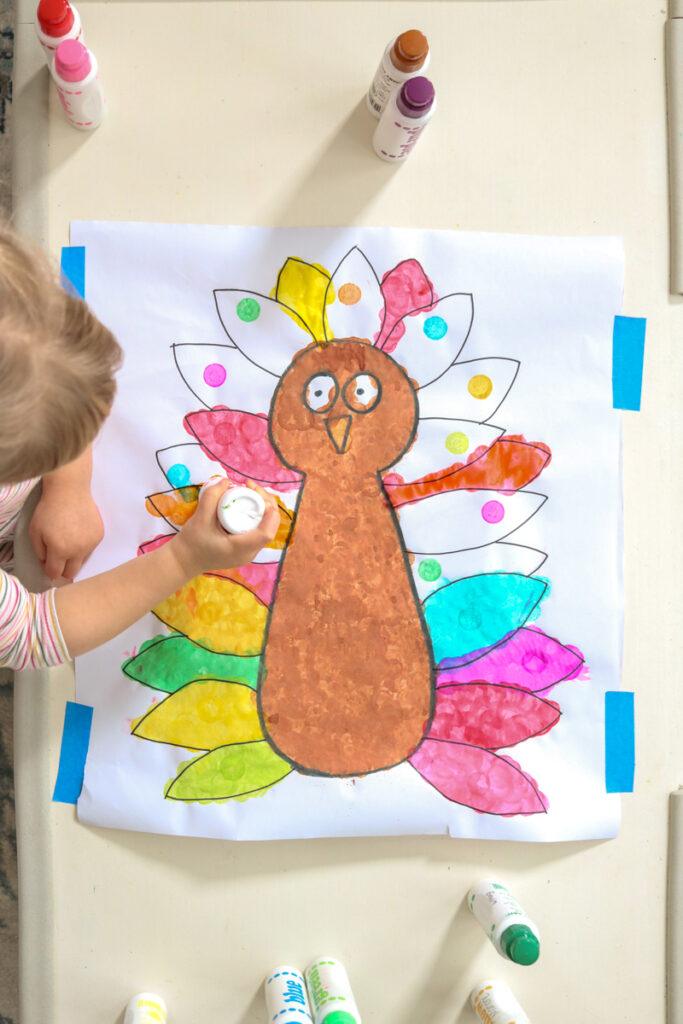
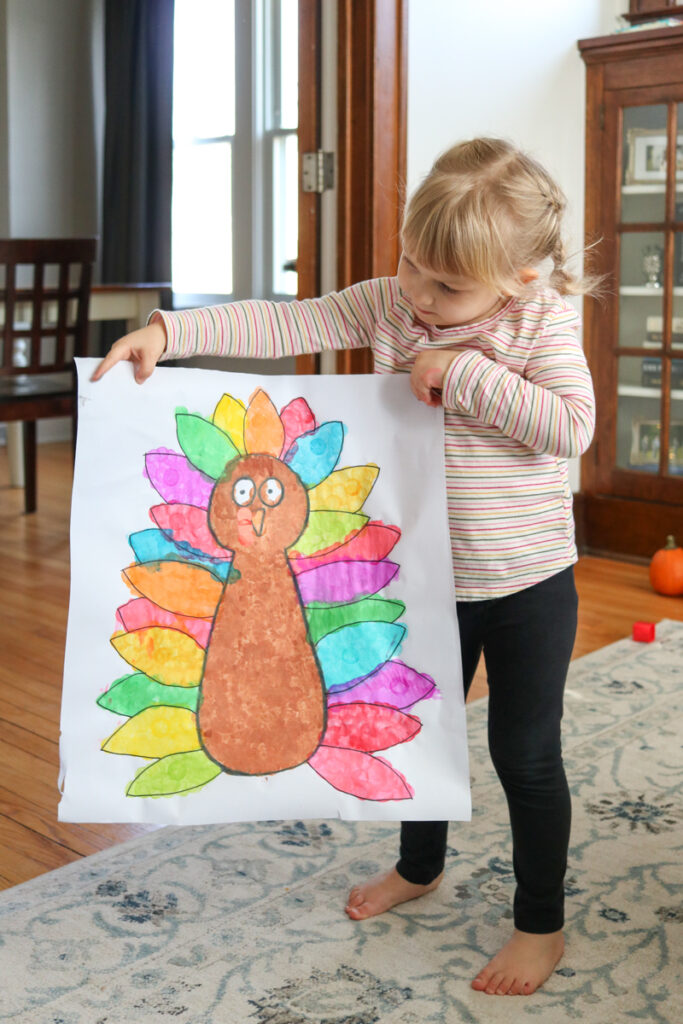
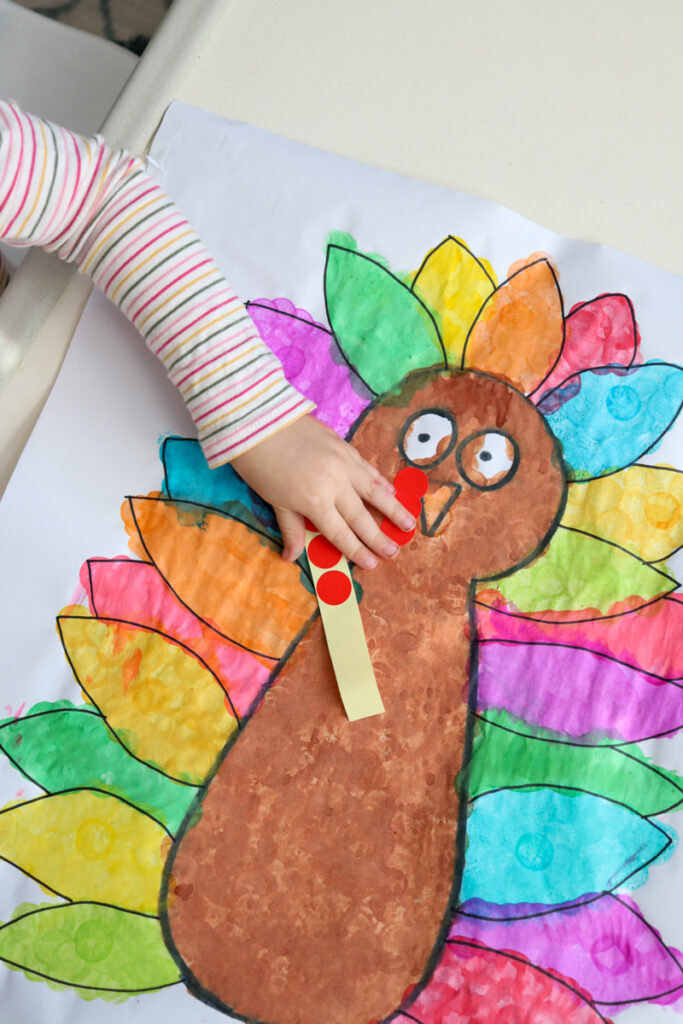
Once Dessa finished painting, we added a few red dot stickers as the turkey’s wattle and our project was complete!
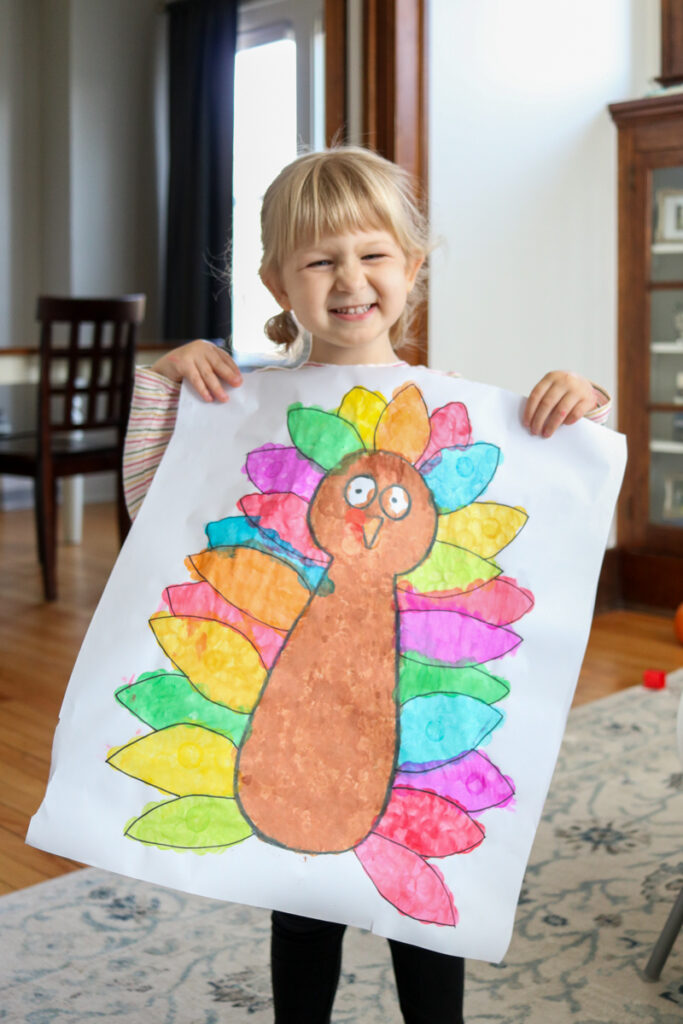
Dessa was so incredibly proud of herself for completing this project. She absolutely loves her turkey Thanksgiving art and was beaming when she posed with her painting.
PROJECT SUPPLIES
PS – Just in case your little one wants to get extra silly, you can always add more dot stickers to create an extra-long wattle.
Happy Thanksgiving to all of you! I know that this year’s celebration will look different from most, but I sincerely hope that it is filled with joy and appreciation for the gifts we have.
You can follow along with more of Dessa’s shenanigans and our household adventures on my lifestyle blog, Crazy Together and discover more Thanksgiving printables and resources here.

I’m a former kindergarten teacher turned work-from-home mom. I still love sharing ideas and resources to make teaching easier, so you can focus on what really matters in the classroom. When I’m not working on the blog, you’ll find me chasing kids around the house with a cold cup of coffee in my hand (some things never change even once you’re out of the classroom!)


3 Responses
Terrific project! My 3 yr and 5 yr old grandkids had a great time dotting! The family enjoyed the decoration near our Thanksgiving table. Looking forward to more projects for the littles!
Oh yay! I’m so happy to hear that your grandchildren loved the project – they really are the perfect age for it! I have more special projects for little ones in my head. I just need my daughter (and time) to cooperate with me!
This turkey art activity looks like so much fun for the little ones! 🎨🦃
I especially love simple craft ideas that keep kids engaged and creative. By the way, if anyone’s looking for something special to pair with holiday crafts, I recently found some beautiful customized baby basket gift options that make such thoughtful keepsakes — perfect for little ones and new parents!