
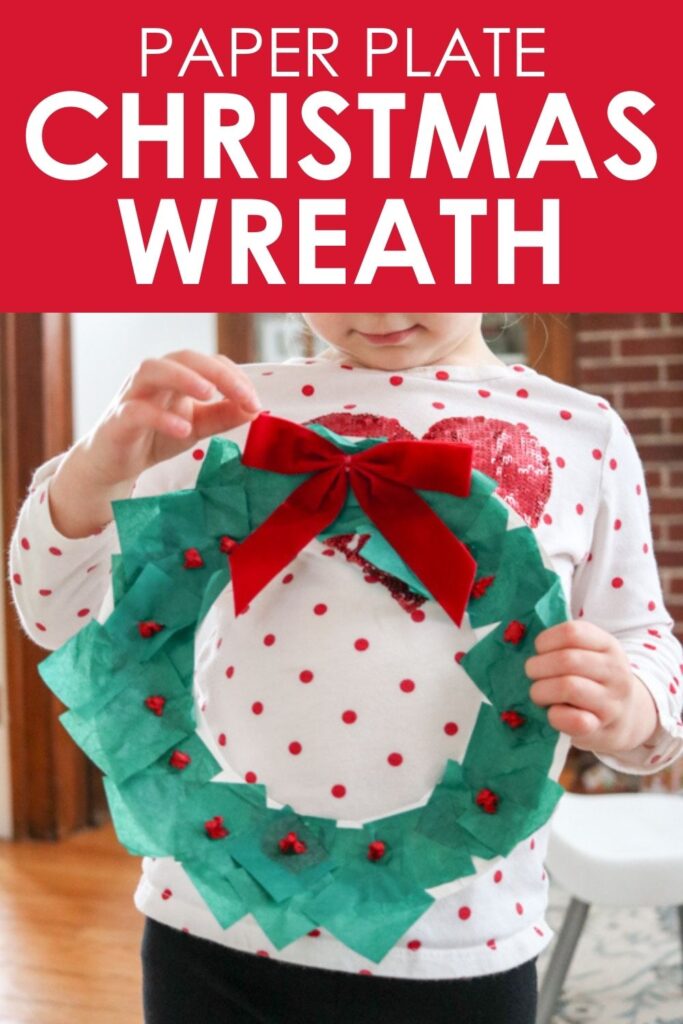
Creating crafts at Christmastime will always be one of my favorite ways to celebrate the holidays with children. I loved incorporating crafts and art projects into our holiday fun when I taught kindergarten, and now that my daughter Dessa is old enough for preschool, the crafts keep rolling. We recently created a simple paper plate Christmas wreath that was the perfect age-appropriate project and it even offered a little fine motor practice. Get ready to pin this craft because it’s fast, easy, and uses only a few basic materials you might already have lying around the house!
This post contains affiliate links. I earn a small commission each time someone makes a purchase through one of my links, which helps to support the blog.
The items needed for this project are so simple and basic. There is a good chance you already have everything you need somewhere in your house.
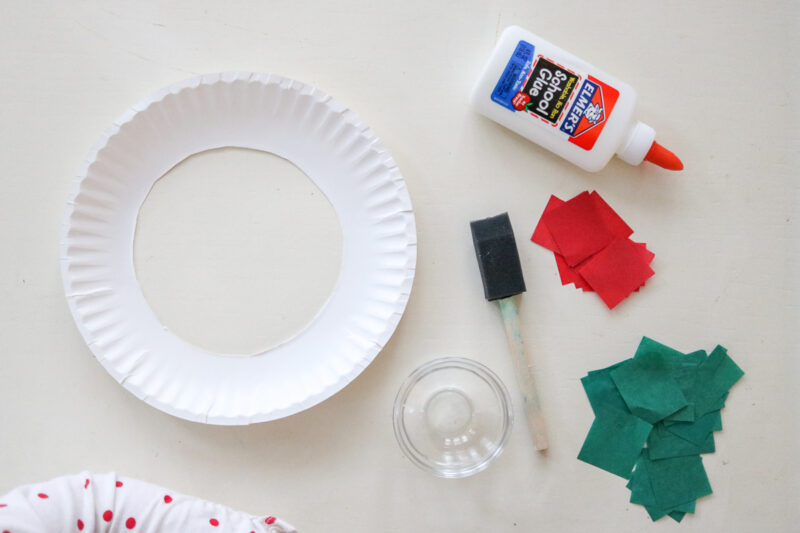
White paper plate with the center cut out
Bottle of liquid glue
Red and Green tissue paper squares (approximately 1.5″)
Foam paintbrush
Small dish or cup to hold the glue – I like these ones
Red velvet tie-on bows (optional)
Hole Punch (optional)
CLICK TO STOCK UP ON SUPPLIES

Once your materials are assembled, it’s time to dive right in. Pour a little glue into a cup or dish. I like to twist the top just a little bit so the glue comes out slowly if my little one is helping with this step. This helps to regulate how much glue gets poured into the cup and it also helps to build finger strength from all that squeezing.


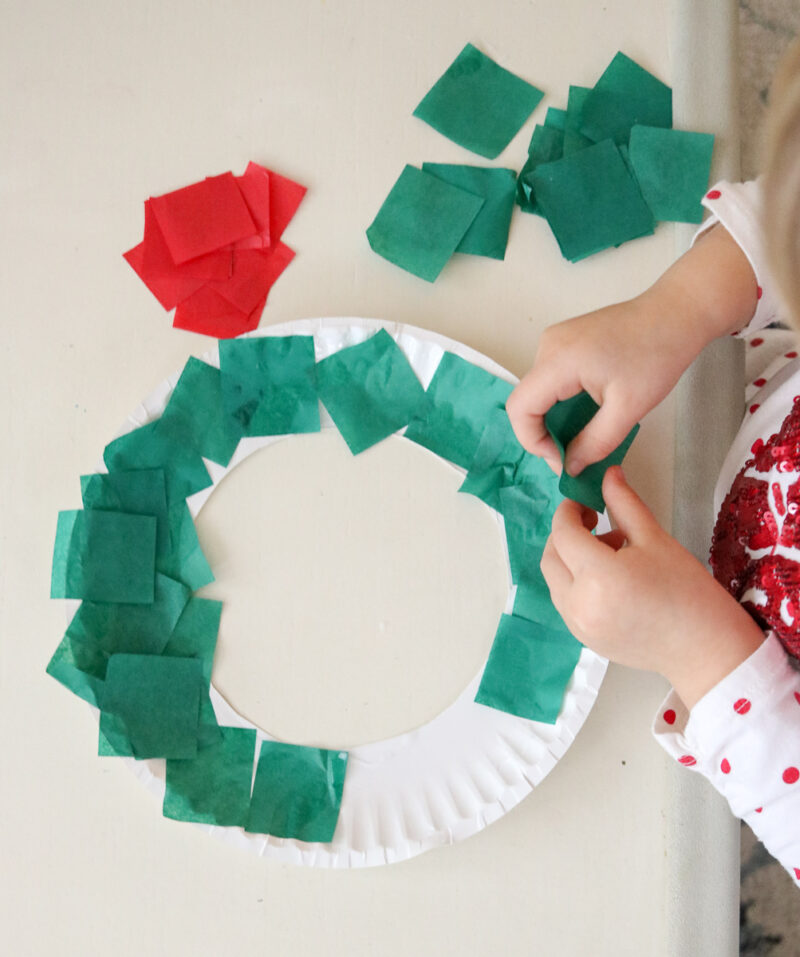
Once the glue is ready to go, use the foam paintbrush to spread it onto the paper plate. We did a 6″ section to get started, but there’s no reason why you can’t spread glue all over the entire plate right from the start.

After the glue has been spread onto the paper plate, it’s time to add the tissue paper. Place one square at a time onto the wet glue. I encouraged Dessa to go slow and to lay the pieces flat as she placed them onto the wreath. The dry squares stick together easily, so this provided a good opportunity to slow down and concentrate on the task at-hand. There isn’t any need to try to arrange the squares a certain way since the random, messy look is a better representation of an actual evergreen wreath.


Since we had only applied glue to a section of the plate when we started the project, it was time to finish spreading glue around the entire circle. Then we added more tissue paper squares.

Dessa was so careful and deliberate with every tissue paper square that she glued onto her wreath. She even stopped a few times to turn the wreath over so she could check and see if any of the squares fell off. This was completely her idea and it was one of those things that just sort of left me in awe of the way her brain is developing.

Then it was back to work.

Another status check of her wreath led to an unexpected visit from a silly lion girl.


Dessa added a few more green squares to her wreath, and we were ready for the second part of our project.

Once our Christmas paper plate craft was satisfactorily covered with green tissue paper squares, it was time to turn our attention to the pre-cut squares of red tissue paper. Dessa squeezed and squished each red piece of tissue paper into tiny red decorative berries for our wreath (or as Dessa explained, “the kind of berries that birds eat.”)

Her little fingers worked so hard to form tight little berry balls for her wreath and the activity provided a great opportunity to develop those fine motor skills.


Once the tissue paper berries were complete, Dessa placed one small drop of glue at a time around the wreath and gently placed her “berries” onto the glue.


I was amazed at how well-spaced all of her berries were. I was certain that Dessa’s finished wreath would be 90% bare with a clump of berries gathered in one small area. She surprised me with this detail.

Honestly, this would be a great stopping point for the Christmas craft – especially if it were spur of the moment and these were the only supplies you had on-hand. But I really wanted to add a velvet bow as a finishing touch to Dessa’s tissue paper Christmas wreath, so we waited for the glue to dry. Dessa embraced the opportunity to pose like a lion one more time.

Once all the glue had dried, I grabbed my hole punch and a small velvet tie-on bow. I bought a pack of bows from my local Target store, but you can order similar bows on Amazon. (This set with the little bells is especially cute.)
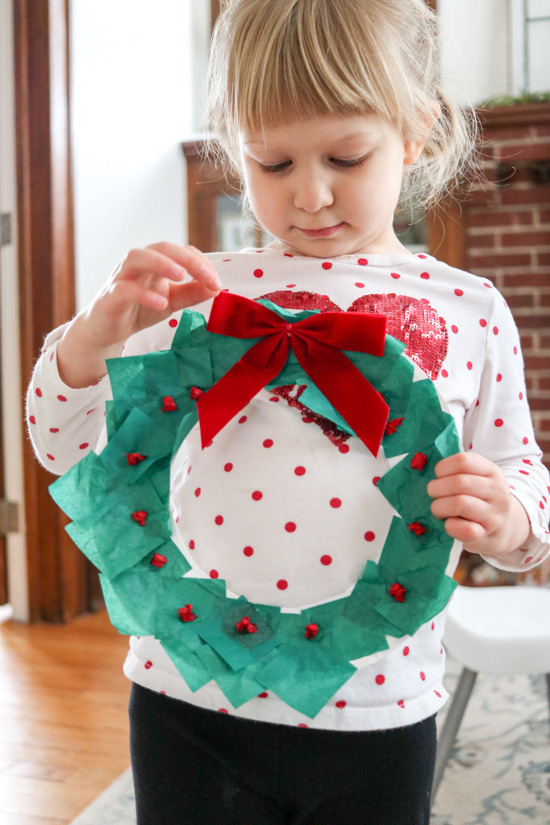
Punch two holes next to each other at the top of your wreath and use the bow’s twist-ties to secure it into place.


The finished result is a perfectly adorable tissue paper Christmas wreath! I love this sweet little craft and was so pleased with how it turned out.

Dessa couldn’t wait to find the perfect location to hang her finished Christmas wreath and I loved seeing the look of pride on her face.


This paper plate Christmas wreath was the perfect fast craft to complete with my three year old. I loved how easy it was to prep and the fact that the tissue paper and glue kept the mess to a minimum. If you’re looking for a simple craft to create at home or in the classroom with little ones in the last days leading up to Christmas, I highly recommend this project.
Wishing you all a safe, healthy, and merry Christmas from my family to yours! Stop by my lifestyle blog, Crazy Together for more glimpses into our life at home with two little ones – along with some fashion, decor, and financial goals mixed in.
Click any image below to stock up on project supplies from Amazon.

I’m a former kindergarten teacher turned work-from-home mom. I still love sharing ideas and resources to make teaching easier, so you can focus on what really matters in the classroom. When I’m not working on the blog, you’ll find me chasing kids around the house with a cold cup of coffee in my hand (some things never change even once you’re out of the classroom!)