
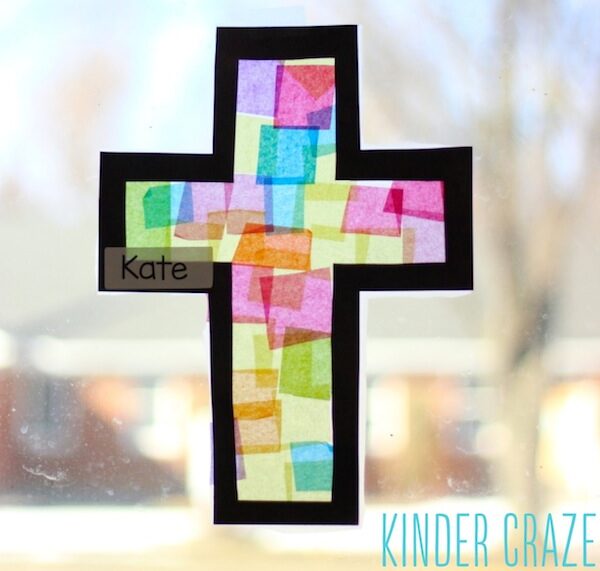
This simple stained glass cross window decoration is my favorite Lenten craft for kids to create in the classroom. By now, my students are stained glass experts (they require very few instructions from me) and these beautiful crosses look stunning when they hang in my classroom windows. I’m thrilled to share a tutorial for this simple craft with you today.
This post contains affiliate links. I receive a small commission each time someone makes a purchase through one of my links, which helps to support the blog.
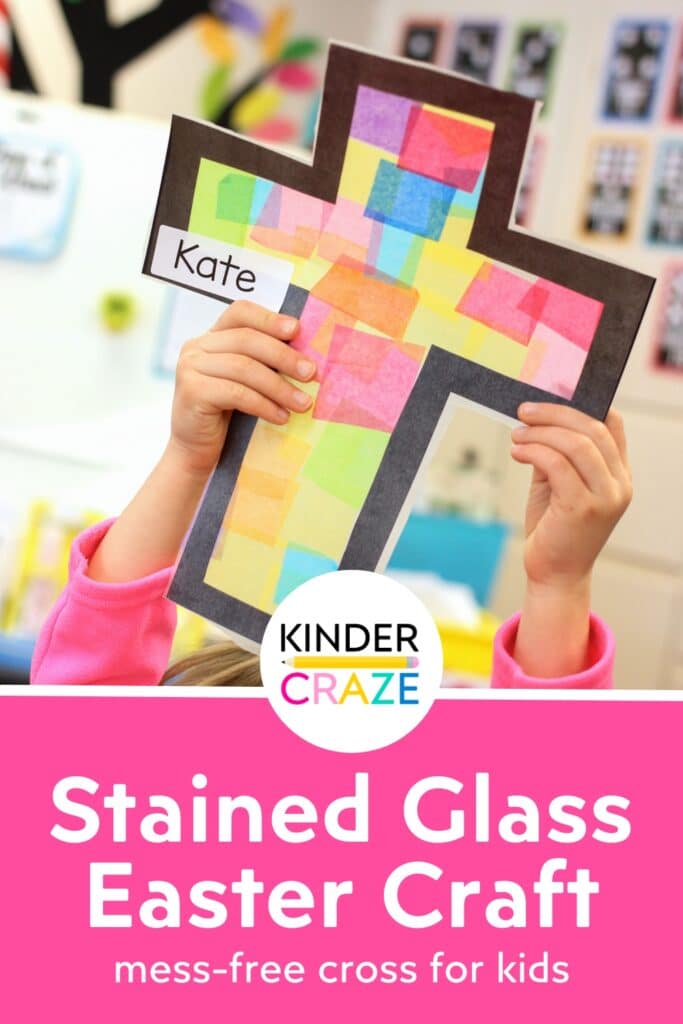
Lent may not be the most exciting time of year, but it is one of my favorites to teach about in my kindergarten classroom. I teach in a Catholic School and we spend a significant amount of time learning about the Stations of the Cross and “the sad story of what happened to Jesus” as I describe it for my students. No matter what sad part of the story we are discussing, I always remind my children of the happy ending when Jesus was able to rise from the dead! This simple stained glass cross is the perfect Lenten craft to remind us of the beauty and joy that awaits on Easter.
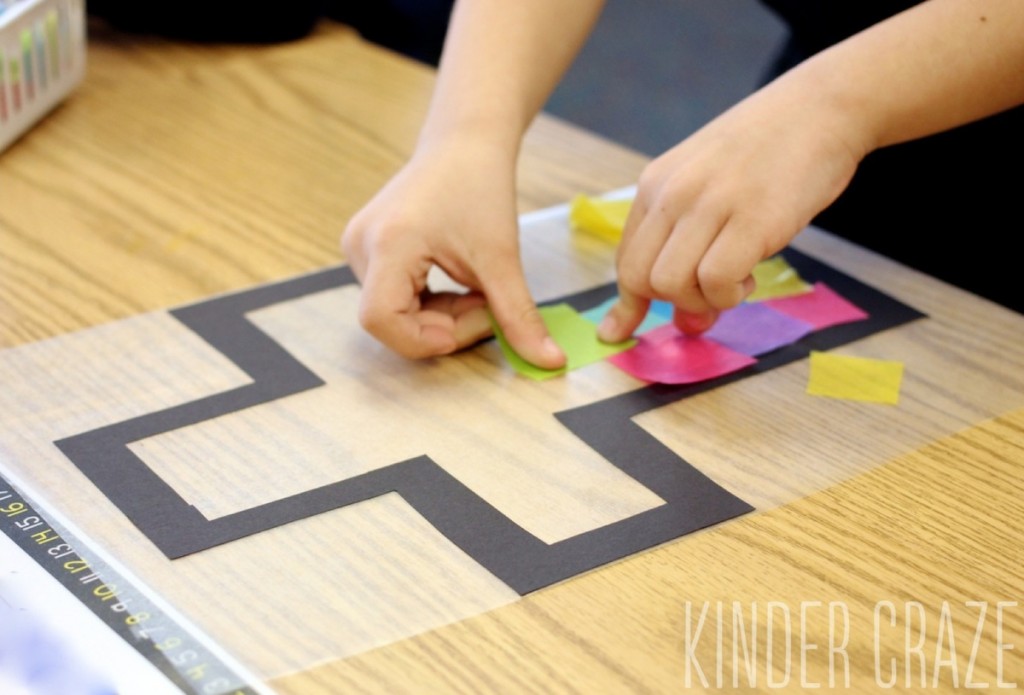
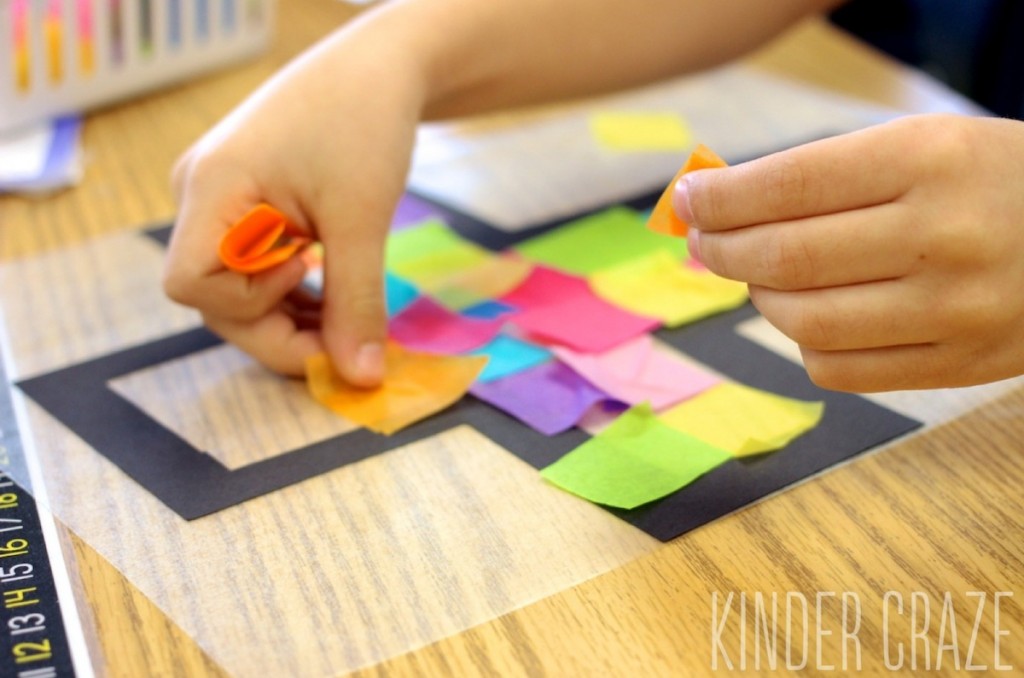
To begin, peel and set one piece of clear contact paper sticky-side-up on each child’s desk. Carefully place the cross frame onto each child’s piece of contact paper (I usually do this task while the class is away from their seats – either playing with toys or while they are at a special). Place a small basket of multicolored tissue paper squares within easy reach of each child.
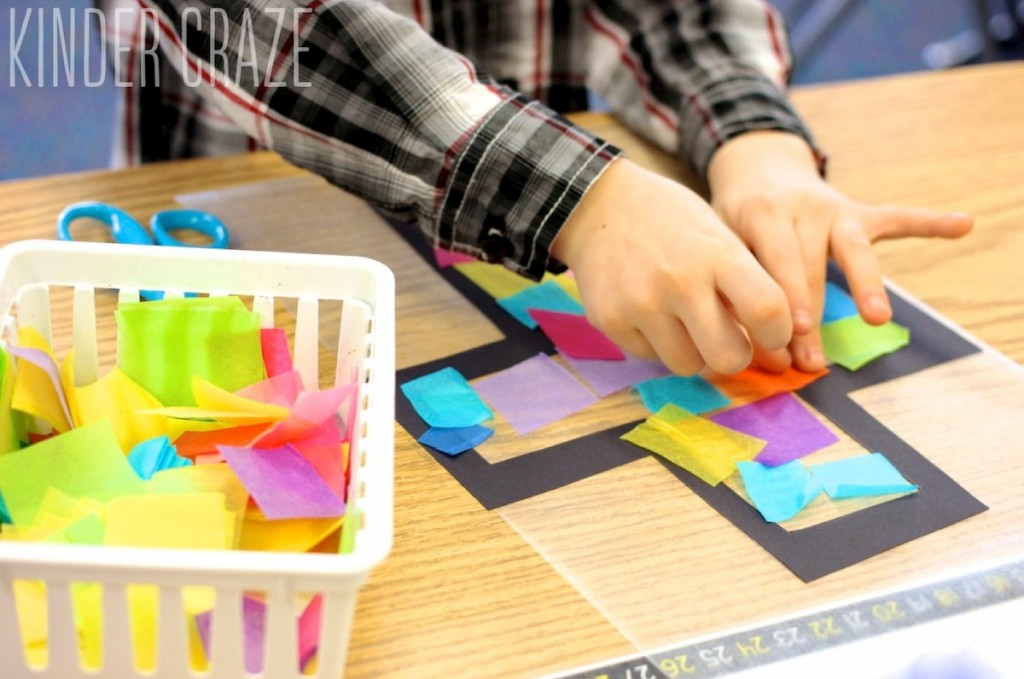
When the students are ready, they can begin to fill their black cross frames with the tissue paper squares. For best results, students should do this part carefully and place only one tissue paper square onto the contact paper at a time.
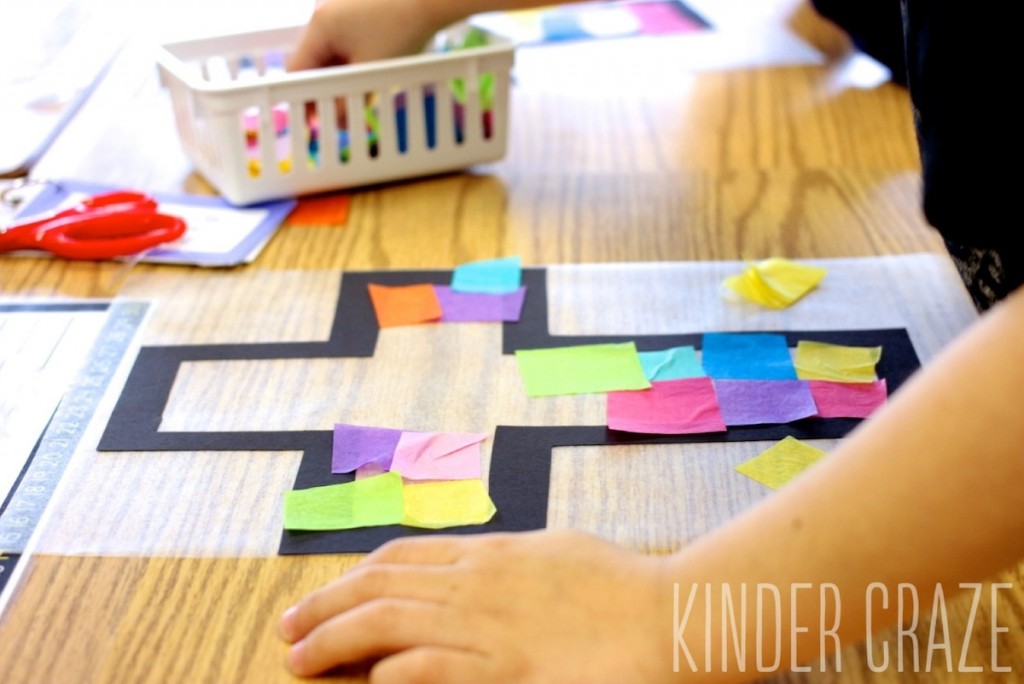
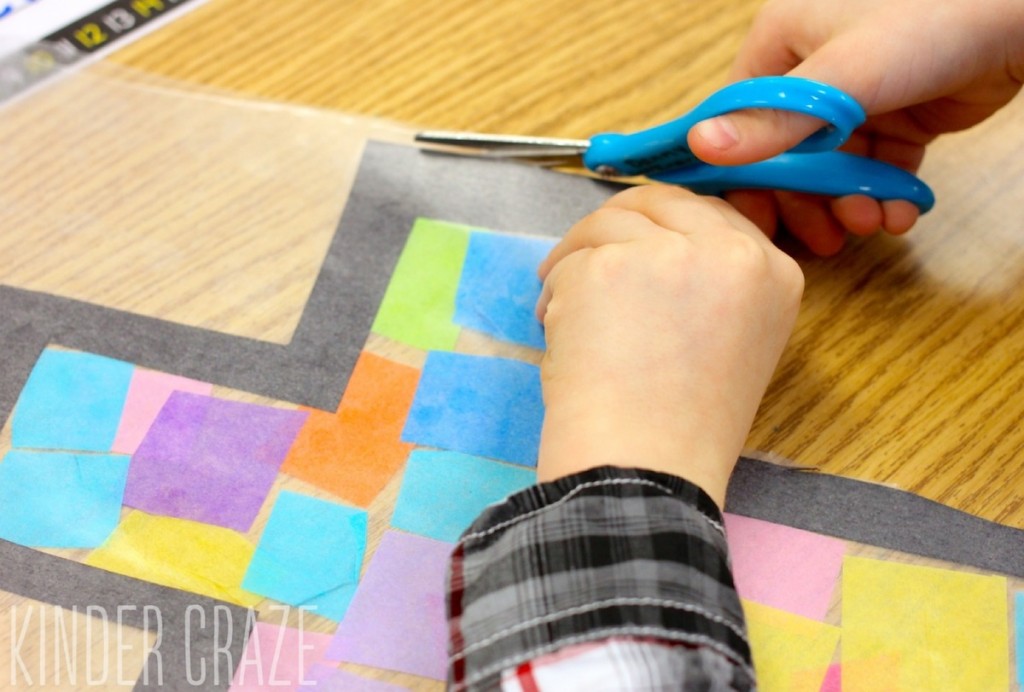
Once the crosses are completely filled with tissue paper squares, peel a second piece of clear contact paper and place it sticky side down on top of the cross. This “seals in” all of the tissue paper squares and prevents any fly away pieces.
Each child can trim the excess plastic from around their crosses to complete the project.
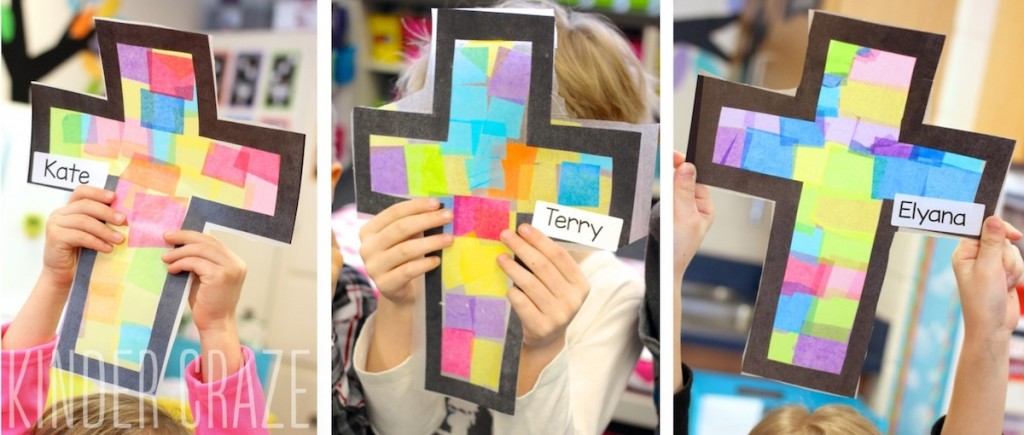
Every child’s completed cross project is completely unique and oh-so-brightly colored!
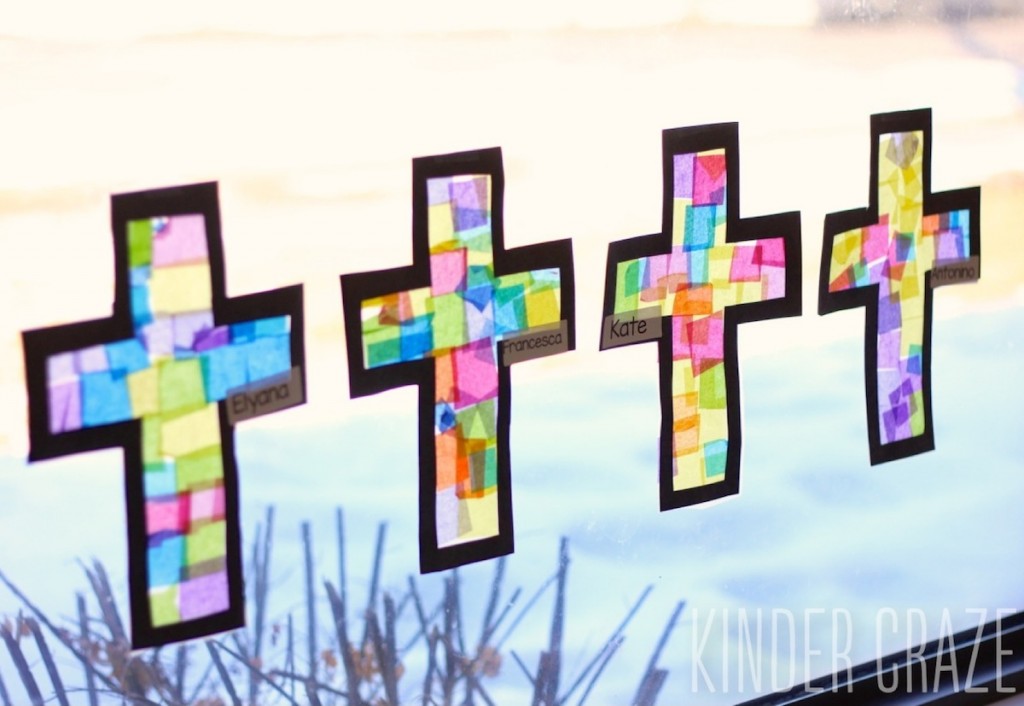
Hang the completed crosses in a window with a piece of scotch tape. It’s the perfect Lenten craft that provides additional beauty during the Easter season also doubles as a springtime decoration.
I love how these crosses look hanging in the windows of my kindergarten classroom.
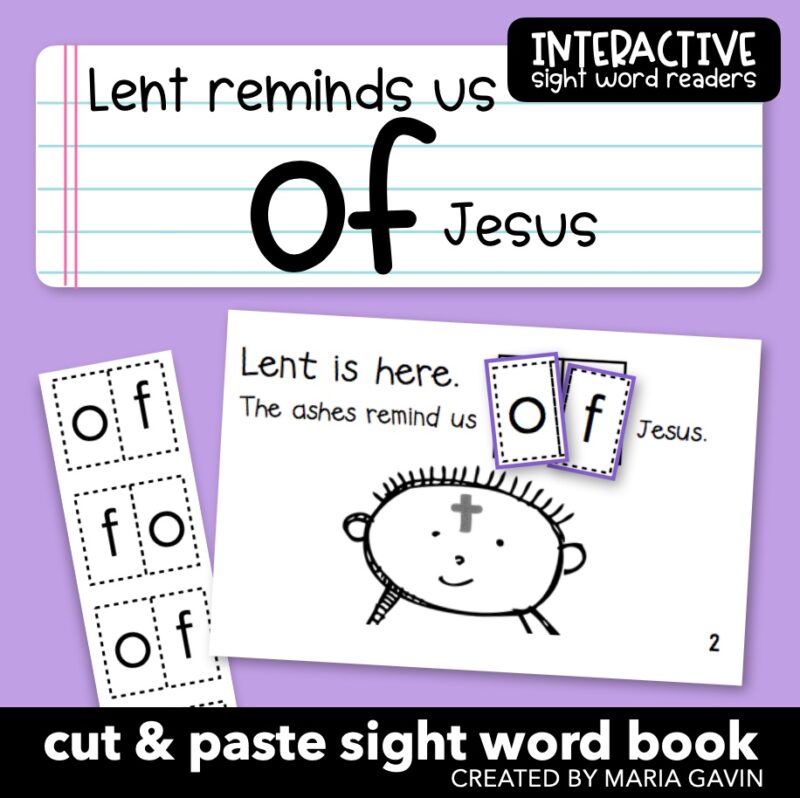
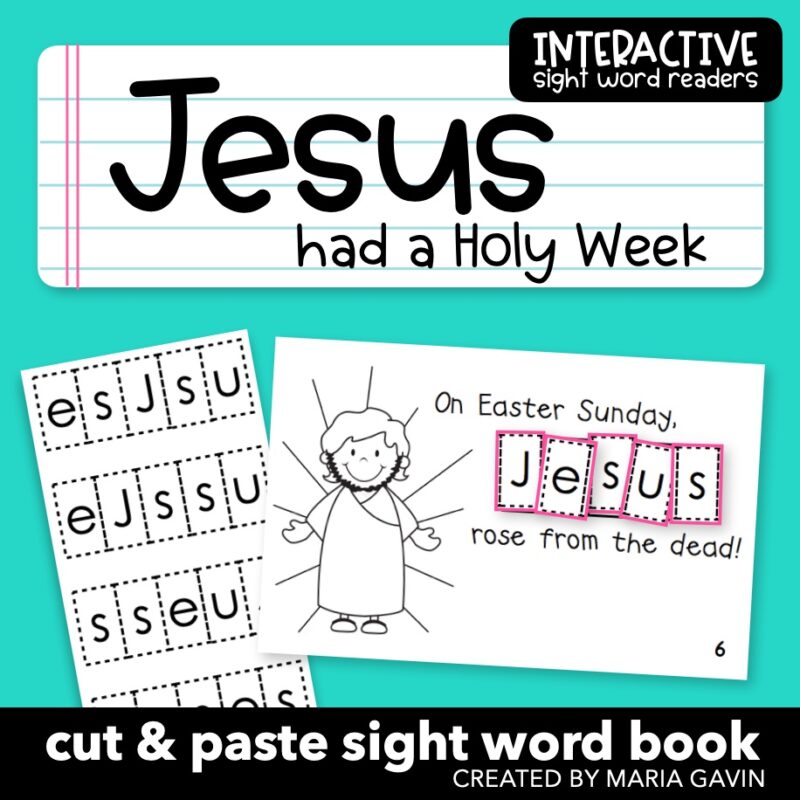
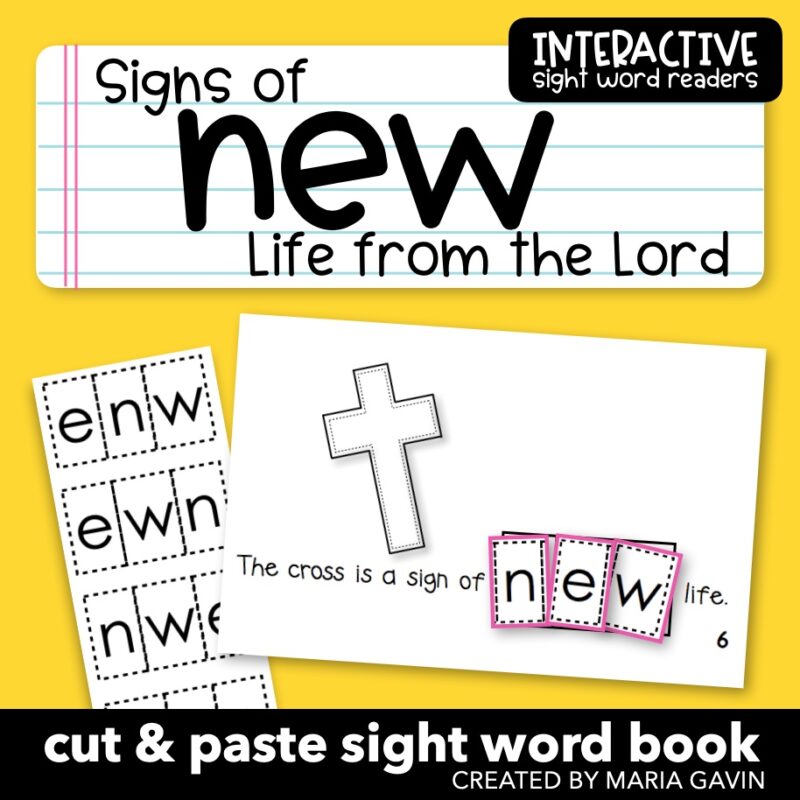
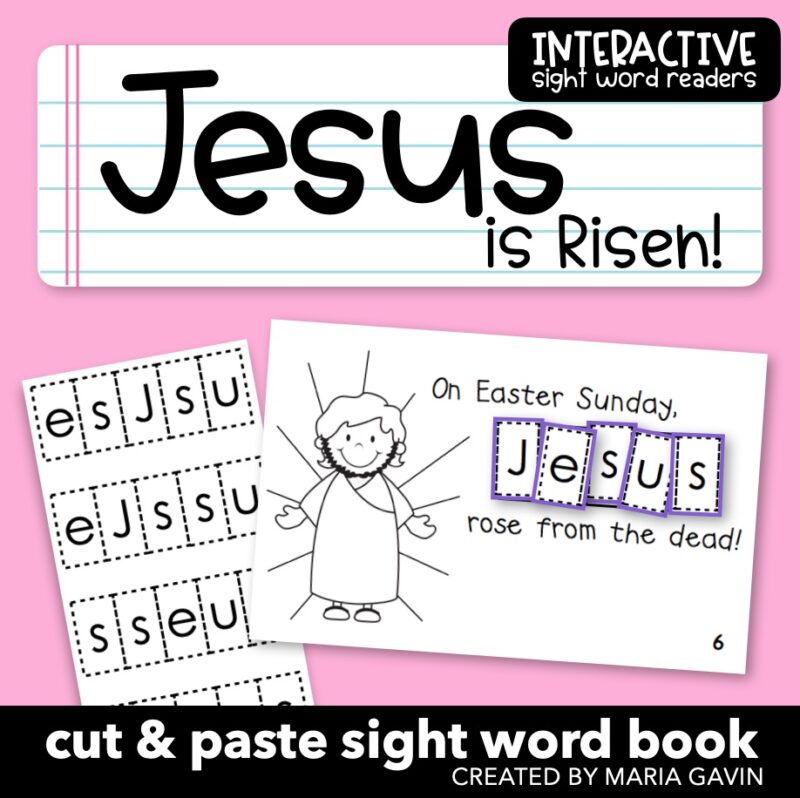
Enhance your classroom instruction during the Lenten and Easter season with Interactive Sight Word Readers. Each of these books feature predictable text to teach important themes for this season of the Church while providing hands-on sight word practice. Click any image below to get yours for free.
I wish you and your little ones a very blessed Lenten and Easter season!

I’m a former kindergarten teacher turned work-from-home mom. I still love sharing ideas and resources to make teaching easier, so you can focus on what really matters in the classroom. When I’m not working on the blog, you’ll find me chasing kids around the house with a cold cup of coffee in my hand (some things never change even once you’re out of the classroom!)


13 Responses
These are beautiful!
I remember making this craft growing up and loving it! We used wax paper and ironed the pieces together which was pretty neat, too! Love the simplicity of the clear contact paper! Thanks so much for sharing!
So cute…going to try this with my kindergarten Sunday school class!
I have done stained glass crafts with my first graders using wax paper and glue. But I love the idea of using contact paper. So much easier.
I wonder about getting Avery Self-Adhesive Laminating Sheets, 9 x 12 Inches, Box of 50
instead to save prep time? Setting this craft up for over 200 kids! Thoughts?
Thanks!
Jay
Hi Jay,
I have heard that some teachers have success with the self-adhesive laminating sheets and actually prefer them. It might work! Maria
PS- that’s a LOT of kids!
Hi,
Thank you for sharing this craft, I love it! Any suggestions on how to make the cross as easily as possible, I am not a very crafty person and would be doing this for about 30 kids.
Thanks, Linda
Do you have a new link for the contact paper. This one doesn’t exist anymore. Thanks