

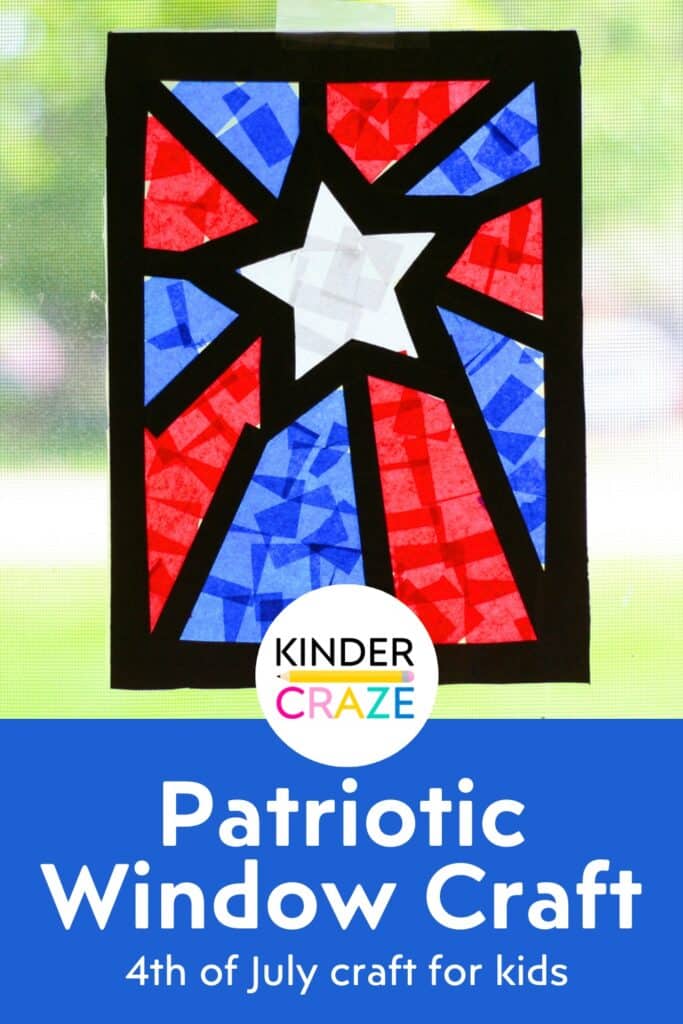
With Memorial Day coming up next week, my students created patriotic “stained glass” window decorations in the colors of the American flag. We had SO much fun with this patriotic craft and the results are really quite stunning.
This post contains affiliate links. I earn a small commission each time someone makes a purchase through one of my links, which helps to support the blog.
I love this activity because it looks complicated, but just requires a few materials to create. I prepped a few things ahead of time but constructing the design and filling in the colors were tasks that my kindergarten students completed independently.

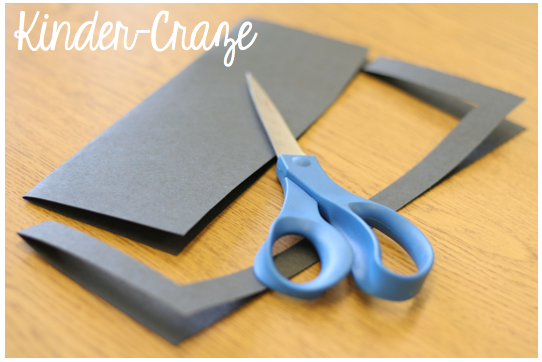
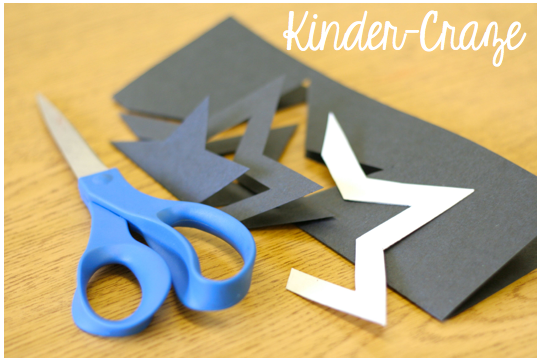
To begin, fold each 8×11 sheet of black construction paper in half (so it is tall and skinny.) Keep the paper folded in half, start at the crease, and trim 3/4″ from around the edges to create a frame for the window. Set the frame aside for later and use the solid rectangular piece that remains to cut a star shape and strips for creating the window design.
Using the rectangular piece that remains from the previous step, place the star template along the crease of the folded paper and trace the inner and outer star edges.
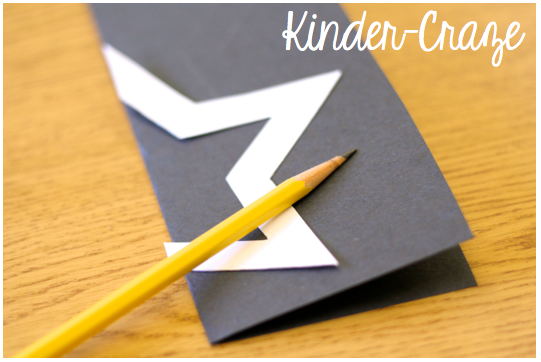
Keep the paper folded while you cut both lines you traced in the previous step. Discard the small solid star (or use it on a future project) set the larger star outline aside for the stained glass window, and use the remaining paper scraps to cut strips of paper that are approximately 1/2″ thick.
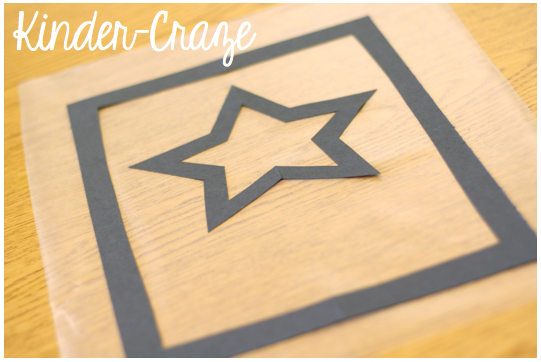
Peel a sheet of clear contact paper and place it STICKY SIDE UP on a table. Open the rectangular frame you trimmed in the first step and place this in the center of the contact paper. Open the star outline and place it on the contact paper as well.
NOTE: I did this step for my students.
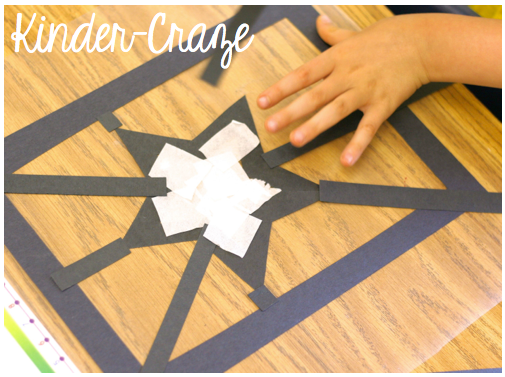
Have students fill in the star with white tissue paper squares. The tissue paper can overlap the black paper a bit since the side they are working with will become the back of the completed project.

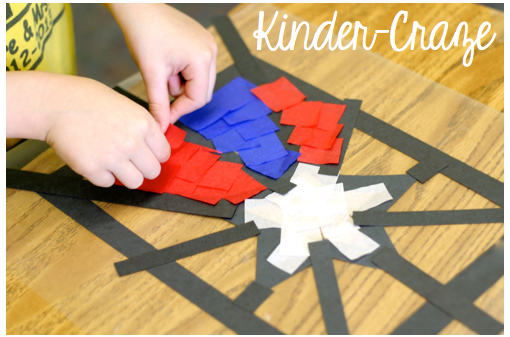
Use the 1/2″ black construction paper strips that were trimmed from the star’s paper scraps to create a window design that resembles rays shining out from the star. As you can see, the strips connect each “point” and “inner corner” of the star with the rectangular frame. This requires 10 paper strips of varying length.
Now the REAL fun can begin! Have students use alternating red and blue tissue paper squares to fill in the sections they created around the star.
A completely tissue-papered window decoration.
(Yes, I did just make up my own verb.)

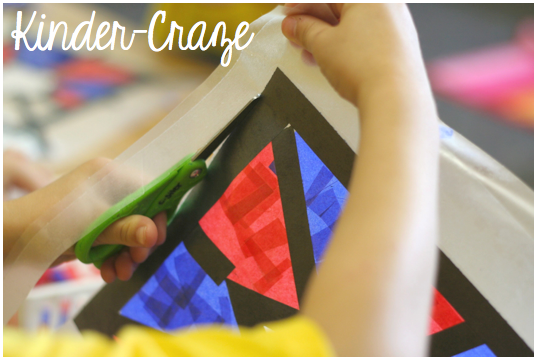
Place a second piece of clear contact paper STICKY SIDE DOWN on top of all those tissue paper pieces. This essentially makes a “tissue paper sandwich”. Students can trim excess contact paper from the edges of their creation.
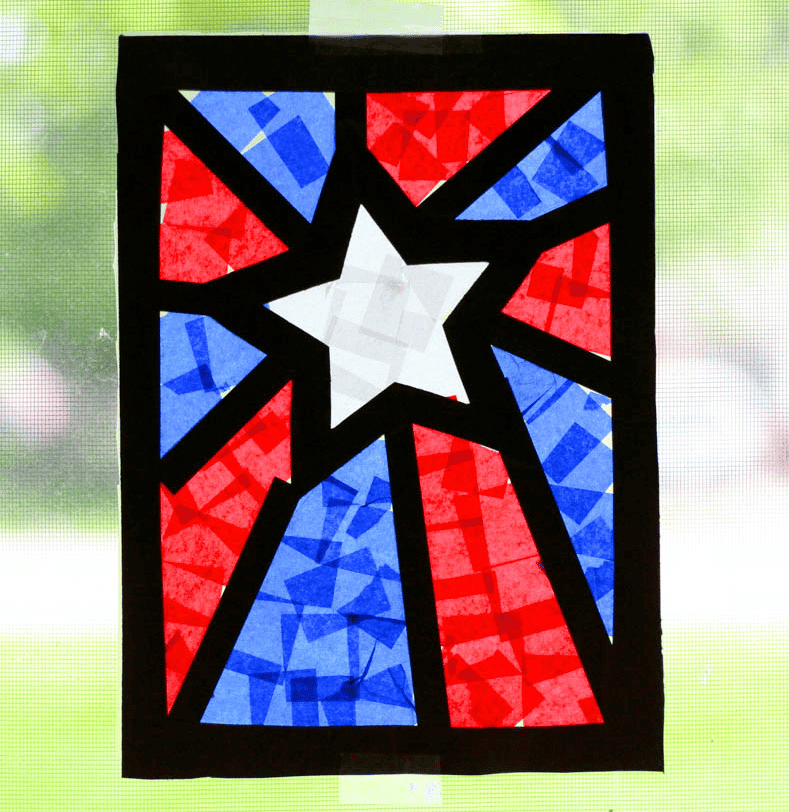
And there you have it… a completed red, white, and blue “stained glass” window decoration!
Just in case you were wondering how I manage this project in my classroom…
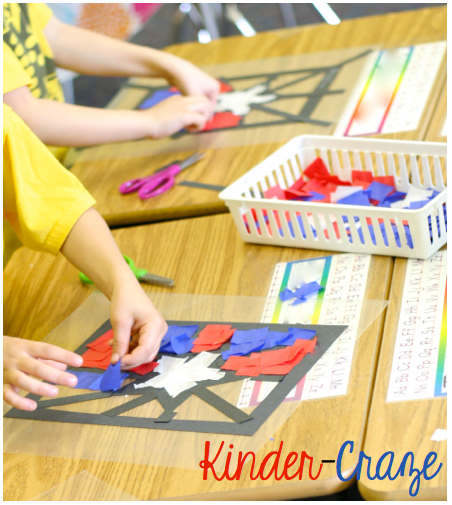
We did this activity whole-group. My students worked in groups of four. Each group shared a box of tissue paper squares. It was a success!
Ready to make your own red, white and blue window craft? I created a free star template that you can use to create your own patriotic craft at home or in the classroom. Use the form below to sign up and the star template will be sent directly to your email inbox!
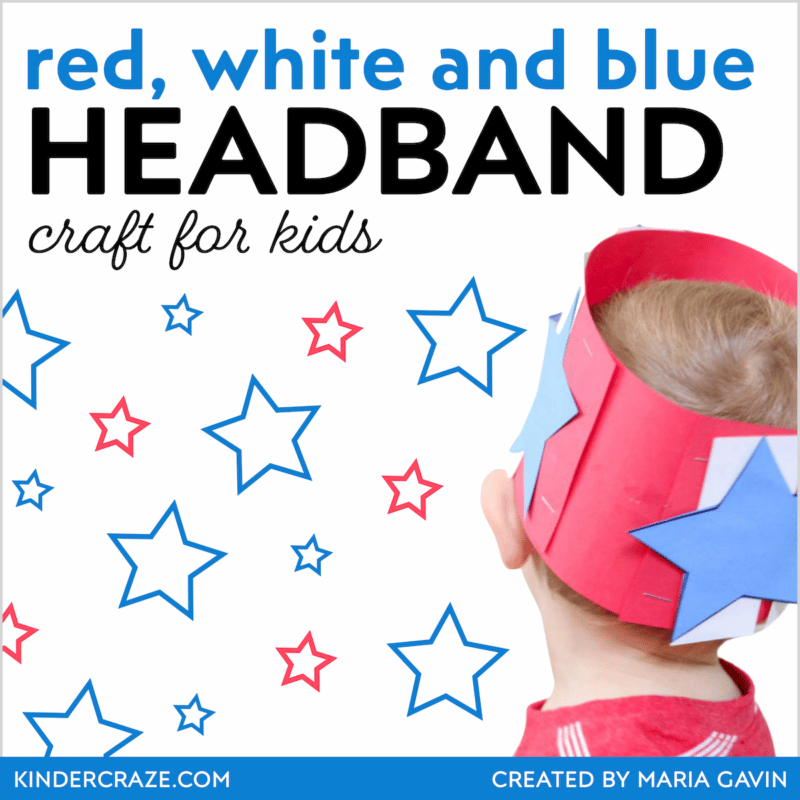
Keep the patriotic spirit going… download my FREE Patriotic Headband Craftivity. This free product includes templates and instructions for creating fun hats to celebrate any American holiday. Click the image below for step-by-step directions and a free printable template.
Coordinating calendar numbers are also available to purchase for $1.50 each. Each set of calendar numbers measures 2.7 x 2.7″ and includes 36 number cards.

Click the button below to purchase the Patriotic Monster calendar numbers in my shop.
Looking for more window decoration projects? Hop over to the Freebies page to find links to additional stained glass creations that I’ve made with my kinders. They look beautiful on the windows and are very fun to make!

I’m a former kindergarten teacher turned work-from-home mom. I still love sharing ideas and resources to make teaching easier, so you can focus on what really matters in the classroom. When I’m not working on the blog, you’ll find me chasing kids around the house with a cold cup of coffee in my hand (some things never change even once you’re out of the classroom!)

18 Responses
I love this! Your blog is fantastic. 🙂 Thanks for sharing all your wonderful ideas. Preschool Wonders
I’m the Editor of Fun Family Crafts and wanted to let you know that we have featured your patriotic project! You can see it here:
https://funfamilycrafts.com/patriotic-stained-glass-window-craft/
If you have other kid-friendly craft tutorials, we’d love for you to submit them. Thanks for a great project idea!
These came out amazing and the kids had so much fun making them!
Love all the fun and great ideas you have made available for my family to do together. We are having a blast making some of the crafts together. My children have been loving every moment making these. Thanks for this.