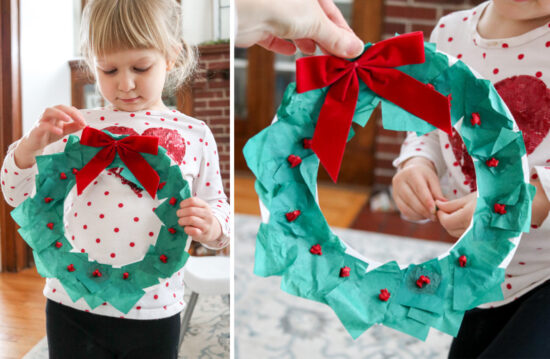

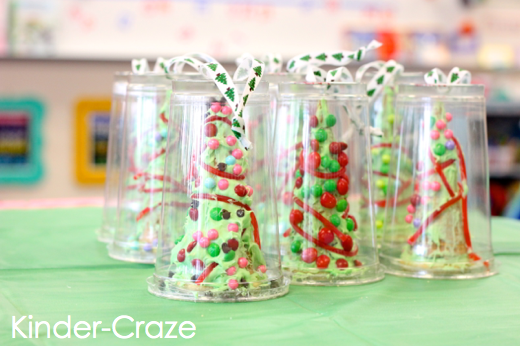
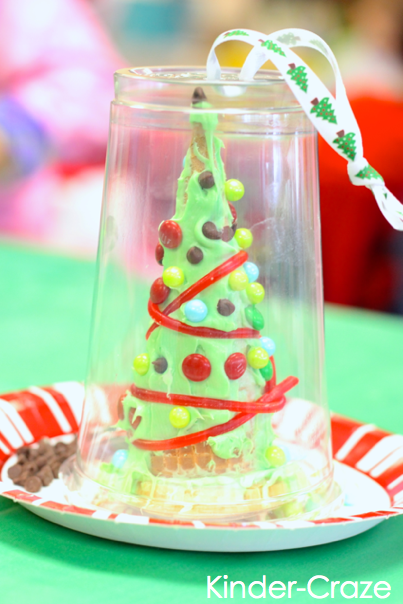
It seems as though everyone has discovered the fun of creating frosted ice cream cone Christmas trees! (The simplicity of the craft with delicious candy treats makes it the perfect classroom party project.) I have received dozens of questions and comments about the plastic cups I use as carrying cases. I’m thrilled to share a tutorial to help you prep for the easiest mess-free way to transport those adorable frosted Christmas trees.
This post contains affiliate links. I earn a small commission each time someone makes a purchase through one of my links, which helps to support the blog.
If you missed the post about the ice cream cone trees we frosted at my class Christmas party, you definitely want to check it out.

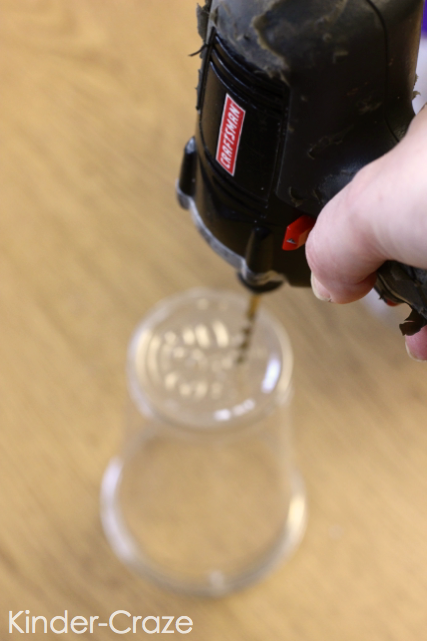
First of all… brace yourself. I do not consider myself a handy person. I’m a laptop kind of girl and power tools frighten me. I had to use a drill to prepare the cups and I was a little nervous. The school custodian fixed me up with his drill, bit, and safety glasses. Once I had the proper equipment, I was good-to-go.

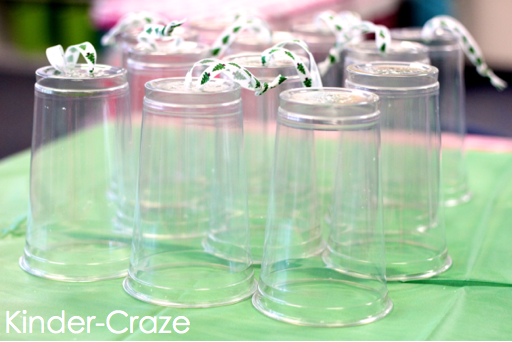
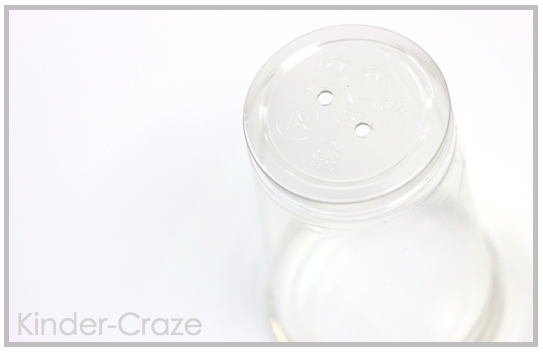
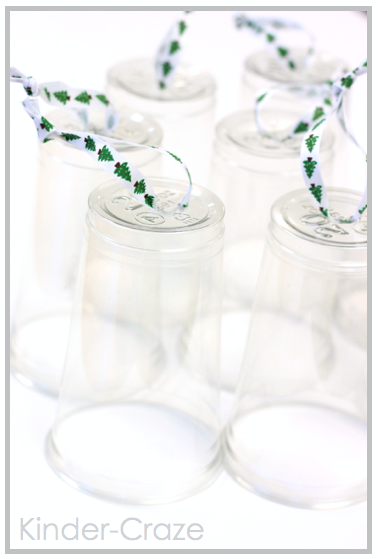
You will need 20 ounce clear plastic cups with lids for this project. Grab them on Amazon!
You’ll also need holiday ribbon, a cordless drill, and 5/16″ drill bit.
CLICK TO SHOP

After gathering my materials, I was ready to drill!
I drilled 2 holes into the bottom of each cup.
The goal was to place both holes near the center of the cup.
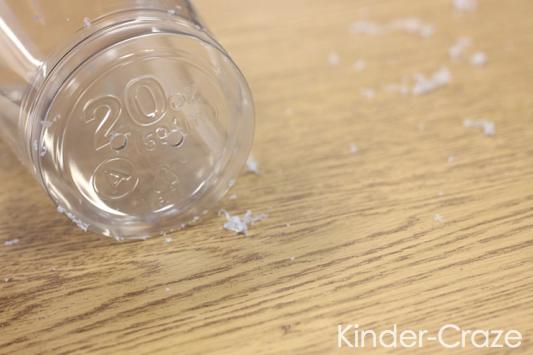
Before long, I had a collection of drilled cups and bits of plastic debris on the table.
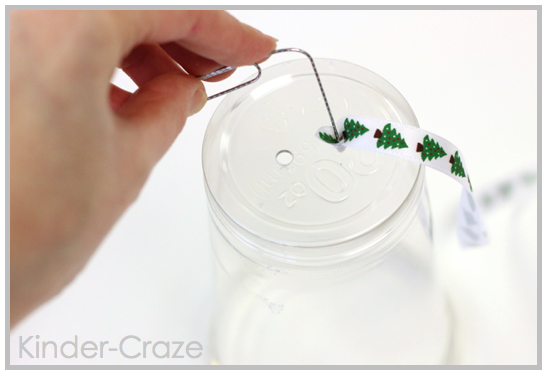
With the holes complete, my next task was to thread ribbon throughout the holes to create a loop.
This required a very specific and highly-technical tool…
a paperclip.
Ok, maybe it isn’t a very technical tool.
I opened one prong of the paperclip and kept the rest of it coiled so I could easily maintain my grip on the clip while I worked.
First, I used the paperclip to push one end of a 12″ strip of ribbon into the cup. I pushed about 2″ of the strip through the hole.
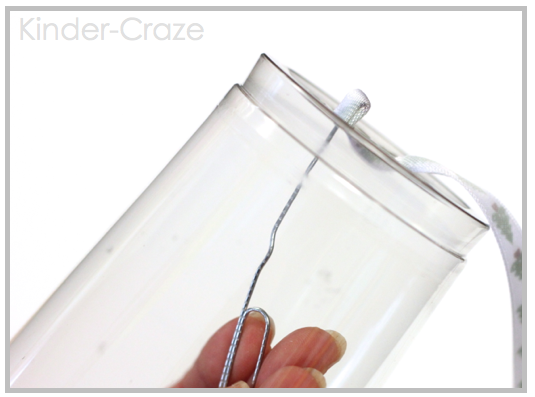
The next part was a bit more tricky. I reached into the cup and used the paperclip to thread the same piece of ribbon up through the second hole and back out the bottom of the cup.
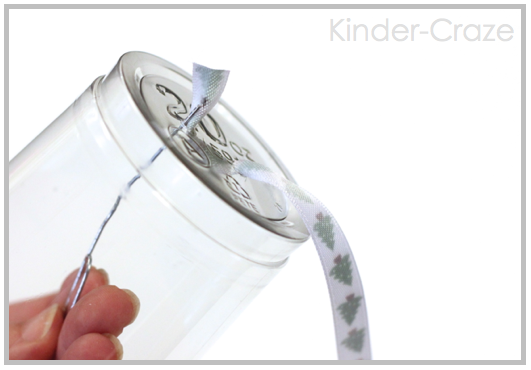
Once the ribbon was pulled through both holes, I joined the two ends together and tied a simple knot. My collection of cups was ready for the party!
These cup cases were the perfect way to showcase and display my students’ frosted tree creations!
Want to see how I managed this holiday project in my kindergarten classroom during our party? I wrote about it in my Frosted Christmas Party blog post.
Happy Holidays!
If you are looking for more fun holiday themed ideas, be sure to check out the blog posts below. They are filled with fun ideas and projects that will spread the joy of the holiday season.


I’m a former kindergarten teacher turned work-from-home mom. I still love sharing ideas and resources to make teaching easier, so you can focus on what really matters in the classroom. When I’m not working on the blog, you’ll find me chasing kids around the house with a cold cup of coffee in my hand (some things never change even once you’re out of the classroom!)

©2021 Kinder Craze. All Rights Reserved.


19 Responses
Thanks! I love these and I know what I will be doing next Christmas. The kids will LOVE this!
Were there lids and where did you find the cups with lids?
You can get the cups and lids on Amazon – I linked my favorite in the post 🙂
You can also use an icepick to poke the holes. A little easier and no need for power tools… lol
Where can u buy ice pick I been looking for awhile, thanks
Adorable!!
A Tall Drink of Water
We make these every year and this is a great way to transport them. I’ll be using this next year (as long as I can find the cups with lids)!
Teachin’ First
I am very excited about this project. The Pre-K and K in my school will enjoy making the Christmas trees. Thank you for this great activity!
Did you hot glue the lids on after you were done decorating or did they stay on tight on their own?
They stay on tight all by themselves! Plus, not glueing them allows kids to break into the cups when their parents are ready to let them eat it 🙂
Thanks so much for this– we just did it for our Christmas parties this week! I’d always wondered how to get these decorated sugar cones tree home in one piece. The cups are a perfect fit and look so cute too!
You are awesome! Thank you for sharing!
You can heat a screwdrive and poke a 2 holes on the bottom of the cup. If you don’t have a lid cut cut a circle out of a paper plate, add glue around the circle and seal or tape it on. No difference than sealed candy at a store. Great idea. I will try this.
Would 18oz work? We’re sold out if 20oz