

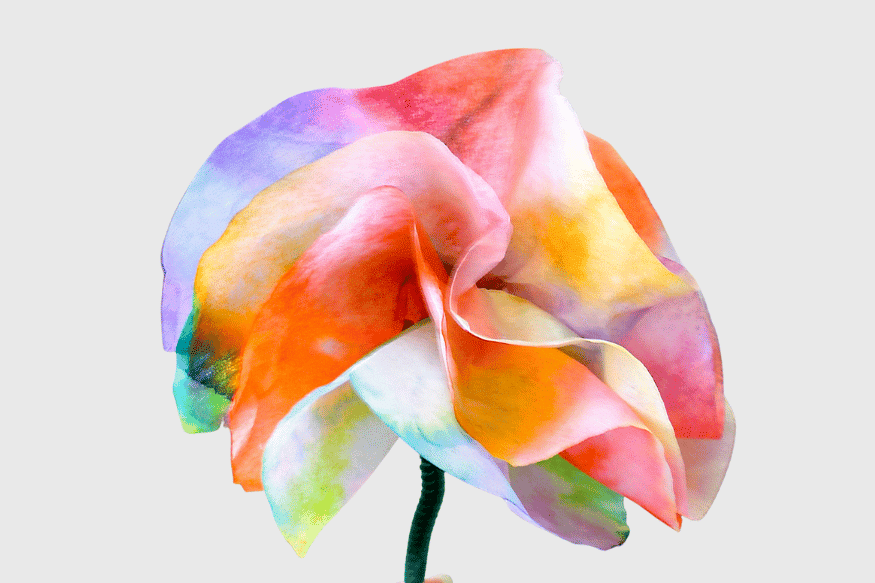
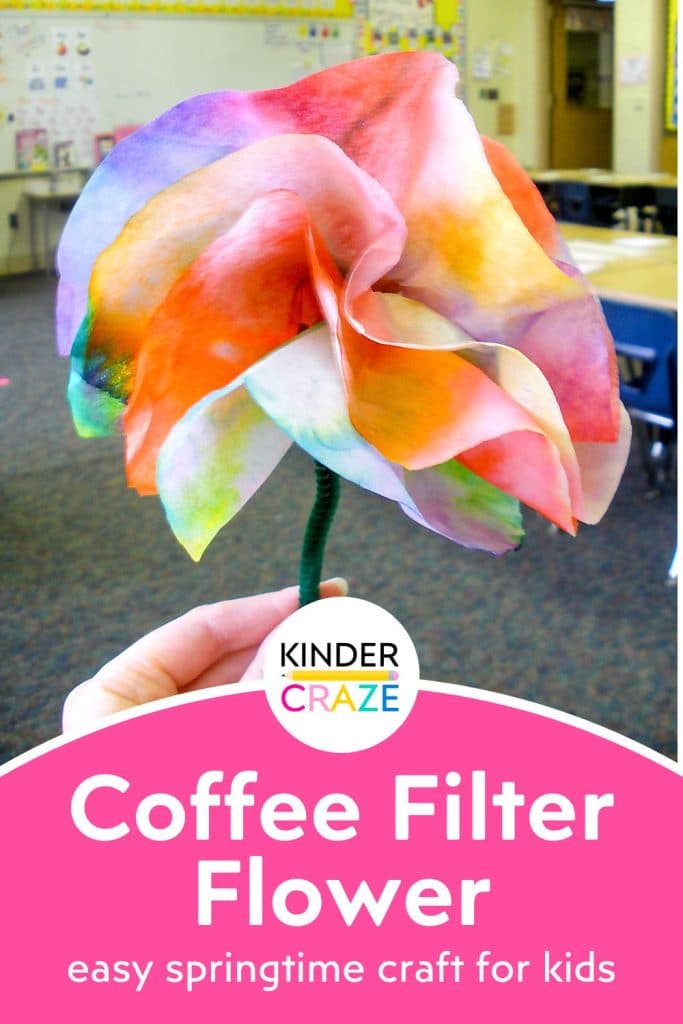
Did you know you can make beautiful, full flowers with your students with coffee filters and pipe cleaners? It’s a very simple, inexpensive spring craft project that the kids will love!

Protect your work surface with a table cloth or some sort of liner (the marker will soak through the paper layers and you won’t want to stain your work area with ink. Next, Tear off a sheet of wax paper big enough and place coffee filters on top. I give each students their own sheet of wax paper with coffee filters on top and use a sharpie to write the student’s name on the wax paper. This helps me keep track of who decorated the filters.
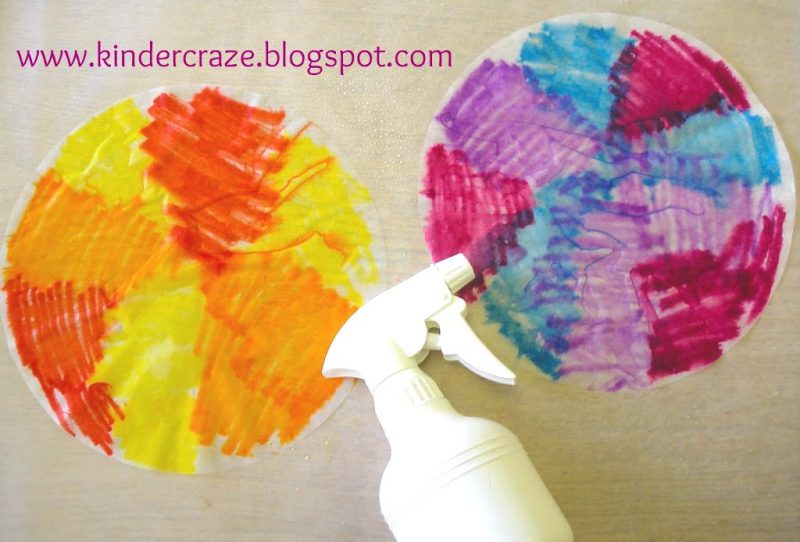
Now comes the fun part. Use markers to scribble all over the coffee filters. Later on, these colors will get wet and bleed into each other so I try to use colors near each other on the color wheel. Otherwise, you may end up with brown flowers.
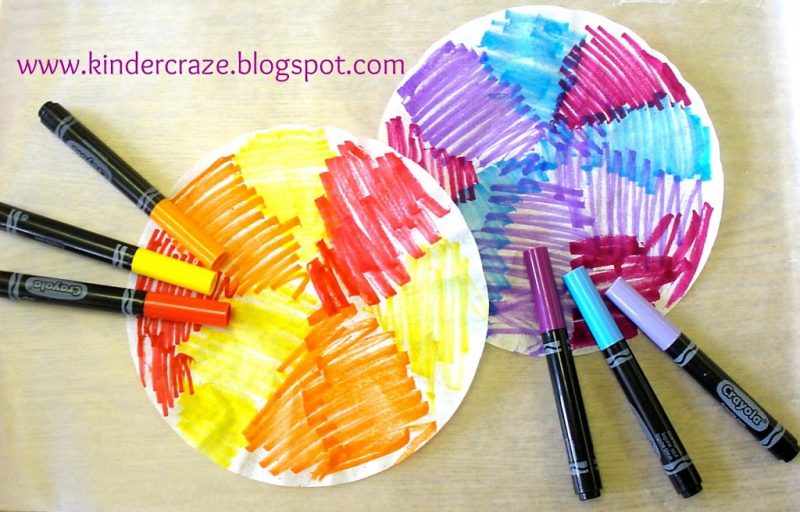
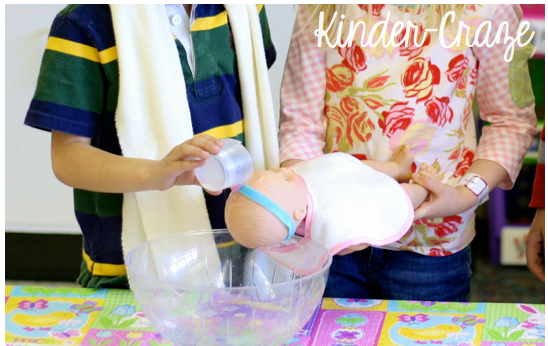
Next, spray the newly-scribbled flowers with your spray bottle. I usually help my kinders do this part. You only need about 5 good sprays.
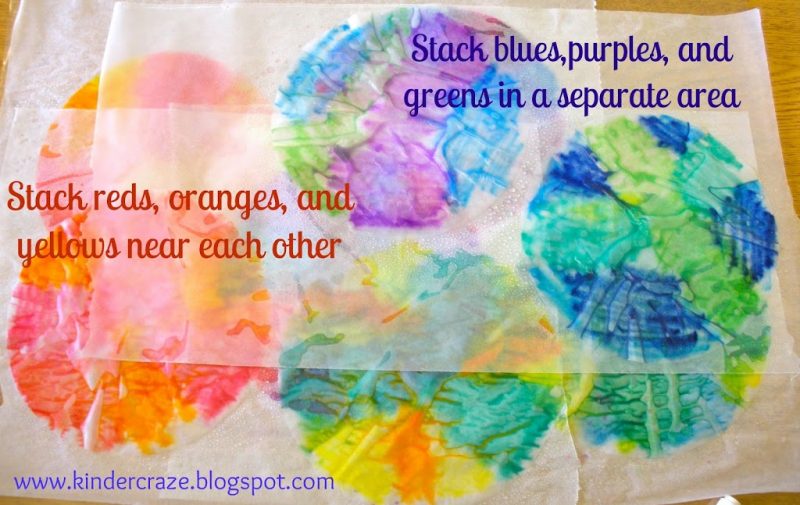
Set the whole sheet of wax paper aside while you wait for the decorated coffee filters to dry. The colors will continue to bleed as they sit.
You can stack the sheets of wax paper on top of each other while they dry. I try to stagger them a bit. Be mindful that the color will bleed a bit through the wax paper as well and complimentary colors (such as orange and purple) will bleed to make brown.
After the coffee filters have dried, you are ready to assemble. I always do this part on my own after school. Older students can probably handle this on their own with instructions from you.

Stack all filters for a single flower together and fold in half.
Now, fold in half again.
This is where it gets a little tricky to understand. You basically want your folds to zig-zag. Take the top section of your coffee filters and fold it backward onto itself.
Then flip the filters over and repeat for the other quarter section. It will look like this when pressed down.
If you let go of the filters, they will open a bit. See the zig-zag?
Use a pipe cleaner to tightly wind around the point of your folded coffee filters. Be sure to cinch it tightly so it holds.
Gently separate the folded pieces from one another, and then you’re done!
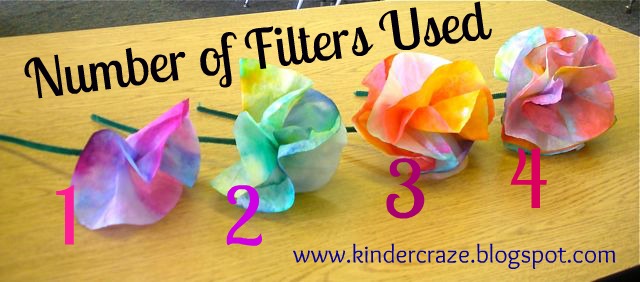
The photo below will help give you a sense of the fullness of different numbers of coffee filters. You can technically complete this project with just one coffee filter, but I personally like to use 2 to 3 filters per flower.
These flowers are great for all things spring and summer: plant units, mother’s day gifts, May Crowning celebrations, Spring decorations, and more. Save this project to your favorite spring Pinterest board so you can easily find it later.

I’m a former kindergarten teacher turned work-from-home mom. I still love sharing ideas and resources to make teaching easier, so you can focus on what really matters in the classroom. When I’m not working on the blog, you’ll find me chasing kids around the house with a cold cup of coffee in my hand (some things never change even once you’re out of the classroom!)


57 Responses
I love this- how simple, but what an impact. I would like to use these to decorate for our end of the year party.
http://www.kindertrips.blogspot.com
Very pretty!! And easy, too!
❤Teri
A Cupcake for the Teacher
What a great lil tutorial! Thanks, these look adorable 🙂
Kimberly
The Learning Tree
Love these! I’ve made lots of things out of coffee filters but never flowers! I can’t wait to try it!
Stop by and check out our Classroom Management Linky Party.
Tamara
2 Crazy Texas Teachers
Sounds like a fun project! Thanks for the tutorial! 🙂
Lisa
Learning Is Something to Treasure
These turned out wonderful. Thanks for sharing.
✿Michele
Miss Nelson’s blog
Aww, thank you for all the love! I’m so happy the information was helpful to you!
hey… I stumbled upon your blog when I was looking for ways to dress up my ugly sterilite drawer sets… thx for showing me what this looks like, and that is doable, i thought of it, but didnt know if it would look good!! thx… I am redoing my makeup vanity in my bedroom, and I have a massive collection and it is my sanctuary, you’ve given me several ideas for decor in the space, thank you so much!!! I will be following you more often now!! Also, have you considered joining twitter? I know so many others who would def follow you!!
Made these today for Mother’s Day in our Before and After School Program and they turned out beautifully! Thanks so much for an awesome and easy craft!
We are using these at our international preschool in Stockholm, Sweden as a peace demonstration. We’re making them, then handing them out to people at the train station on Nobel Day (learning about the Nobel prizes for peace, literature, chemistry, etc).
I color the commercial size coffee filters ahead of time, I just mix food coloring and water and then put stacks of filters in each color. I add more on the top and bottom and squeeze them. Then I put them in the dryer, one color at a time. when you open your dryer, you will need trash bags to unload each color, then while watching your favorite show, you slowing restack them and they are ready to use!
Hi: Love the idea! Did this today with my preschoolers for May Day. The children enjoyed the process and watching the colors blend. I did have to help putting the flowers into a paper cone that they decorated. But otherwise, it was a hit. When I removed the dry coffee filters from the wax paper, it left an imprint of the colors. So rather than throwing the wax paper away, I cut around the colors and made more flowers using the same procedure. They look beautiful. Just thought I would share our story.
Thank you,
Adria
Hi Adria, I’m so happy that your students loved the project. There is something so magical about the process for young children. What a great way to re-use the wax paper. I’m sure your flowers turned out beautiful!
I’ve done a similar project using 2 filters and a pipe cleaner to make butterflies. I use white copy paper under the filters and get a watercolor effect on the paper which I use as another project when they’re dry. My students have cut the colored sections into flowers or other shapes to make mother’s day cards and other things.
Perfect for our spring wall mural. Thanks.
These are fantastic, did them last year with 2-3 year-olds and am repeating this year with my new group 😉
Muy originales
I do this project with K5 in my art class. The kids use all colors except brown, black and gray. They are required to cover all of the white so the colors become pretty saturated. I use large garbage bags on the floor – cut off the bottom of the bag and open up one side – then spray them with water from a spray bottle – sometimes I let the kids spray their depending on the time. When putting together the flowers – I have the kids pinch the middle and twist a point out of the center – then wrap the pipe cleaners around the point and ta-dah! We have beautiful flowers for mom.
I have also used this technique to create butterflies.
2 coffee filter and a clothespin pinched in the center – AWESOME!
Do I color both sides of filters
Nope! You just need to color one side- the ink bleeds through really easily and both sides are equally beautiful!
These are beautiful!
How long do they take to dry, is it a 2 day project?
Hi Sandy! I don’t recall how long it takes for the filters to dry, but the project usually takes me 2 days just so I’m not pressed for time.
Hi, Great ideas! I’m working with 2 grandchildren, 9 & 8. the 9 y/o has limited use of her left hand, & other issues, the 8 y/o, very talented & helpful. The elder wants to do everything herself & is very impatient . Would you consider using crayons on both side of the filters, designs, numbers etc to skip the spraying of water, anything to make it a 1 day project ? Thank you for any suggestons
Thank you for the tutorial! I was looking for a frugal mother’s day crafts idea for my ninth graders after the state test! This one is a winner!
Awesome! So glad I could help!
We did this craft over spring break using the dye that comes with egg-kits. The kids had decorated their eggs but weren’t done having fun so we pulled out the filters and made these. All we needed was a couple paintbrushes and some brown bags at a drip cloth underneath. Hung out in the sun to dry! Thanks for the idea!
How fun! And what a great way to use that leftover egg dye!
These are so cute! Why is wax paper used? I’m a little confused because you said to move aside the wax paper while the filters dried, but then you said you can stack them while they dry. Is one way better than the other? Thanks for the help!
Hi Sarah,
The wax paper helps prevent ink from transferring between coffee filters while they dry.
Can’t wait to try these with my Grandchildren!
The Coronavirus has been a life altering experience for sure. My 5th grader is home from school in March and I saw your blog. We are ready to construct our filters today. I colored a bunch of other filters yesterday in food dye.. purple, pink and yellow. I even soaked some cupcake wrappers and I think we’ll use them as the center of each flower. Thank you!!!
What size coffee filters do you suggest?)
Love these. I’m trying to figure out how many my great-granddaughter would need to make so she could make a wreath (using a wire form) out of them. 🙂
I’m doing this for a class project and this was VERY helpful thanks a lot!!!!!!!!!
I am an activity director in a small town nursing home we do these flowers for lots of different projects this time we are making these for flowers in our May Day basket easy and lots of fun thanks