
My students have been working like busy little elves preparing their gifts for Mom and Dad. We always make two gifts to send home – one addressed to Mom, the other to Dad (this helps simplify things for the more complicated family situations). Over the years, I have made many different parent gifts in the classroom. The primary goal is to create a simple keepsake that the parent will treasure for years. My secondary goal is to share something with the families that conserves my time and finances.
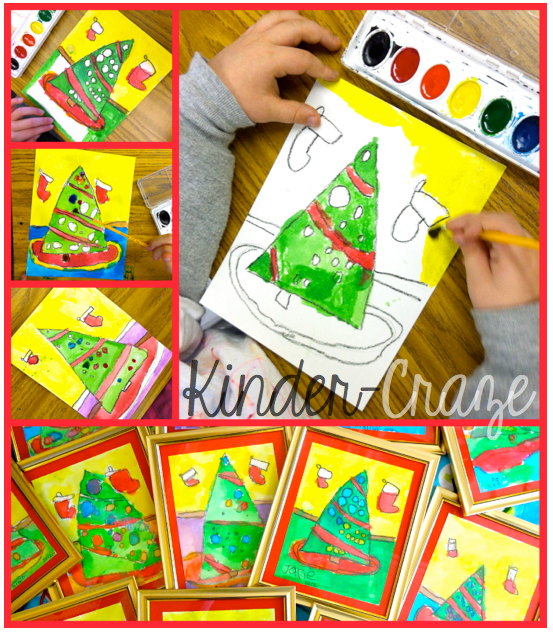
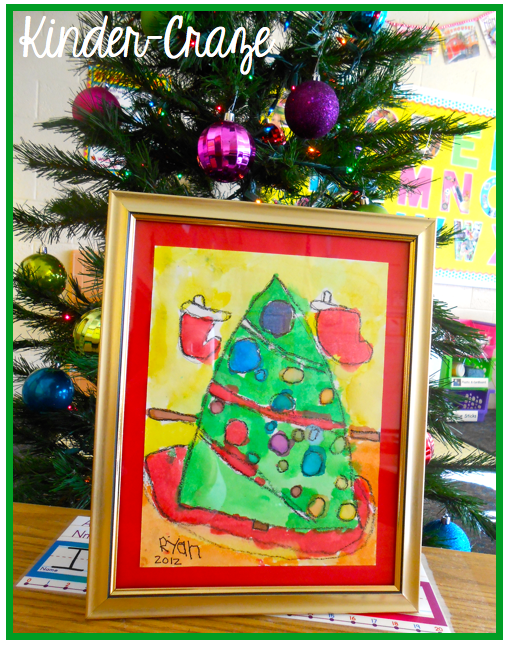
After some serious brainstorming with my teaching partner, I declare this year’s gift-giving to be Mission: Accomplished! My students created these ADORABLE Christmas tree paintings as their first gift.


In anticipation of this project, the children had a few “drawing lessons” in class. I demonstrated step-by-step how to create this Christmas scene and the students created their own drawings on their whiteboards. After a few practice sessions, they were ready for the “real deal.”
On the day of our art project, I distributed white cardstock cut to 6.5×8.5″ to each student. This size was big enough for my students to have ample painting space. It also allowed for a nice matted effect when mounted on red cardstock in a picture frame. Just like our drawing lessons, I used my Elmo and went step-by-step through the drawing process with my class.
After the drawing was complete, the children traced over every pencil line with a black crayon (the crayon wax helps prevent the paint colors from bleeding into each other on the paper). Painting was also a step-by-step process. We all began by painting the tree green. This was followed by red ribbons on the tree, red stockings in the background, and a red tree skirt. Specific painting instructions continued until students selected their own colors for ornaments, lights, and carpet.


The finished paintings are fabulous and I couldn’t be more proud! The best part was that my students did most of the work on this projects. I firmly believe that the children need to be a part of the gift they give to their parents. I cut the paper and framed the paintings – the rest of the work came directly from the students. Parents will love this gift much more than any ornament that I could have slaved over to accomplish on behalf of the students because it was created by their own child.
Seriously, I am in LOVE with these painting and my little artists. This was a very budget-friendly project. The frames cost $1 each, the cardstock cost about $5, and I spent $7 on gift wrap… that comes to only $2 per child. Perfect, right?!?
I couldn’t resist taking a photo of one of the finished paintings with my classroom Christmas tree. Seriously, I am in LOVE.
I always tell my students that we are working on a “Top Secret” project when we make gifts for the people we love. Seriously, I hide the gifts anywhere I can in the classroom so my parent volunteers don’t accidentally stumble upon our creations. I have volunteers in the classroom nearly every day so keeping our projects a secret can be a delicate balancing act. I created this festive sign to hang on my classroom door to alert parents before they walk in and spoil any surprises we have up our sleeves.


You can grab one for FREE! Just click the image to download, then hang on your door to protect all of your classroom gift-giving secrets.
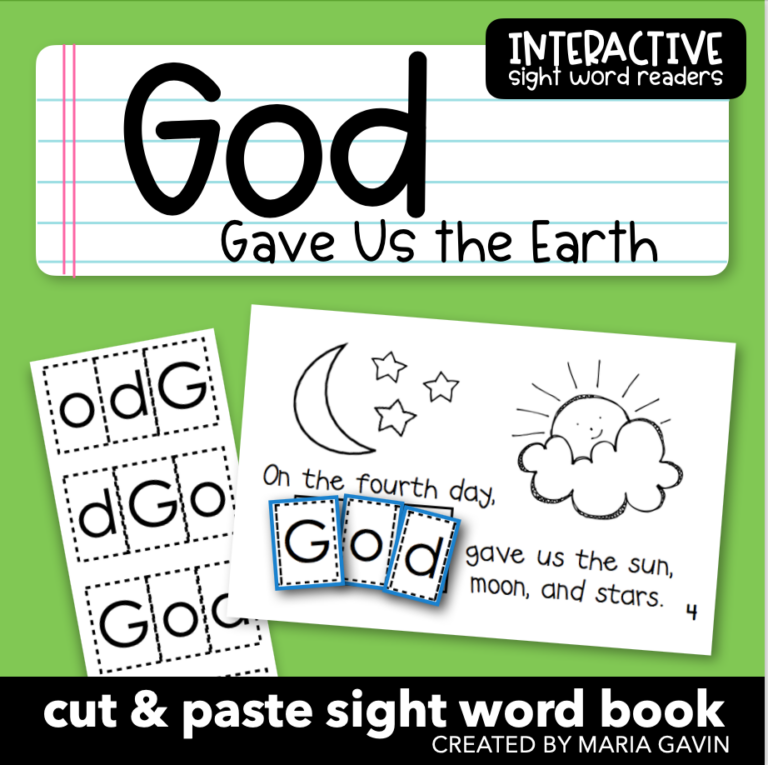
I know you’re a smart cookie and you’re probably thinking, “Wait a minute. She said she makes TWO projects in her classroom every year as Christmas gifts. Where is the other one?!?!” Yup, I did say that and yup we made another (equally awesome) project. I recorded all of my students reciting the lyrics to “Away in a Manger” (I can use this song because I teach in a Catholic school.)
Read all about the second gift my students will be giving their parents in this blog post.
Merry Christmas!
Get ready for Christmas with Kindercraze. Stop by any of my Christmas posts to see more exciting ideas to help you celebrate.
[pt_view id=”6717fef74e”]

I’m a former kindergarten teacher turned work-from-home mom. I still love sharing ideas and resources to make teaching easier, so you can focus on what really matters in the classroom. When I’m not working on the blog, you’ll find me chasing kids around the house with a cold cup of coffee in my hand (some things never change even once you’re out of the classroom!)


23 Responses
I love the paintings!! They turned out adorable!!!
April
Wolfelicious
Thanks April! I’m thrilled with them as well!
Wow, those paintings are fabulous!!! I’ll have to remember this idea for next year!
❤Teri
A Cupcake for the Teacher
Thank you Teri – I love all of your ideas too, so that’s a BIG compliment!
I should have thought about the present hiding/sign idea! I told the kids our snowman project was a secret, but then forgot to hide them this morning! One little guy scrambled to block them with his body and make up goofy excuses for standing there while she was putting away his medicine in my fridge this morning. Too funny!
Lisa
The Lower Elementary Cottage
The paintings are lovely, what a special keepsake ! The door sign is a great idea….can’t wait to see craft #2 🙂
WOW! These paintings are impressive!
Robynn
BusyBees
They are beautiful! A keepsake families will cherish for years to come.
I had a similar idea. I was going to let them draw a family picture, outline with black sharpie and watercolor. BUT I love the drawing lesson and final outsome of yours:) Heading out for white and white cardstock!
Thanks for the inspiration:)
Tammy
The Resourceful Apple
Such a cute idea, Maria! It looks really nice in the frame too. 🙂
Maria, what is the font you are using on your blog? It is so easy to read.
What size frame?
Where did you get the frames?
Wow- these paintings turned out so cute! And I love your sign- that’s a great idea too!
The paintings are darling! I also love the Away in a Manger video, so precious! Thank you for sharing.
Love the sign for our door! Thanks so much! We just posted our patents gift this week also, we would love if you checked it out
http://thrillsandfrillsinfirst.blogspot.com
Sorry if this is a really stupid question, but do you have posted the step-by-step directions on how to draw this, the directions you give to the kids. I LOVE this idea. Thanks so much.
Hi Stacey,
That’s not a stupid question. I always have students draw the following details in this order:
1) start with a big triangle in the middle of the page to be the tree.
2) add a small rectangle under the triangle to be the trunk
3) draw a circle around the bottom of the tree to be the skirt
4) add another circle right outside of the first one to be a ribbon on the skirt
5) next we add the garland to the tree. Draw one diagonal line near the top of the tree. Draw another diagonal line right under that one so it looks like ribbon. Repeat in the middle of the tree, and then near the bottom
6) add 10 circles to the tree to be the ornaments
7) trees don’t float in the air. They sit on the floor. Draw a line from one edge of the paper to the other. Add another line under the first line so it looks like wood trim on the floor
8) stockings are last. Start by drawing a backward J, then hood around and come back up. Draw a rectangle on top of the stocking so it looks like it has white trim on top. Repeat on the other side of the tree.
I hope this helps!
Thanks so much!!!
I am so excited to do this! Just need to buy frames now!
I did this project with my first graders last year, and they absolutely LOVED it! They turned out wonderfully and many parents commented on how much they enjoyed them. I’m definitely doing it again this year! Thank you for the fabulous idea.