
This week my I entered my post-Christmas classroom and instantly felt the need to freshen it up and bring a little “winter wonderland” into our learning environment. We arrived at school on Monday with a fresh blanket of snow outside and it only seemed appropriate to add some wintry fun to the classroom windows.
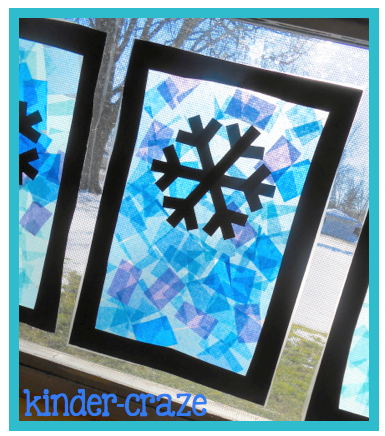
Of course, I went straight for my “go-to” project of choice: “Stained Glass” Window Decorations. I just LOVE making these in the classroom. It’s a simple project that my students can do with minimal supervision, it’s not messy, and it’s QUICK!
What’s not to love about this great project?

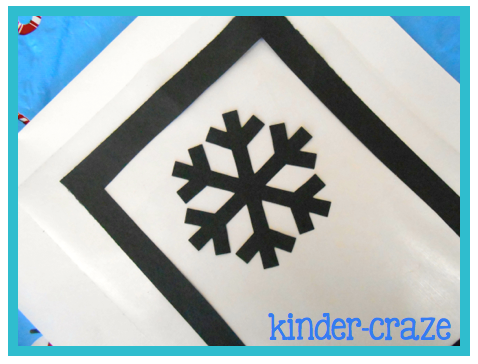
Peel 1 sheet of clear contact paper per student and place the paper STICKY SIDE UP on each student’s desk. You can faintly see the border of the contact paper around the black frame lines. I completed this task during play time while students were away from their desks.
(I laid a sheet of white construction paper under my work area for photography purposes. The white paper is merely a backdrop and was not necessary to complete the project).
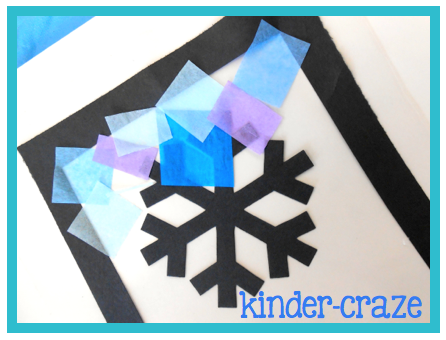
Once the setup was complete, give each child one paper snowflake and instruct them to place the snowflake near the top of the sticky paper, but in a way so that it does not touch the frame. All of my students followed this direction perfectly.
Then the real fun begins… students use 1 piece of tissue paper at a time to fill the inside of the frame. It’s ok to cover up the snowflake and the frame edge. The work side is actually the back of the project.
Keep adding more tissue papers…
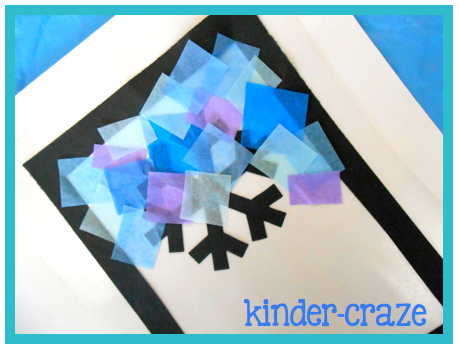
…until the frame is finally FULL.
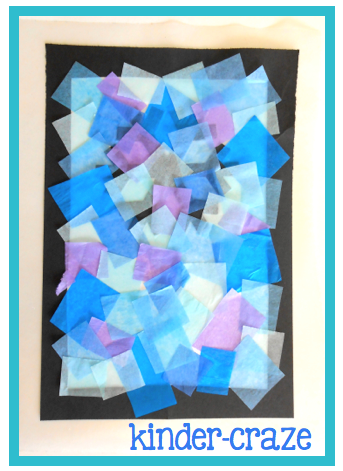
Once the frame is completely filled with tissue papers, peel the second piece of contact paper and place this STICKY SIDE DOWN on top of the tissue paper pieces. This seals all of those little papers firmly in place so they can’t escape (I always do this step for my kinders). Then flip the window over to reveal the newly-created masterpiece.

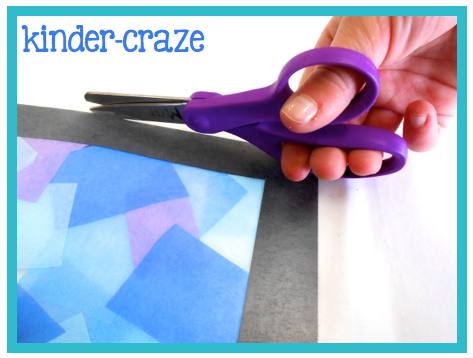
Trim the excess contact paper from around the frame
(my kinders can do this independently)…
And voila! A beautiful “stained glass” window for the classroom.
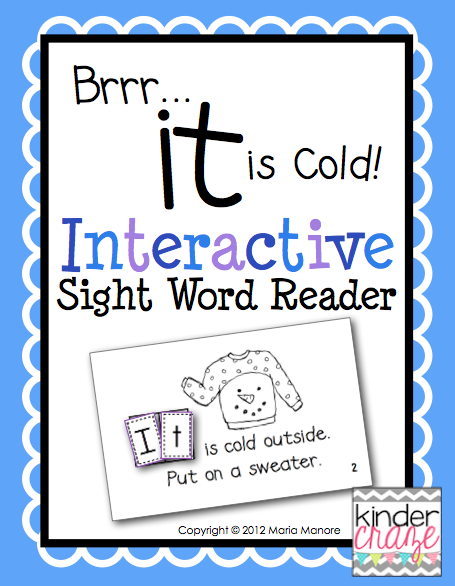
Celebrate winter while you work on the sight word “it” with my latest Interactive Sight Word Reader “Brrr… it is Cold!” To complete the book, students cut out, unscramble, and glue letters to spell “it” on each page of the emergent reader. This Sight Word Reader only costs $1 and is perfect for a winter’s day!
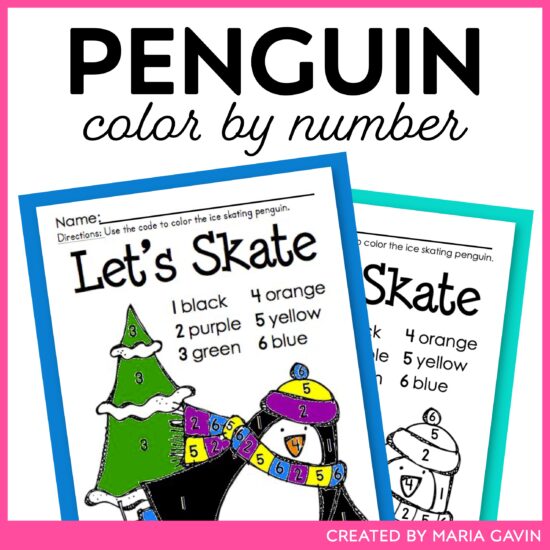
Since I’m in such a Winter-y mood today, I also created a cute little Color by Number Penguin page. This quick little activity is great when you only have a few minutes. Add a subatizing element by having students roll a dice to determine which space to color. And since I try to conserve paper as often as possible, this freebie has been set up to print 2 per page. Click the image below to download this great FREEBIE!
Winter’s Blessings to You!

I’m a former kindergarten teacher turned work-from-home mom. I still love sharing ideas and resources to make teaching easier, so you can focus on what really matters in the classroom. When I’m not working on the blog, you’ll find me chasing kids around the house with a cold cup of coffee in my hand (some things never change even once you’re out of the classroom!)

41 Responses
Your project is beautiful! Thank you also for the penguin freebie- my kinders enjoy those!
~ Amy
You are so welcome for the freebie! My kids love those coloring activities too!
I just found your adorable blog and became your newest follower! Thanks so much for sharing your snowflake art idea and for the awesome penguin freebie!
Rebecca
Teaching First
Hi Rebecca! Welcome to kinder-craze! I’m so happy you found some inspiration here!
What a beautiful project! My windows are facing a very busy street so there’s a lot of pressure to have really good stuff on my windows. 🙂 These would be PERFECT! Thank you for the idea!
Sarah
Sarah’s First Grade Snippets
Hi Sarah! I am a BIG fan of seasonal stained glass window projects. It’s a great easy way to liven up a drab window.
Very pretty…..the frames look lovely and wintry !
When I taught preschool I did something very similar-I used the negative part of a diecut and only 1 piece of contact paper. I would do this every month. I love this tho. How did you get the frame? Did you purchase one or did you cut out the center part of a piece of paper.
Hi Tami! I love the idea of using the negative of the die-cut (especially for preschool!) Anything to make tasks even more simple for young children. The black frame is cut from black construction paper. I cut a rectangle, folded it in half, and cut out the center. I had a class set of frames in no time!
LOVE your stained glass windows. I did something similar with my kids a few years ago as a Christmas activity – they looked great displayed on the windows.
Thanks for the freebie.
Sue
SOS-Supply
http://www.sos-supply.blogspot.com
oooh, I LOVE seeing stained glass windows in December! That must have been so pretty.
Thank you for sharing this awesome project!
I’m dumping my previous planned first day as Pre-K Art Teacher project and doing this instead…
You are welcome. Enjoy!
Recently made these stained glass window snowflakes with 20 kids of all different ages and they all enjoyed it. Lots of fun and beautiful art piece when they are done. Loved it so much that I will be doing this project with my first graders class soon. Definitely helps to have all pieces precut and individual bags with all supplies in it to make it go smoother. ❄️
I can’t seem to find contact paper. I see rolls of it, or “shelf liners”. I’m assuming you buy a box of so many sheets though. Can you give details?
Hi! This is beautiful! What do you suggest I use if my school doesn’t have the die cut for the snowflakes? Thanks!