
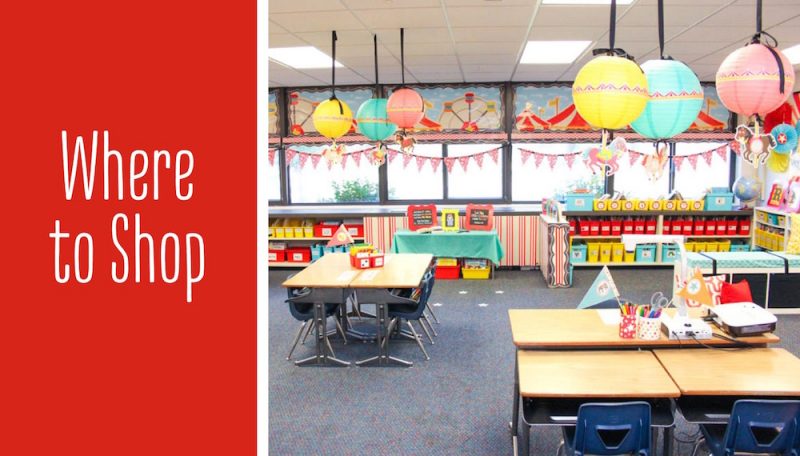
Now that you have had a chance to see my entire kindergarten classroom and the new Vintage Circus decor theme from Schoolgirl Style, I am so excited to take your hand and guide you as we take a closer look at some of the classroom projects and detail items that make this learning space extra special for my kindergarten students. If you just arrived at the blog, you probably want to begin by taking the tour of my classroom so you can enjoy the beauty of the entire room before you learn about the smaller spaces. I promise, it’s well worth the time!
 Now let’s dive into some of those details!
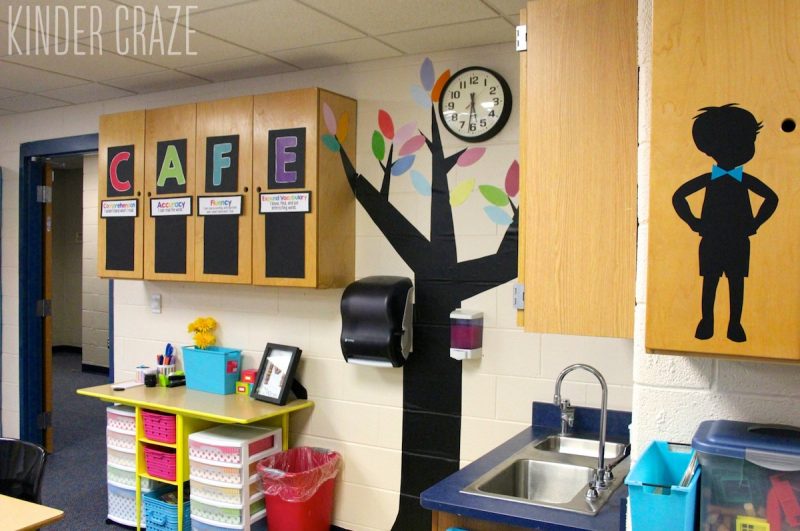
The back wall of my classroom is a bit of a dead space and difficult to make interesting. It’s primarily used for storage and sink access. there’s also a toy shelf and some pretty ugly yellow tile. But I didn’t let a boring corner hold me back as I was preparing the classroom for my kindergarteners.
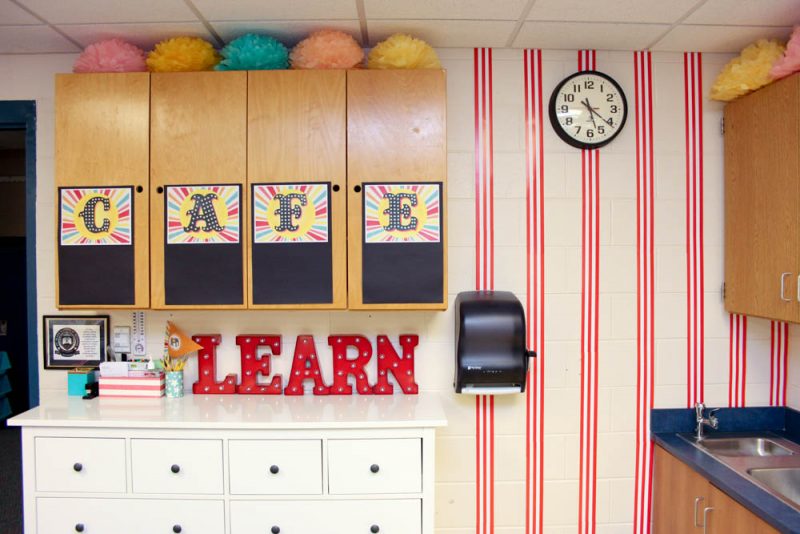 First off, let’s talk about that fabulous dresser.
I have been dreaming of Hemnes 8-drawer dresser from IKEA dresser for 2 years. I knew it would fit perfectly into my classroom and create an plethora of extra storage. This summer I finally drove to the affordable furniture mecca that is IKEA and made the investment. My loving husband even came in one afternoon to assemble it for me.
Red vertical stripes (more info on them later) were added to enhance the carnival theme and I love the marquee letters that spell “Learn” on top of the dresser. I purchased the letters from Jo-Ann this summer on clearance. They were available in red, silver and white. Of course I went with RED!
The circus style CAFE printables were created from the Alphabet line in Melanie’s Vintage Circus pack. She has a complete alphabet. I just printed the C, A, F and E.
This corner was finally starting to come together, but the red, black and white needed a little extra pop of color so I added a variety of teal and pastel pom poms from the Schoolgirl Style shop above my cabinets. The soft colors are reminiscent of cotton candy and salt water taffy.
Without a doubt, one of my favorite details in the entire classroom is the lanterns! I needed soft colors to offset the red and keep the classroom feeling light and playful. I used the largest lantern in the aqua turquoise three-pack, the 12″ coral pink and 12″ neon yellow lanterns above each set of tables in my classroom. I hung each lantern from the ceiling with black ribbon.
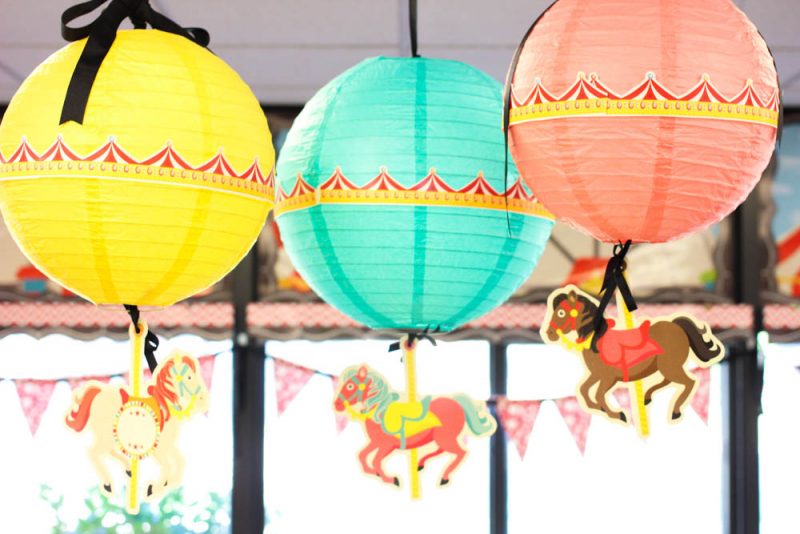 While the lantern colors themselves are lovely and reminiscent of salt water taffy & cotton candy, their real charm comes from the paper embellishments that transformed the simple lanterns into miniature carousels. I wish I could take credit for this genius idea, but it was all Melanie! The thin carousel border was included in her Vintage Circus printable pack. I just printed them off, cut them out, and attached the border to each lantern with double sided tape.
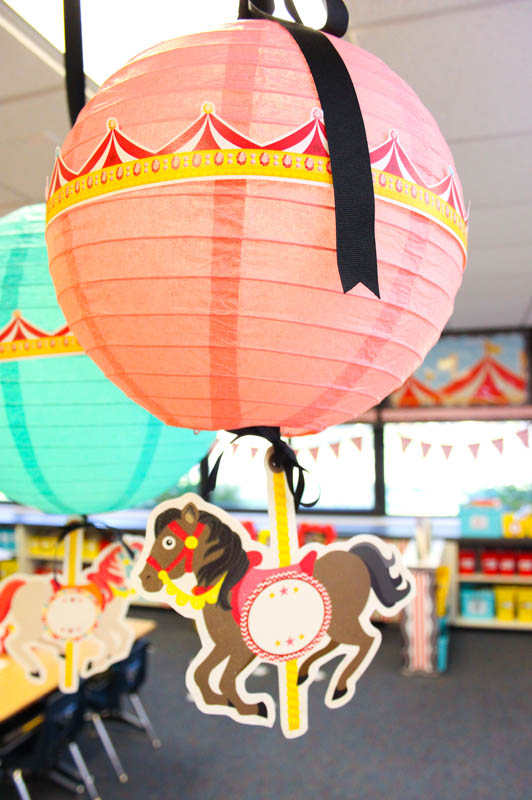 Different colored horses are attached to the bottom of each lantern with thin black ribbon. This project required a lot of cutting, but it was well worth the effort! I love the sweetness of these hanging carousel horses.
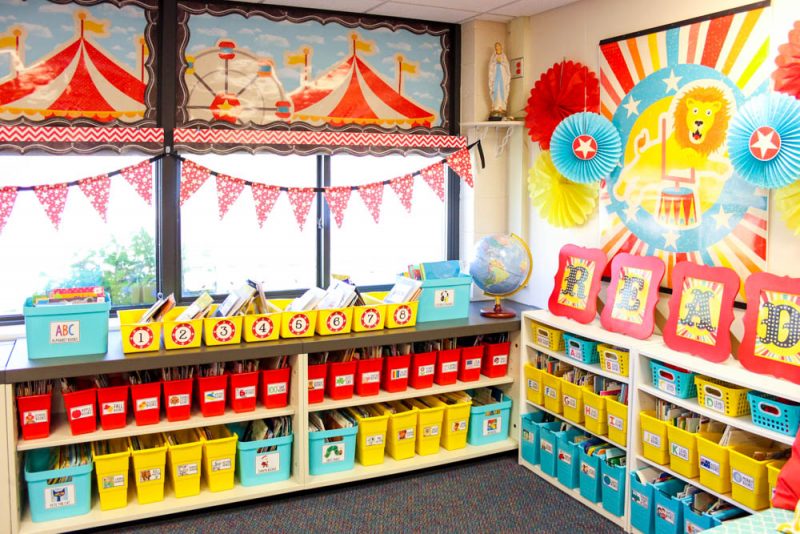
Without a doubt, one of the most convincing details of my classroom design is the skyline scene that I created above my classroom windows. This was the most daunting project to complete as I set up my classroom, but it is breathtaking in real life and it makes the atmosphere feel as though you might have really stepped into a circus.
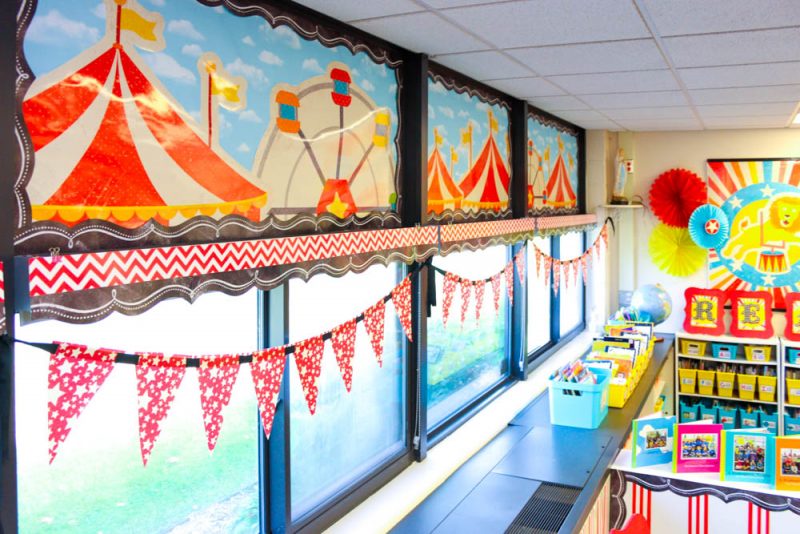 The space isn’t an actual bulletin board (it’s just a board). The Cloud Fadeless Paper is from Pacon. I affixed the cloud paper to the board with a minimal amount of clear packing tape to provide the base. Once the paper was in place above each window, I got to work planning my skyline!
How did I make those tents?
I recently discovered that my local ISD has a 36″ poster maker that prints on high quality glossy paper and they hardly charge anything to use it. The Vintage Circus theme from Schoolgirl Style includes many sweet printable graphics (such as the horse and carousel border you saw on my lanterns). The pack also includes tents and ferris wheels. I don’t think Melanie ever intended for anyone to print those items large scale to create a giant classroom skyline, but I couldn’t resist the urge! I printed multiple sizes of the tent and ferris wheel images and cut each one out. From there, I slowly pieced together my classroom skyline.
Creating the skyline scene involved a lot of guess and test as I arranged the pieces. I would climb up on top of the heating unit, hang a few pieces, climb back down to inspect my work, then climb up to make adjustments. I sprayed Super 77 adhesive from 3M onto the back of each piece before I placed them on the skyline scene. The spray is amazing. It has a permanent bond, but it is repositionable for a few minutes and is forgiving of mistakes in that time. It’s also a LOT faster to use spray adhesive than to attempt this project with a glue stick.
Once all of the tents and ferris wheels were in place, I trimmed each space with the Chalkboard Black and White Dotted Swirl border that also came from the Schoolgirl Style Shop. I added a little red and white chevron border to complete the window and add a little contrast at the bottom of the scene. I used packing tape to hang the border, but spray adhesive would have worked well too.
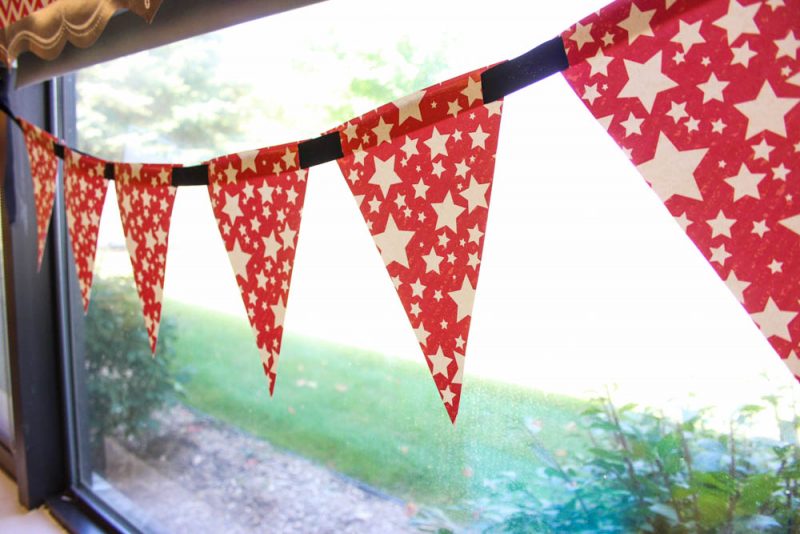
 The tops of my windows are such a show-stopper, I added a decorative touch to the windows themselves to avoid a sharp contrast between the two elements. I printed several starred pennants (included in the Vintage Circus decor pack), strung them onto some black ribbon, and swagged the bunting across each window. The result was simple and clean, and the stars were a fun touch.
With the skyline in place, I was convinced that the walls also needed some attention as I transformed my space into a carnival experience. I removed the black vinyl trees that had been adorning the blank spaces of my walls and I needed to fill the white space in a new way. Trees no longer fit the theme, so I imagined what I might see if I took a trip to the circus. The answer was stripes. I wanted my classroom to feel as though my students were actually inside of a circus tent while they learned.
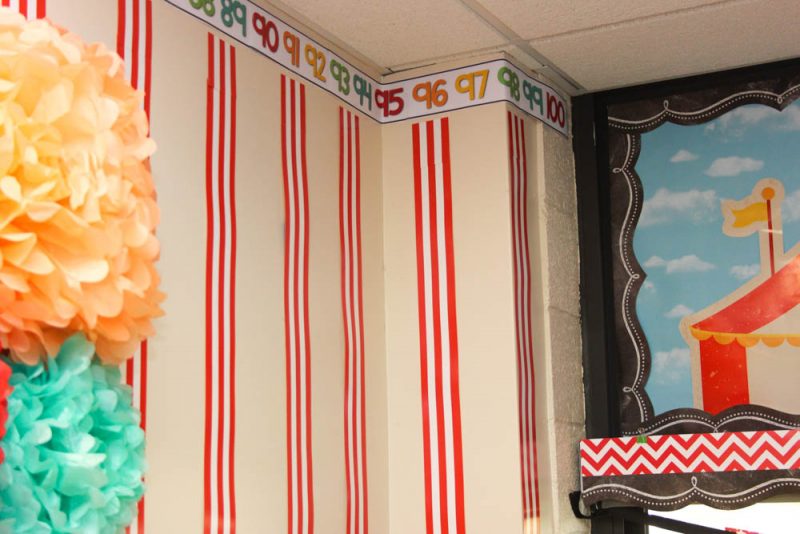
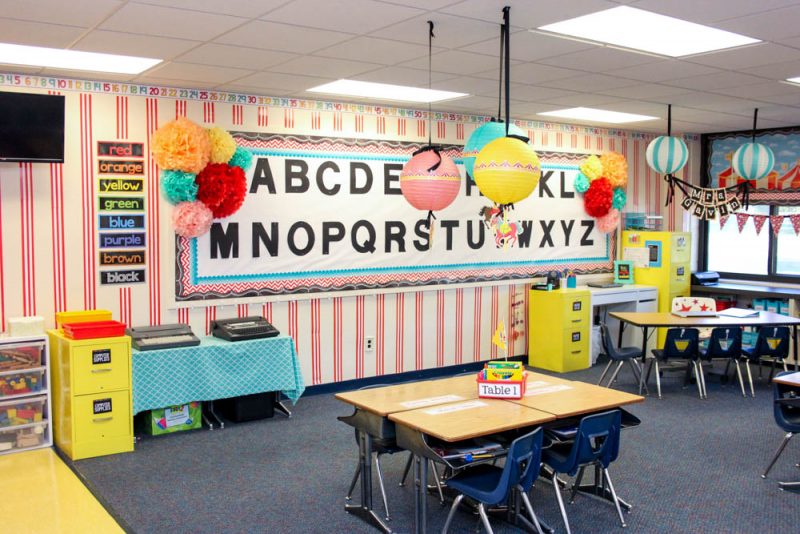 The stripes were created using bulletin board border. It was the perfect material because it’s cheap, readily available and more durable than plain paper. This red and white striped border from Teacher Created Resources was absolutely perfect for my classroom walls. The red and white color scheme was on-point for a circus theme and I was so fortunate to find a border with stripes that ran along the length of the border. The thin stripes were much less overwhelming than if I had used solid red strips of border on the walls.
I must confess that initially I did not set out to have so many stripes in my classroom. My goal was just to use the stripes in the exact spaces that I had previously displayed a vinyl tree. Once those stripes were in place, it didn’t seem like enough so I kept going. Then I added more and more until an entire wall of my classroom prominently displayed those gorgeous stripes.
Without a doubt you are wondering how exactly I hung those stripes to my classroom wall. If there is one thing I have learned about Kinder Craze readers, it is that you like to know exactly how I accomplished a task.
I have two different kinds of walls in my classroom and I used two different methods of hanging the stripes based upon the wall’s material. My school just purchased our building two years ago and the principal has made it very clear that we are not to do anything that might cause damage to the walls so these solutions will appease even the fussiest of principals.
CINDER BLOCK – I know many teachers have cinder block walls and despise them. You don’t have to hate your cinder block walls. Many teachers would use hot glue to attach the border (yes, hot glue sticks to cinder block), but I have had poor experiences with cinder block and hot glue if the item I am gluing is not laminated. Since the strips of border were not laminated, I hung them with my trusty DAP blue stik tack. For best results, I just kneaded the blue tack in my hands for a few minutes then placed a dime-sized blob onto he back of the border. I spaced the blobs out approximately every 8 inches. They stick just fine.
PLASTER WALLS – most of the walls in my classroom are plaster and not cinder block. On these walls, I have best results using painters tape. I placed about five generous “pillows” of painters tape onto the back of each strip and hung them directly onto the wall. They stick great and will cause zero damage to the walls. For best results, buy the wide tape, it provides more surface sticky surface area and ensures a better bond to the wall.
I just have to take a quick moment to share a before and after photo from my classroom. Here you can see the vinyl tree that once adorned this space of my classroom. Admittedly, the space wasn’t bad, but the addition of the white dresser and red stripes completely streamlined this corner of my classroom and helped it go from so-so to stunning.
 I used more painters tape to add some additional tent stripes to my classroom heating unit. This subtle addition provided a little extra pop to my wall of windows and created cohesion with other areas of the classroom.

I teach in a Catholic School so it was essential that I create a prayer space for my students to gather in each day. I wanted this corner of the classroom to fit the theme, but to also have a more serious tone. Fun graphics of lions, monkeys and carousels would not encourage prayerful thoughts in my students. I kept this space clean and simple with a solid table cloth, a bible quote, our daily prayer to pray for the school administration, my favorite children’s bible and a cross. Three boxes of Christian books are stored below the table as a resource for my children to enjoy when they have free time.
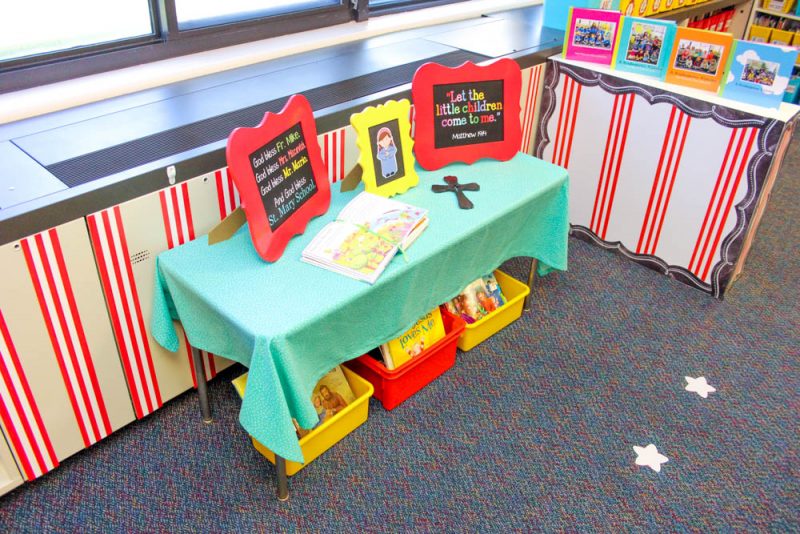 The picture frames are raw wood frames that I purchased at Michaels. I added a coat of primer, then spray painted the frames to match my classroom decor. I used 2 large 8×10 frames and a smaller 5×7 scalloped frame that I spray painted red and yellow to match my decor.
 The editable God Bless Our School printable sign is available as an free download in my TpT store as well as the “Let the Children Come to Me” printable scripture quote.
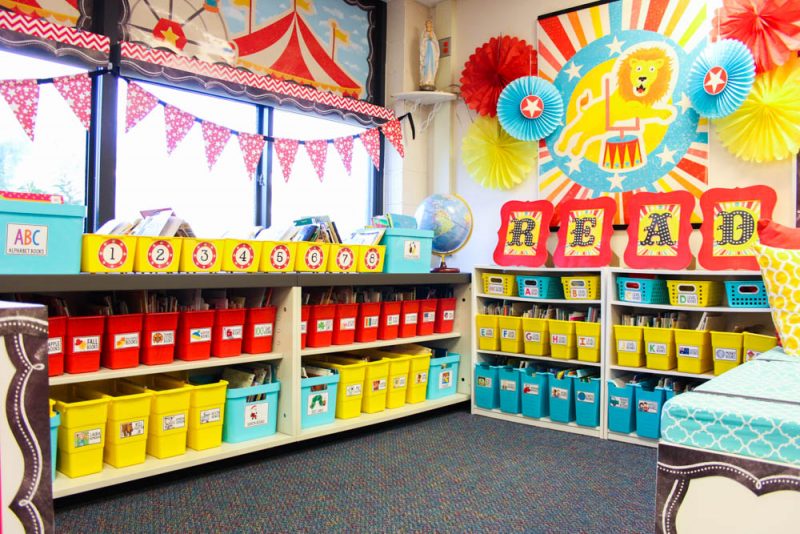
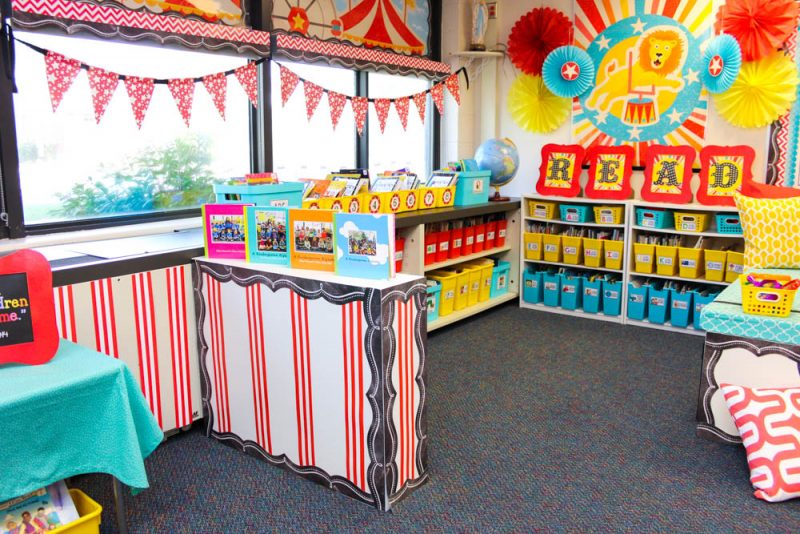
The classroom space that I am most excited about is without a doubt, my classroom library. I loved my previous classroom library but something about my new library setup completely takes my breath away!
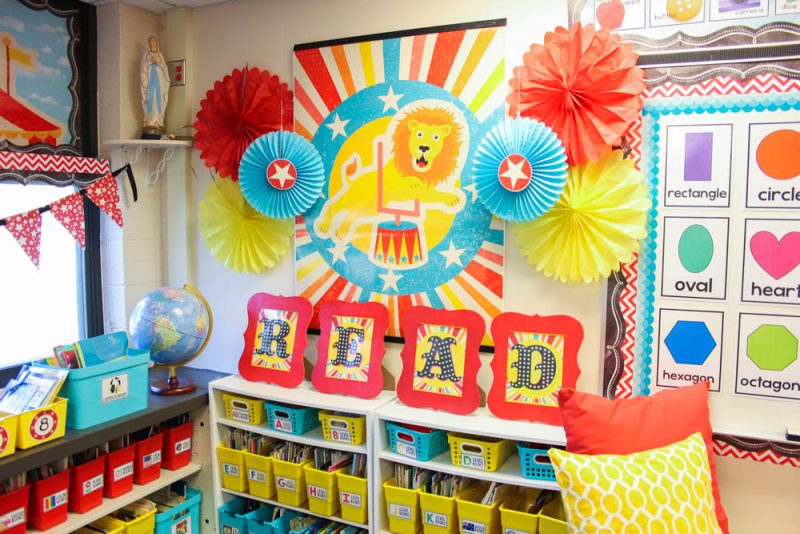
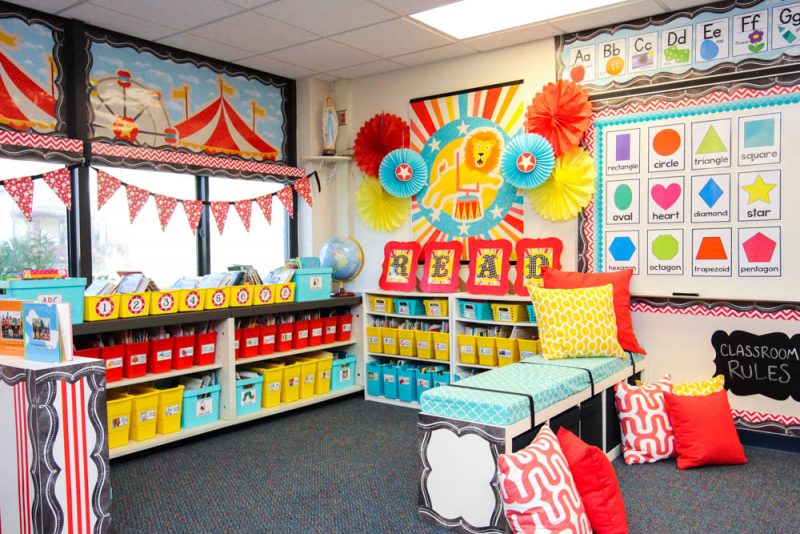 The focal point of this space is the large circus print that is prominently displayed above my bookcase. Red, yellow and blue daisies from the Schoolgirl Style shop hang on each side of the lion and a star cutout from the printable collection adds an extra touch in the center of the blue daisy.
Yes, the poster is awesome and of course I will tell you all about it!
Melanie included a few poster graphics in the Vintage Circus bundle. Remember that poster maker that I discovered at my ISD? I made another trip and had two 36″ wide prints made of the lion poster. They were printed on high-quality glossy paper (that’s the only paper they use at my ISD). I opted not to laminate the poster because I didn’t want the glare from the laminate to reflect our enjoyment of the poster during the school day. Mounting the poster was quite simple. I spray painted a few black yardsticks and stapled them to the top and bottom of the poster (which worked out perfectly since my poster was 36″ wide). I punched 2 tiny holes into the top of the poster with a pushpin and fed some clear fishing line (a decorating essential) through the hole to create a loop for me to hang with. I placed a clear command hook on the wall just below the ceiling and hung the loop of fishing line on the command hook. It worked like a charm and won’t cause any damage to the wall!
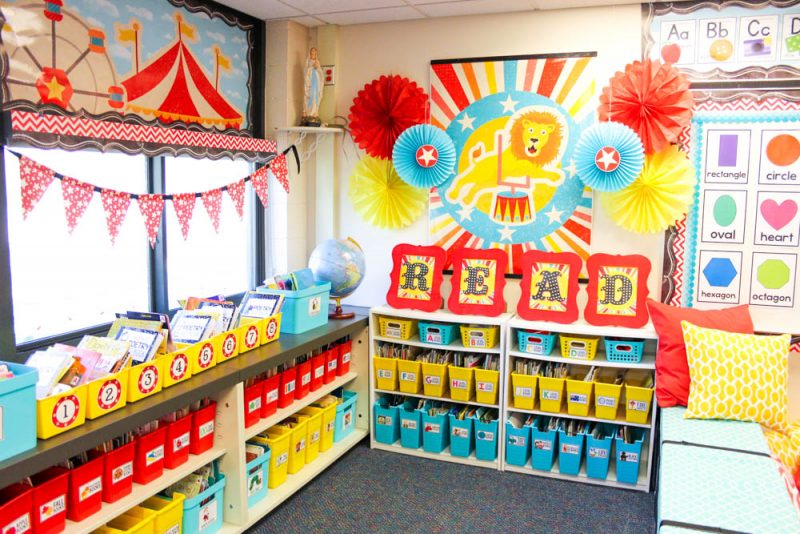 I printed the READ sign from the alphabet that is included in Melanie’s Vintage Circus collection and framed them in unfinished wood frames from Michaels that I spray painted red.
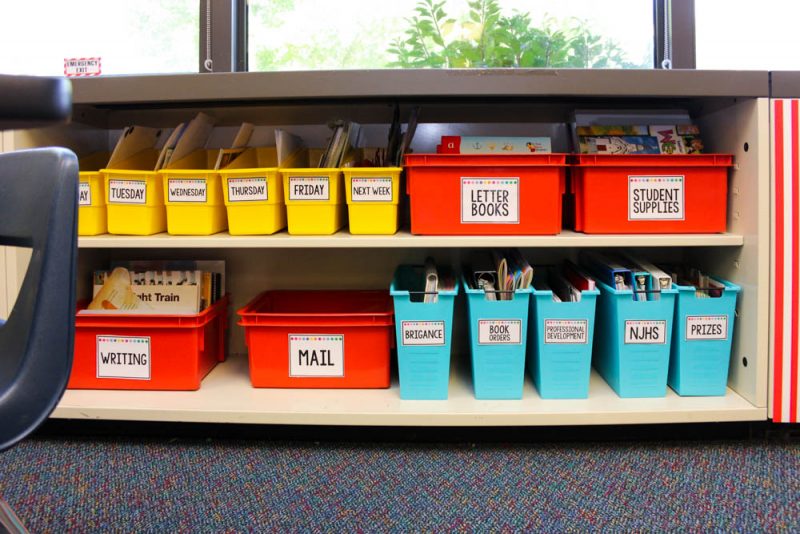
 I purchased many new bins for my classroom library, but I was happy to repurpose some of my old yellow and teal bins from my previous library.
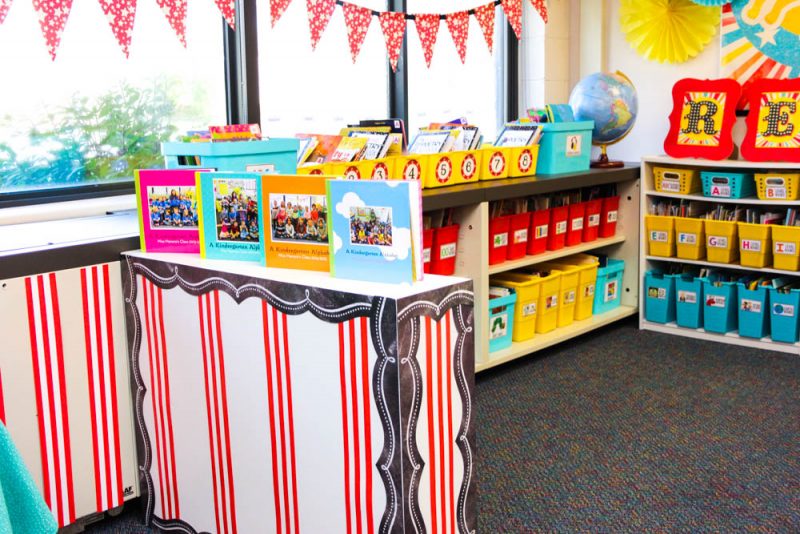
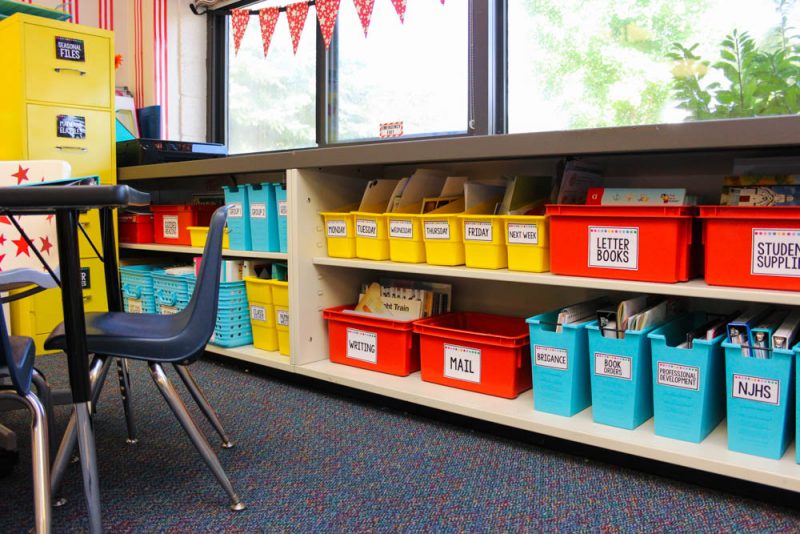
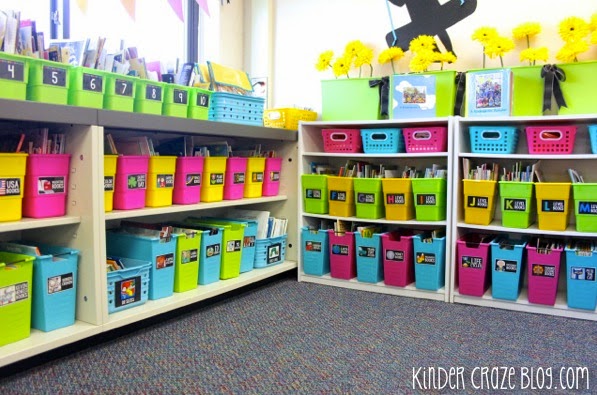 The large teal bins that you see here are from Target. They were a seasonal summer item and they are now very hard to come by. If you want them for your classroom, I highly recommend that you start raiding all of your local Target stores ASAP. The yellow boxes that you see on the top shelf are my student’s book boxes. I purchased them at Lakeshore (they’re called Help-Yourself Book Boxes) and my favorite thing about them is that they rarely tip over due to the fact that they are wider than most boxes. The red boxes are Book and Binder holders from Really Good Stuff. The tall yellow boxes that you see on the bottom shelf were purchased online from the Schoolgirl Style Shop but they are no longer available. The magazine bins from Big Lots are a great alternative storage option.
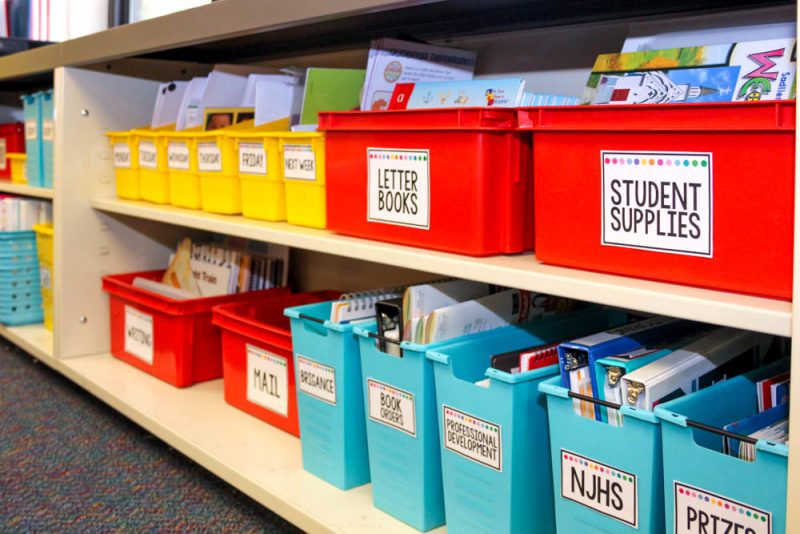
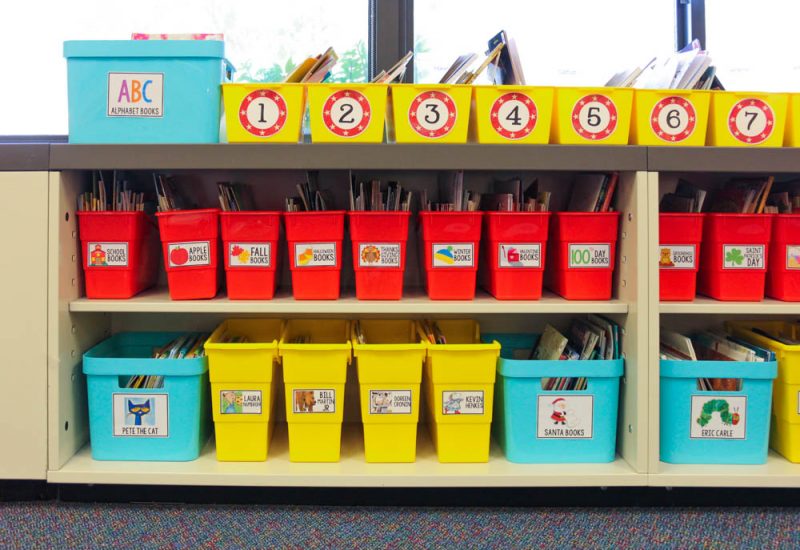 The small yellow baskets that you see on the top shelf of the photo below are Medium Rectangle Book Baskets from Really Good Stuff. My turquoise baskets came from 5 Below a few years ago and they are no longer in stock, but it looks like the blue neon book baskets from Really Good stuff would create a similar look. The yellow boxes you see on the middle shelf are Book and Binder Holders from Really Good Stuff. The teal baskets you see on the bottom shelf are the elusive magazine bins from Big Lots. They release new colors each summer and I’m always in suspense waiting to see what colors will be in the new release. I was fortunate enough to stock up on the teal bins a few years ago.
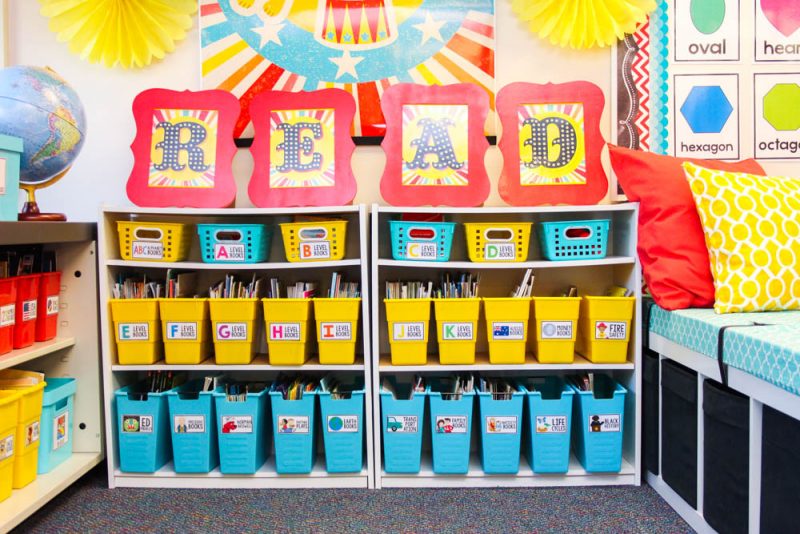
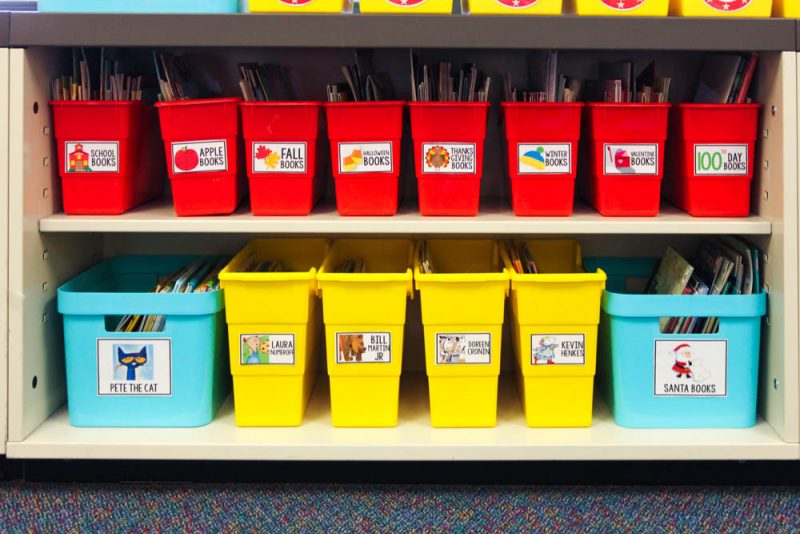
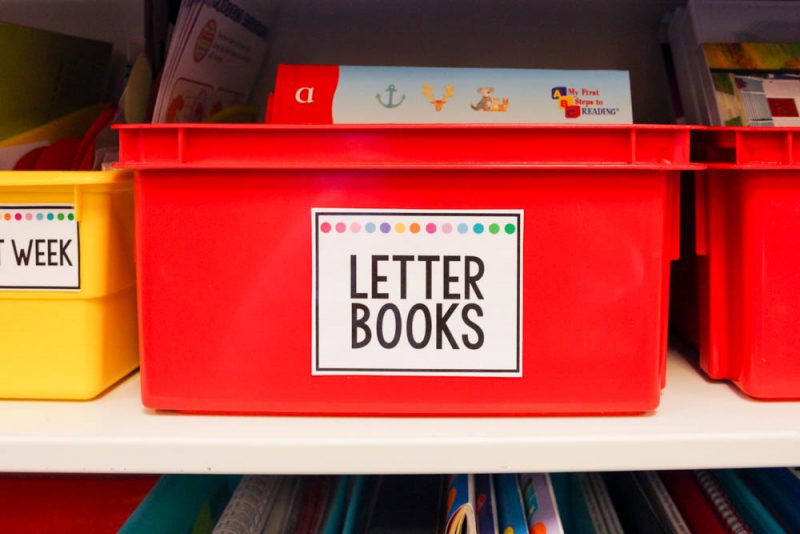
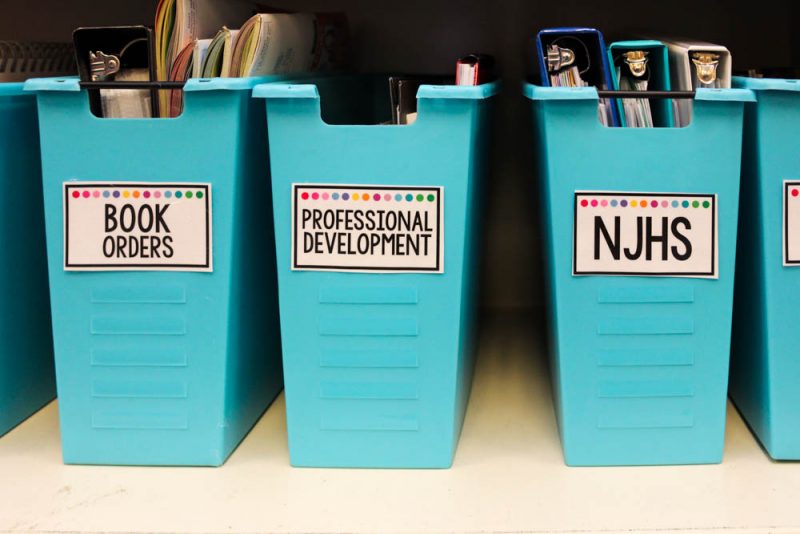
The decorations are wonderful, but what makes my classroom library truly special is how well organized it is. As you examine the boxes in the library, you can see that every bin is labeled with the kind of books that are contained inside. Some of the labels describe what level of reading material is inside, while others indicate a particular theme or holiday. Regardless of the label, every book has a home and there is no guessing about where to put any of the books after reading them.
 I use the White Series of Classroom Library Labels from my TpT shop to label all of the bins in my kindergarten classroom library. Most of the labels that you see in the photos are included in the set. The only exception are the labels about particular authors (Such as Bill Martin Jr) or characters (like Pete the Cat). Many author names and ALL character names are copyright and trademark protected and I am legally prohibited from profiting from the use of those images. The good news is that the Classroom Library Labels are completely editable and you can easily create your own labels for personal/classroom use with any images you find online. It’s a simple work around that anyone can do.
 Still have questions? Read more about how I leveled my classroom books and learn more about how I organize my classroom library.
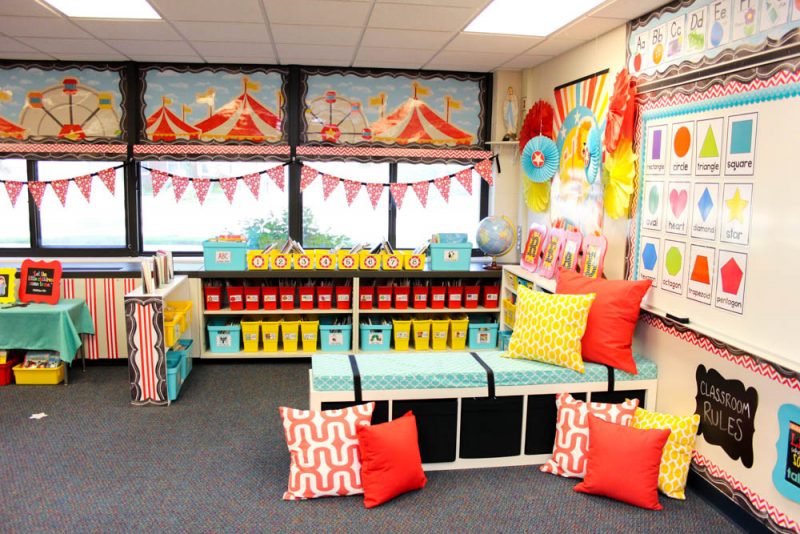
I created a special seating area using an IKEA shelf turned onto it’s side to create a bench. My bench is a few years old and it is 72″ long. IKEA recently discontinued that furniture line and replaced it with this Kallax shelving unit. The shelf/bench is very similar, except this unit is only 58″ long. Either way, I love how this bench distinguishes between the general learning space in my classroom and the reading area. I often sit on the bench to teach my Daily 5 lessons. The close proximity to the classroom library reminds my students of their goal to become better readers.
The bench was custom made. I purchased some foam and found this pretty teal fabric from Hobby Lobby. The yellow pillows were also custom made with fabric that I found at Hobby Lobby.The solid red pillows are from At Home.
 The black bins you see inside of the shelf are also from IKEA (and also discontinued). I use the bins to store extra books that haven’t been leveled yet, as well as the duplicate copies of books that I use with my mp3 players during Listen to Reading time in my classroom. I adore the extra storage. My particular bins may be discontinued, but IKEA now makes black Bladis baskets which are similar. I also adore these red Kallax doors and think they would look stunning.
I have this little white bookshelf that I use to hold boxes of books for my classroom library and, while I am so happy to have a simple white bookshelf, this piece of furniture also needed a little personality. It looked stark among all the other decor items in my classroom. On a whim one afternoon, I decided to add some red stripes and scalloped chalkboard border to the bookshelf.
 How did I attach the border?
Unlike the back wall of my classroom, this area is very high-traffic and I couldn’t rely on a little bit of painters tape to keep the border in place. It was also important that I not damage the shelf or cause any permanent changes. Painters tape was my friend once again, with a little help from hot glue! I placed strips of painters tape everywhere that I intended to add border to the shelf. Then, I put a thin line of hot glue down the center of the painters tape and added the border on top of the hot glue. The border pieces are all firmly attached to the painters tape, which can easily be peeled off the next time I decide to decorate!
 As I stepped away to admire my completed project, I couldn’t help but think that my little white bookshelf now looks like a perfect puppet show theater! The combination of red and white borders mixed with the chalkboard scallops remind me of a lion conductor’s stage at a real circus. This happy accident was so perfect it gave me chills! I really need to invest in some puppets.
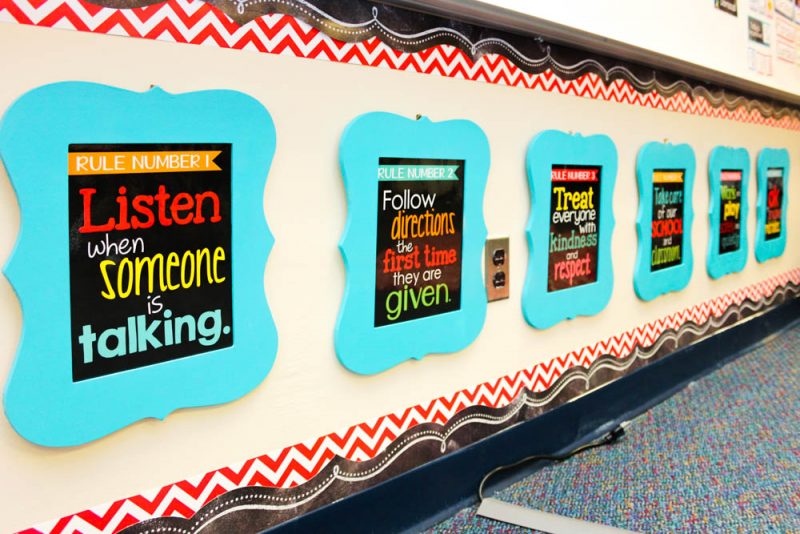
My classroom rules display also got a new look this year! Much like my previous classroom design, I framed placed each rule in a wood frame from Michaels that was spray painted. I created a more cohesive look this year by painting all of my frames the same color. I contrasted the red decor by choosing a pretty blue color from Rustoleum called Seaside.
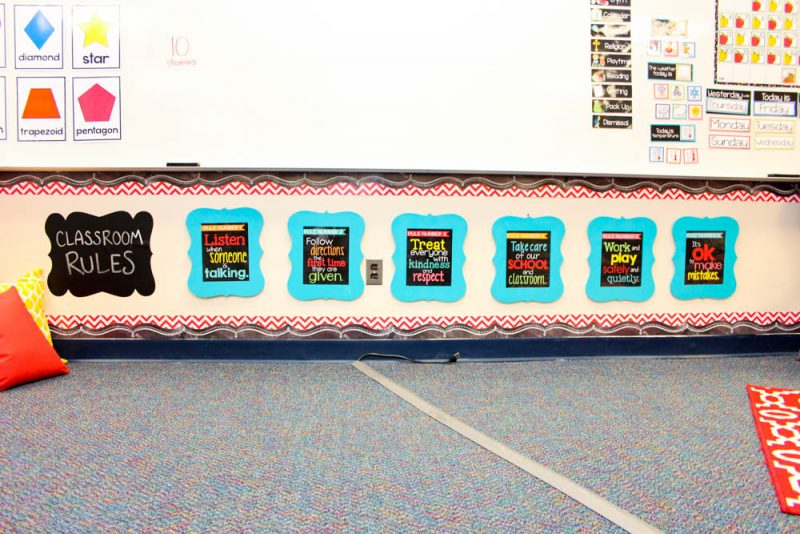 Even with the framed rules, the space below my classroom whiteboard needed a little extra pop. I added a combo of red chevron and and black scalloped border to the space just like a real bulletin board. Since this wasn’t a real bulletin board, I couldn’t use staples and I didn’t want to damage the wall. To attach the border, I trimmed the space with wide painters tape, then used hot glue to attach the border to the painters tape. It worked like a charm and was a great way to treat my wall like a faux-bulletin board.
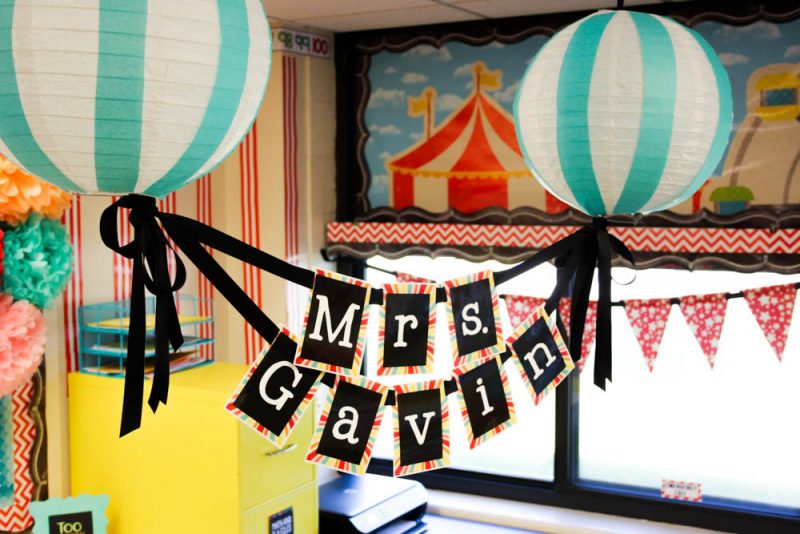
What I love most about my classroom is that it is filled with surprising details. Yes, it is stunning at first glance. But when you take a careful look around the room, you start to notice all the extra details. My teacher workspace has a few of those special touches. I have hung my name over my desk for several years. It creates a decorative touch in a space that could otherwise be sparsely decorated, but it’s also a valuable resource for my kindergarten students. They often want to write my name but don’t know how to spell it. When someone asks how to spell my name, I just have to point to my desk and it immediately solves their problem.
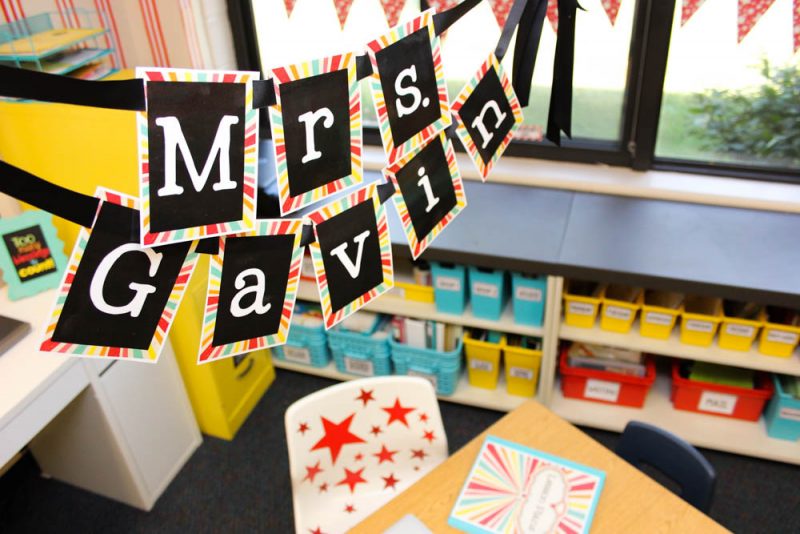 The name sign above my desk is held up by two lanterns that hang from the ceiling. I added an extra special touch to the lanterns above my desk this year. I gave them stripes! To create the stripes, I cut strips of turquoise tissue paper and taped them onto the lanterns. The tape holds pretty well but giving those tissue paper pieces a spritz with spray adhesive would work even better!
 My teacher chair is also surprisingly playful. I bought a white Snille swivel chair from IKEA this summer and attached red vinyl stars to the chairs. I purchased the vinyl online and used the Cricut at my school to cut the stars. A Silhouette Cameo is another great cutting tool that would easily cut out the stars. The editable binder cover is included in the Vintage Circus download from the Schoolgirl Style shop.
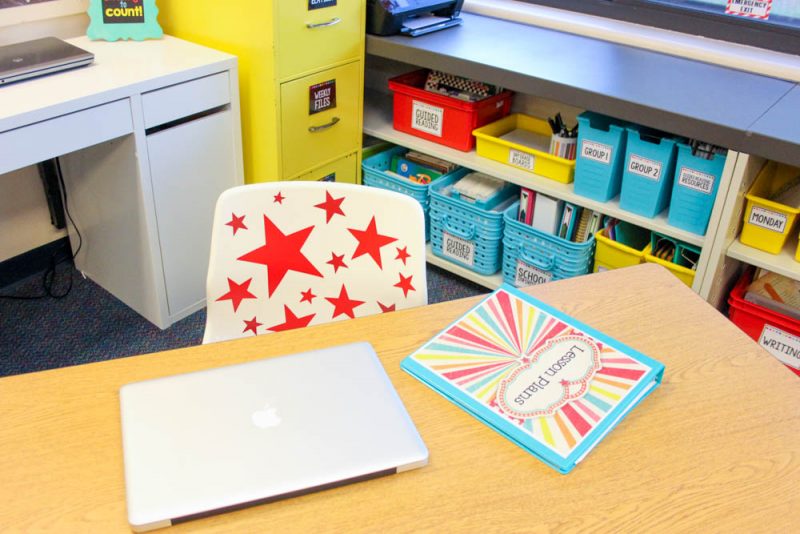
The teaching materials I use most often are located in colored bins beside my desk. Ok, so it’s not an actual desk. It’s a table that I still refer to my desk out of habit. My kindergarten students meet me in this area for guided reading instruction. I have all of my guided reading materials within reach when we meet. I also have specific bins to hold my daily lesson materials, as well as a host of other tools.
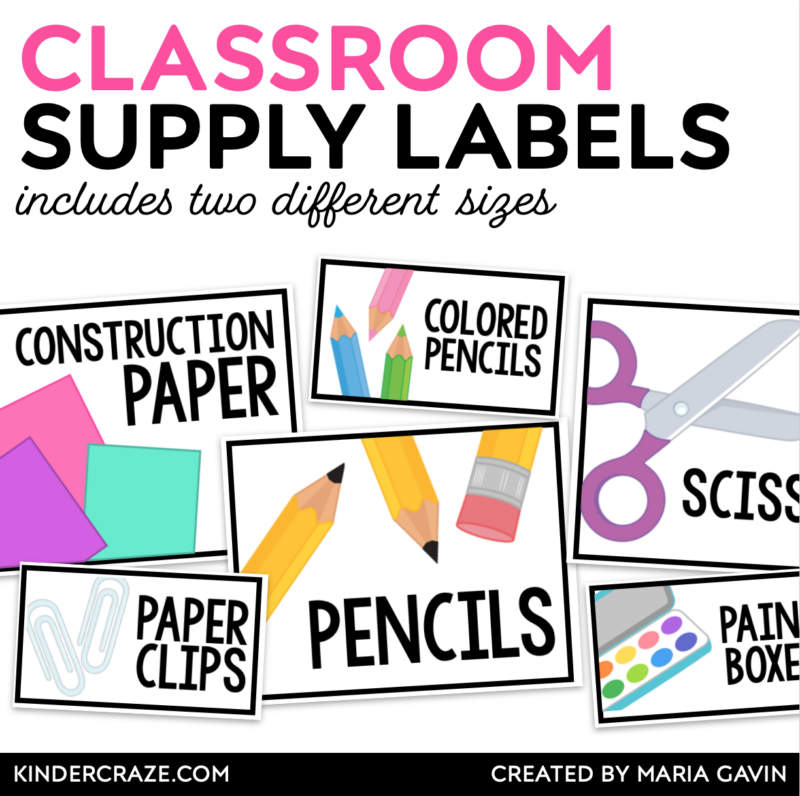
 I love using brightly colored boxes for storage in this space because it looks clean and cohesive. Small materials fit great into a box and they keep the are from looking cluttered. All of the bins are labeled with my White Series Classroom Supply Labels. This editable set includes dozens of pre-made labels in two size options, plus editable files so you can easily create additional labels to suit your own classroom needs. Just print and laminate the labels, then use hot glue to attach them to any plastic bins. The hot glue is durable and long lasting, but it pulls easily off when you are ready to change a label.
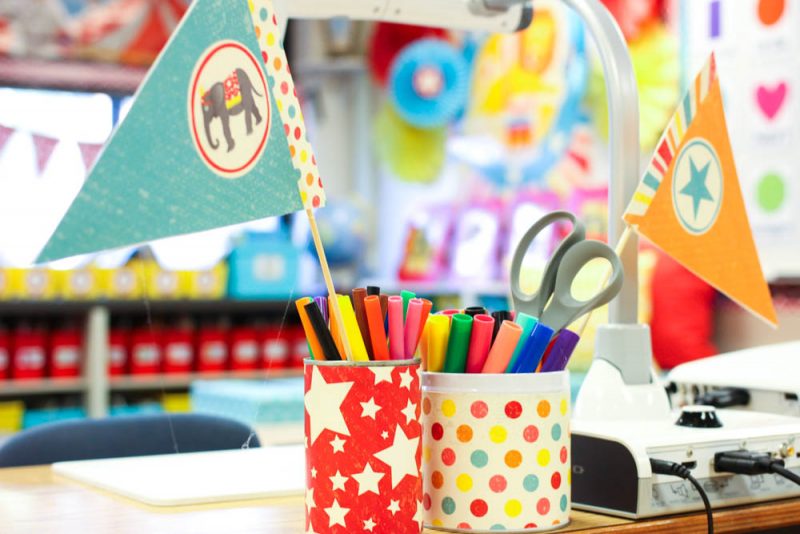
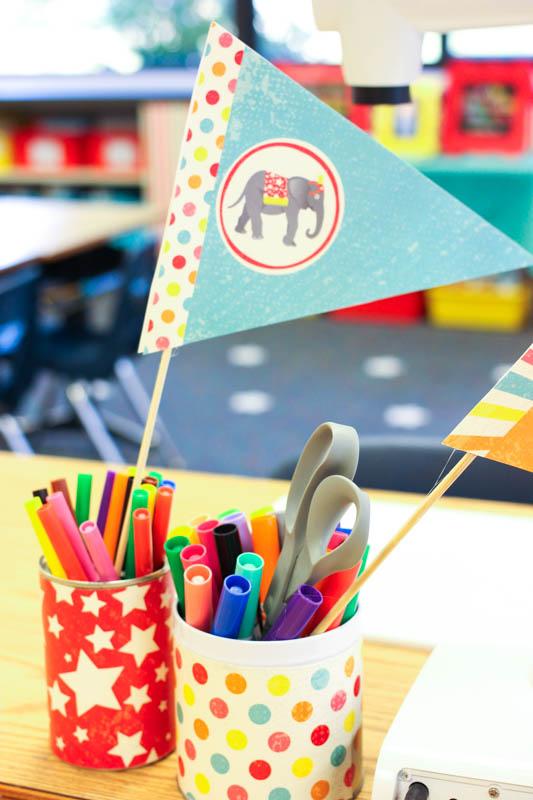
I created a few pennants using the printables in the Vintage Circus set. I printed the two matching pennants on white cardstock, glued the pieces together and tucked a wooden skewer into the edge of the pennants. It added a playful touch to my tabletops and they look great tucked into the supply cans that I covered with printed papers from the decor pack.
I have created a complete shopping guide for my Vintage Carnival classroom. Click over to the next page to find quick links to all of the decor pieces and supplies that I used to create my classroom. You can shop now or pin your favorites for later.

I’m a former kindergarten teacher turned work-from-home mom. I still love sharing ideas and resources to make teaching easier, so you can focus on what really matters in the classroom. When I’m not working on the blog, you’ll find me chasing kids around the house with a cold cup of coffee in my hand (some things never change even once you’re out of the classroom!)

84 Responses
Your room is really cute! I love all the changes.
Love your circus classroom! The color combinations are adorable and all of your extra special touches make it such a nice classroom. Thank you for sharing.
Susie
I love it and adore the scenes of the circus above the window and the stripes just make the room pop! Love the new white dresser from ikea along with the marque letters. I have to go to JoAnns to get the red ones. I am fearful of red too but it looks great with the other pastel colors to soften the brightness. I am also beginning to think of what I want next year as I shop in stores. I need schoolgirl style! I think black, grays, gold, coral, and teal might be cool with an old Hollywood glam. Enjoy your room and all the blessings it will surely bring.
Your classroom is such a joyous, happy place for kids. I love it! I’ve been thinking of a classroom redo for next year and you have inspired me. It looks like so much fun!
Your classroom is amazing! You have me rethinking my fear of the color red too now. I’m not a teacher and yet you have me wishing that I had a classroom of my own to design exacrly like yours. I can only assume that you have to make all of these purchases out of your own pocket. Such dedication. Teachers are very special people and your students are so very lucky to have you.
Dearest Maria, What an amazing room! It’s beautiful, fun, creative, and simply awesome! You are so incredibly talented!!! What a blessing you are to your students, parents and to fellow teachers! You inspire us all and I truly appreciate you and ALL of your hard work and generosity. You make teaching more fun and exciting. I am taking a few years off to care for my Mother but I follow your blog faithfully. I want to keep informed and stay connected. I couldn’t wait for your classroom reveal and I look forward to being back in the classroom again in the future. I also want to say Congrats to you and what a beautiful wedding you had. May you have many years of happiness! Thanks again for how much you share, and for how much you care! Michelle
Thank you Michelle for such a sweet and thoughtful comment! I’m so honored that you are still reading my blog while you take a few years off. Thank you for your patience as I prepared for the big reveal!
Dear Maria, I just exploring the Kindergarten teaching blogs over internet when I landed at yours…and I would say the idea is absolutely stunning and appealing for kindergarteners. I like the way you integrated the animals plus bright circus colours…. I would surely be taking this theme next year when we do animals. What an amazing look! It’s vibrant and work like a magnet for kids. You are truly talented and full of creativity. I will be following you regularly now onwards. Keep sharing nice ideas !
Dear Maria, I was just exploring the Kindergarten teaching blogs over internet when I landed at yours…and I would say the idea is absolutely stunning and appealing for kindergarteners. I like the way you integrated the animals plus bright circus colours…. I would surely be taking this theme next year when we do animals. What an amazing look! It’s vibrant and work like a magnet for kids. You are truly talented and full of creativity. I will be following you regularly now onwards. Keep sharing nice ideas !
Hi Hina! Thank you so much for your sweet words and welcome to Kinder Craze!
Maria!! Your new decor is just gorgeous! I would be very scared of red too, it’s just not my color! But I’m glad you took Melanie’s advice, because it is just stunning and I’m sure the kids love it! Hope you’re having a fabulous school year 🙂
Amber
A Smiling Teacher
Triple love the classroom…I’m so inspired..where is the shopping list to purchase these items. I didn’t see them did you list the links or click on the picture?????
What a seriously awesome classroom! Well done!!!
How incredibly lucky your students are to have you. This is incredible. Bravo!
I love seeing what you have done with your room each year. I also love schoolgirlstyle!!!! I would love to recreate your black chalkboard/rainbow theme from a year or two ago. What do you do with your old decorations? Id love to purchase some of your things. I look forward to hearing from you. Thanks
I am wondering what ISO is? I am in love with this theme and want to have the big posters too. I have a tons of lime green accents in my current room and wonder if I can make that color work also. I am not opposed to getting rid of it but even my rugs have that color..
Hi Rob, I’m not exactly sure what your question is. I’d be happy to help if you want to try and rephrase it.
You mentioned a place that made your big posters. I am wondering the name of the place. Also do you think I can incorporate my line green accents with the look?
Hi again! So sorry for my huge delay in responding. YES, I think lime green accents could work in the collection. I would be careful not to have TOO much green since red and teal are the dominant colors, but pops of lime green could work in very nicely.
As for the ISD. In Michigan, they are called Intermediate School Districts (or ISD for short). Each city has a school district, and to my knowledge, the county provides a higher umbrella of support and services for the teachers in all the county’s districts. It’s a central school resource that offers professional development, physical tools (like die cut machines, printers and a computer lab) and other services. I hope that helps!
I have the same questions as Rob…love your decor and would love to get some large print outs as well. Is ISD an office supply store like Staples or Office Depot? I’m from Florida and I don’t think we have those down here 🙁
In Michigan, they are called Intermediate School Districts (or ISD for short). Each city has a school district, and to my knowledge, the county provides a higher umbrella of support and services for the teachers in all the county’s districts. It’s a central school resource that offers professional development, physical tools (like die cut machines, printers and a computer lab) and other services. I hope that helps and that Florida offers a similar central resource for teachers.
That sounds amazing! Wish we had something like that down here!! Thank you for the prompt reply!!
You’re welcome!
Hey! The Ferris wheel and tents that you have above the Windows, did those come with the package or did you make those on you own? If they came with the package, how were you able to print them out so big? Thank you!
Hi Michelle,
The ferris wheel and tent graphics did come with the set as .jpeg files. To get them big enough for my classroom windows, I used a poster printer to blow them up large scale. It can be expensive to have poster-size prints made at Staples or a similar retailer. I highly suggest asking your teacher friends in other schools if they have a poster printer at their school and seeing if you can access it. You can even try calling some local high schools. They may have a print lab that offers printing services for a much cheaper cost than local print shops.
I just purchased this and I am trying to find the ferris wheel and tent. Do you remember which file it was. So excited to get this ready fro my new kindergarten class for this year!
Thank you for the inspiration!
Hello Maria! I love your room, it is stunning! What did you do for your door and do you have a picture of it? Thank you! Jessica
HI Jessica! I actually don’t decorate my door at all, if you can believe it! With all of the other decorations, I choose to leave my door plain. It’s usually open anyways and my decor doesn’t extend out into the hallway.
Thanks for all of the great pics! I am moving into a room with the same color carpet, and I have been contemplating these colors for my high school English class. So, it was nice to see how well this color scheme fit with that color of a carpet. Your room looks so fun!
Hi Kimberly,
The good thing about this carpet is that just about anything will sort of “go” with it. It’s very versatile!
I love your classroom! Where did you find your red rug?
Thanks!
I bought it at At Home stores!
Hi Marie I love your vintage circus classroom. I love the bright pops of red teal and yellow.Have you already thought about 2017’s theme?Im a 10 year old who wants to be a teacher and I currently have your Rainbow Chalkboard Theme and about to order the silhouettes,pennants,and things to make it pop. Thanks for all your support and Melaine’s Support and inspiration for my classroom theme.Next year I might do modern Apple,owls,or a garden theme.If you do a garden theme use Pom poms as flowers and use green faceless paper for the stems and leaves.
That’s a very cute idea! I haven’t begun to think about my 2017 classroom yet 🙂
Thanks.????????
Hi Maria,
Did you find it difficult during circle time with not having the rug labeled with specific spots for each student?
Hi Alisha,
I think it depends on the group of students. I have had labeled spots in the past, but I haven’t for the past several years. It could become frustrating sometimes, but never got out of hand last year.
Hi Maria,
I was wondering what materials you display on your mobile easel and how you have the bins below it organized. I am finally getting one this school year! And, I’m purchasing a 2 door filing cabinet and would love to know how you organize yours. I’m not sure if I should focus using the new filing system for my personal teaching documents, themed materials or use it as a safe place to store students’ data. I also read the previous posts about the poster because I was wondering the same as others. I wish we had resource centers for teachers in South Carolina, that would be so awesome and save us a lot of money! Love your blog and your classroom, I learn so much from you! 🙂
Kindly,
Mary Ellen
Hi Mary Ellen,
I use my easel in many ways. Mostly, I use the surface to count the days of school during calendar time. We add a straw each day, cross off the number of days on a big chart, do tallies… all of those math skills. I also display books that I intend to read that day on the easel. Sometimes, when I model writing or do an interactive writing pieces, I turn the easel around and have chart paper that hangs from it. Underneath the easel is just storage of materials that I sometimes use with students (such as a class set of hole punches or play dough or magnetic numbers). I don’t really have a system – it’s just where I put materials students may need/want to access when they have free time.
As for the cabinets, I have been wanting to share a peek into all of my drawers and cabinets on the blog. The only problem is, the cabinets are never arranged exactly the way I want and I keep delaying that blog post until I finally get organized exactly the way I want it to be. Maybe this will be the year!
Hi Maria- will the class rules look alright if they are a 5×7? An 8×10 is to large for my space.
Hi Leslie,
You can adjust your print scale so they fit into a 5×7″ frame. I don’t know the exact scale that you will need. Try printing one at 65% and adjust from there.
Your room is always so cute! I am wondering where you got your frames from that your rules are on.
Thank you Katie! I bought unfinished wood frames from Michaels. I primed them and spray painted them to match my classroom. You can read more about the materials I used in this blog post: https://kindercraze.com/faq-all-about-my-classroom-rule-frames/
Where did you get your name banner that you have hanging in the one corner? Did you make it or is it something that can be personalized that I can buy from somewhere? It is amazing! I love your room!
Hi Emily,
I created the banner using the resources in the Vintage Circus collection from Schoolgirl Style. Admittedly, I had to manipulate the files to get them just right for my banner.
Hi Maria! I adore the way you decorate your classroom. You also have some very creative ideas! I was wondering where you got the blank calendar grid for your calendar numbers?
Hi Angela,
I bought the calendar from Creative Teaching Press. Here’s a link! http://www.creativeteaching.com/product/dots-on-black-small-calendar-chart
Hi Maria,
Did you get your book boxes from Really Good Stuff?
Thanks!
Hi Karen, Yes! They are mostly from Really Good Stuff and Big Lots.
Hi Maria!
Just a note to thank you for posting the details on decorating your room. Even though I am decorating my classroom in navy and sage and with a dinosaur theme, I got a lot of decorating tips from you. Thanks for the post!
Hello! Where did you get all of your containers?
Your classroom is amazing! I love all of it! One question, how did you put the flowers on the word wall? They look so awesome.
Can I see a picture of your calendar?
SO AMAZINGLY BEAUTIFUL! The gifted hands had done such a very terrific things like this! It’s not only the viewers like this had loved it so much but ado the children undoubtedly will like to learn for this kind of lively, enthusiastic and brightly colorful room as possible with how they will learn meaningfully! I really dream to have a room like such this one! I would be very blessed. Thanks for sharing this inspiring ideas you had! It’s more than a high ideal of achievement but you call it a gift from above! You are wonderfully blessed with such a talent or skills like that! Have a great positive feedback from your great effort that made a difference of touching lives to us teachers and mentors! YOU’RE GREAT!
I think your classroom is amazing. But I was wondering something. Do your children play? You have written about your library but not about toys. Are they hidden inside something? I am just trying to figure out how to make my room “Pinterest Perfect” when I have 2 shelves full of toys and a kid’s kitchen. Any suggestions? Thank you so much!
Hi Stephanie and thank you for the compliment! Yes, my students play nearly every day. Sometimes we go outside to play on the playground, but they often play with toys inside of the classroom. I just looked through the photos and you are right, the toys aren’t exactly featured in any of the images. My toy shelves are a bit of an eyesore and not exactly a focal point, so I keep them in the corner near the bathroom. You can see part of one shelf in the photo of my classroom sink and part of the other shelf under the TV (next to the typewriters and the word wall). I hope that helps to clarify!
As for making my classroom “Pinterest Perfect”, I put as many of my toys as possible into matching clear Sterilite bins (I bought a few different sizes for cheap from Big Lots). It helps to keep the shelves from looking too cluttered and creates some continuity.
How many years do you keep a theme before you feel like it is time to change things up? I moved into a room last year that was spot painted. I hung up all brand new Superhero decor. At the end of this year they had me take it all down so they could paint. Now I dread hanging the same decor. I am sure I am being silly….right?
Oh boy, that is a a BIG question. Generally, I try to keep a theme for 2 to 3 years because I put so much time and money into it. I wouldn’t usually change a theme after just one year, but I understand why you want to change it since everything was taken down so your classroom could get painted. I would be very tempted to change themes after just one year if that happened to me too!
Maria,
I love your room!! I’m trying to create the same thing but I know it won’t come out exactly like your 🙁 I have some questions…I don’t have windows and I’m going to create the carinval. What color of paper would your suggest I use to replace your windows? Then, did you laminate the pennants under the window? Finally, what font did you use on your name?
Thank you,
Erma
Maria,
Did you do most of your printing on card stock. For example, the horses, carousel around the lanterns, and the cans? Did you laminate the horses?
Thanks for the info 🙂
Erma
Hi Erma!
I absolutely do most of that printing on cardstock. I personally don’t laminate anything that’s on the lanterns. Partly because lamination glares and I like taking photos of those items, but also because they are durable enough without the plastic layer 🙂
Maria,
Last question!!! What sizes did you use for the tents and carousels?
Erma?
I don’t know the exact finished sizes of the tents and carousels, but I printed mine on 3″ wide poster paper.
Thanks for that information. Also Maria, i printed out the Lion poster and noticed the color scheme was much different than yours. Mine looked like a teal color unlike yours that seems to look blue. Was there something you did differently. My tents aren’t as red either. ?
Where did you get the circus rectangle pictures that are displayed over your windows?
The graphics and in the Vintage Circus decor set from Schoolgirl Style. I had the tents and ferries wheels printed on a poster maker, cut them out, and added them to my window scenes.
I am a first year teacher and love this theme!! I can’t wait to get started! If I am wondering where you got your lanterns and any other tips on printing the pdfs? Thank you, it looks amazing!
Hi Maria! I bought this theme from schoolgirl style and I am SO excited for my kinders to see it! I followed the link on your post for the pinstripe border but it’s not available on schoolgirl style anymore. ANY chance you have it saved somewhere? That was one of the details that sold me on this pack/theme!
I love your classroom! It is so well put together, and gives me some good ideas! I think children learn more in a setting that is welcoming like this.
I notice you are doing Daily 5 in your kinder classroom. Will love to pick your brain. This will be my first year teaching kindergarten and I’m not sure how to incorporate it with the little ones. Also, on your TPT do you sell the CAFE posters you have on your picture and the other Daily 5 and Daily 3 bulletin boards cards?
Did you have to pay for your bins with your own money? I have bought bins from RGS but only s fraction of what you have because they are not considered classroom essentials.
Hello! I’m wondering if you would mind sharing the vintage Circus classroom theme. I am wanting to use your tent and Ferris wheel idea. But Schoolgirl style no longer offers it from my research. I would really appreciate it!!
Hello! I’m starting my second year at a new school and they are doing a circus theme. Is there a way you could share the schoolgirl style one? It’s no longer offered and I love everything about it!
I have good news! It looks like the printable collection is still available to purchase at schoolgirlstyle.com: https://schoolgirl-style.myshopify.com/collections/vintage-circus
I circus theme sounds SO fun and I agree that this could be perfect for your school!