
Only 2 more days until my new students enter the classroom for the first time! I have been running around like a crazy person trying to set everything up and create a classroom environment that feels like a second home to us. Last week I turned my attention to bulletin boards. After seeing my Fancy Sterlite Drawers and Organized Sticker Box, you have probably discovered my love affair with bright colors and polka dots. Inspiration has struck once again and I am thrilled to share my newest DIY project for classroom decor with you – Polka Dot Borders!
I already know exactly what you’re thinking:
They sell a million borders at the store – why would you make your own?!?
The short answer is simple.
Because I am Maria.
The slightly more detailed answer is that I can never find borders that perfectly match my color scheme and feature polka dots so I decided to create the perfect bulletin board trimmers for myself.
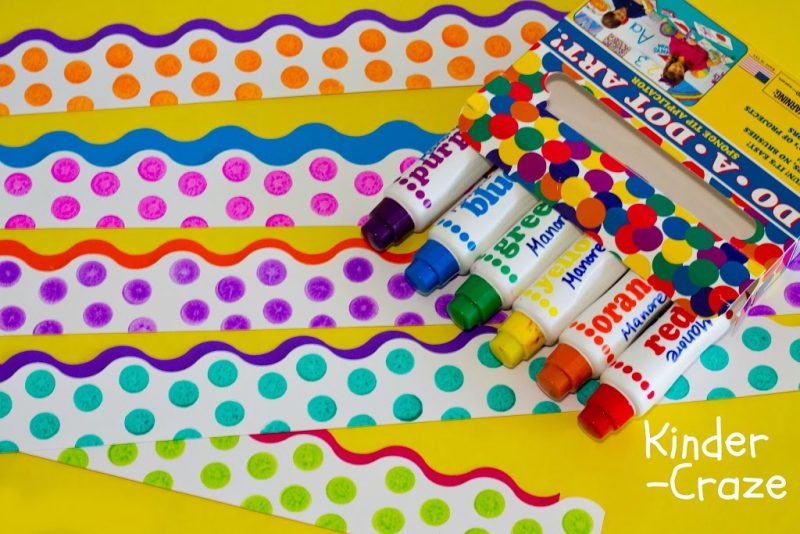
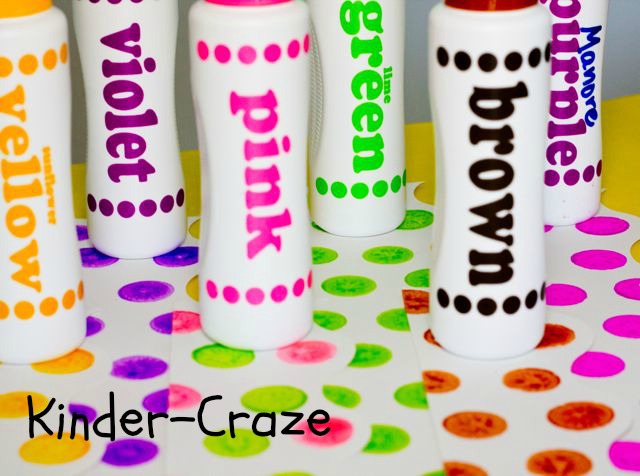
All you need to complete the project are some scalloped bulletin board borders (use any that you have handy – flip them over and decorate the plain white side on the back) and those fabulous Do-A-Dot Art painters. I wanted a variety of colors, so I used two different color packs of dotters: the Rainbow set, and the Brilliant set.
Seeing the finished product, it may seem as though I was incredibly tedious and pained myself to align the polka dots with perfect spaces between each one. I assure you it was not the case. The scalloped borders have hills and valleys in the design. If you follow the curves of the border, it is very simple to create four rows of staggered polka dots. Allow me to demonstrate:
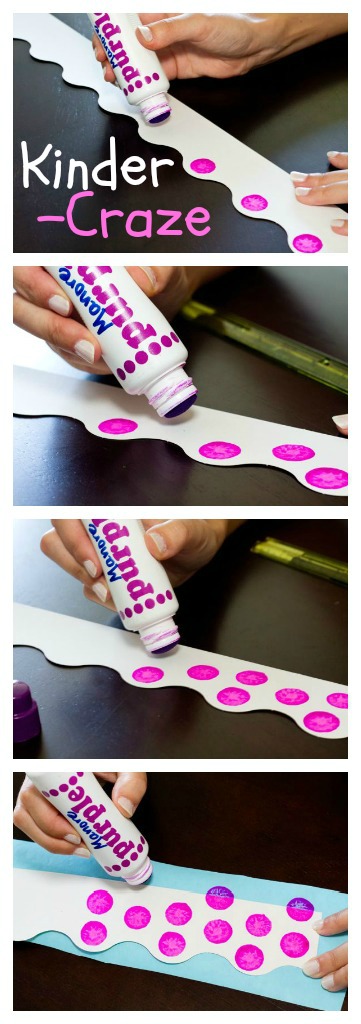
Row 1
The top row of dots is very easy- just add a polka dot to the center of each “hill” created by the scallop.
Row 2
For the second row, place a dot just below each valley” created by the scallop.
Row 3
The next row looks complicated, but I promise it is not. Remember the first row I created in all the hills? I just add a new dot below every hill.
Row 4
For the final row, add a dot below the dots you created in Row 2. This one gets a little messy because it looks best if you only make half a dot and let the dotter come off the bottom edge of the border. You will probably want a sheet of paper under your border to catch the excess.
I had some fun using experimenting with color to make fun variations of this project. Here are a few of my favorites:

Red, blue, and dark green came from the Rainbow Art set, sunflower yellow and lime green are from the Brilliant pack.
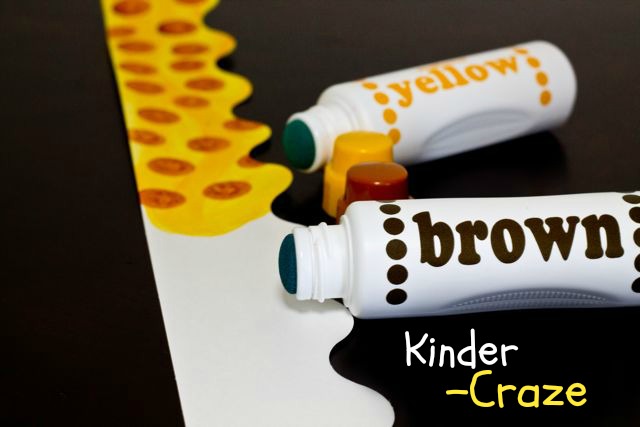
Animal prints are so popular right now, I love how this one reminds me of the spots on a giraffe. To create it, I simply smeared the sunflower yellow dotter on the border then added brown dots in a random arrangement to the border.
(Both are included in the Brilliant pack).
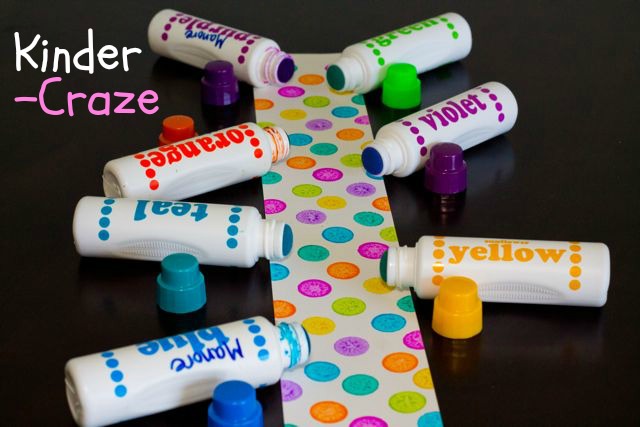
I love this one because it used ALL of my favorite bright colors. Purple (it’s called purple but looks fuschia), blue, and orange came from the Rainbow Art pack. Teal, lime green, violet (purple in color), and sunflower yellow came from the Brilliant pack.

Several people asked me if it was tedious to create the borders. Seriously, you should have seen the Oh my gosh, Maria has officially lost her mind looks I received from the other teachers that examined my borders closely and asked if I created them.
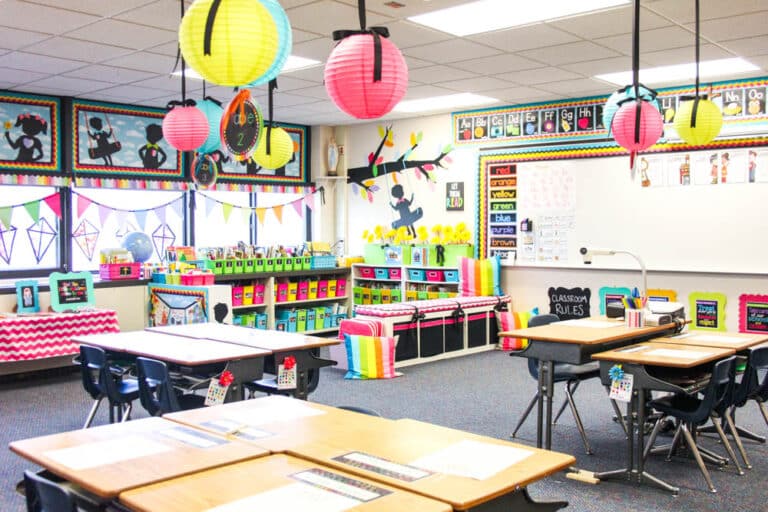
Honestly – it really wasn’t that bad. I made enough polka dot borders to cover all of the bulletin boards in my classroom (and I have a LOT of bulletin board space) but I got pretty efficient and after a little practice, it only takes about a minute and a half to decorate one sheet of border. So, if you have some time to spare, I highly recommend it. My classroom boards are completely unique and colorful. When you add solid border behind your polka dots and use a contrasting color of paper to the background of your boards the finished result is quite stunning.
A great big THANK YOU goes out to my good friend Steve Thompson for taking the beautiful photos for this DIY project. He was extremely patient with all of my ambitious photo ideas and it was great to have both of my own hands free to creating a sample border for the tutorial photos.
Be sure to check back again soon to see my finished classroom (complete with polka dot borders!)

I’m a former kindergarten teacher turned work-from-home mom. I still love sharing ideas and resources to make teaching easier, so you can focus on what really matters in the classroom. When I’m not working on the blog, you’ll find me chasing kids around the house with a cold cup of coffee in my hand (some things never change even once you’re out of the classroom!)

18 Responses
Oh so cute!! I like it so much better than the premade ones! I will have to try it today (my friends will think I am nuts!).
I think all teachers are a little nutty 🙂
How fun and creative! Thanks for sharing!!! Amber ~ Kindergarten Rocks Blog
You’re so welcome!
So clever!! 🙂
Kimberly
The Learning Tree
Thanks Kimberly!
These turned out SO cute. I love the teal and purple one on the bottom photo 🙂 And the multi-colored ones! Love, love, love!
Sarah
Miss A’s Kindergarten
Thanks Sarah! I can’t wait to share the photos of them on my actual classroom boards. I love how they turned out.
What an awesome idea!!!!! I am so with you on not being able to find the right colors in the polka dots border. Wish the bulletin board makers would get with it and make some of these to save me the work. But if they won’t, now I know how to do it myself! Thanks.
Perhaps someone from a school supply company will see my blog post and find inspiration for mass producing big bright dots on a white background. One can only hope 🙂
This is absolutely amazing! What a great idea! I never would have thought of this! You think of everything! 🙂
Erin
Creating & Teaching
Erin, you are TOO sweet! I’m glad to be of inspiration for my fellow classroom addicts.
Brilliant:-)
Love, love, LOOOVVEE your borders! These are amazing!!! And I especially love the purple and pink colors!! Too cute!! I wanna do this for some of my borders now!!! You are so creative! 🙂
Molly
Lessons with Laughter
Aw, thanks Molly! I like things to be perfect so I am always looking to improve the materials available to me. I’m glad you found some inspiration!
These borders look so cute. I will admit that i did think you were a wee tiny bit mad for making them when i saw them a few months back. Oh how the tide has turned…. I am now contemplating doing the same thing except in reverse. What i want is white dots on colour. I keep seeing it on various blogs and it looks adorable but I the only way I can find them is through amazon and it would cost me the equivalent of $40 a border to order them. While I am slightly insane about the money i spend on school, I worry that my family would actually have me taken away if I did this. To be fair they may also do that if I attempt to make my own. I think i need to stop looking at blogs as I just get notions for things that I cannot get over here. It’s like the torture of looking on the Lakeshore site.
Life’s so hard!!
My friend and I were assigned this duty by our teacher. We’re definitely going with this design!?